Table of Contents
Using ROS and Unity
Author: <Nathan Kassai> Email: kassan@unlv.nevada.edu
Date: Last modified on <02/14/2023>
Keywords: <Unity, Tutorial, Step-by-Step>
Time to complete - 30 minutes
In Session #4 of the Unity crash course, we will cover the following:
- Introduction to ROS-Sharp
- Writing a Publisher
- Writing a Subscriber
- Preparing Data Communications
- Final Words
Prerequisites
Please make sure to finish the last session titled “Advanced Unity Programming Concepts” before starting this session! The previous session gave you a crash course in some advanced C# programming concepts and we wrote a few scripts together to demonstrate those concepts. If you have already completed the previous session, you may proceed.
Introduction to ROS-Sharp
Up to this point, we've learned a lot about Unity and how to program in C#. Now, it's time to learn how to use our Unity knowledge to start working with robotics!
As mentioned in the beginning of this course, Unity is a great platform for robotics research fields such as teleoperation (remote controlling), simulation studies, point-cloud rendering, etc. However, we have Unity installed on a Windows PC, and to run/program ROS 1 nodes, we are required to have a Linux-based machine. Additionally, all nodes for ROS 1 are written in C++ and Python; how then do we integrate ROS into Unity?
To address this problem, we will use a package known as ROS-Sharp. This package allows us to integrate ROS functionality into our scripts such as publishers, subscribers, callback-functions, and messages into our C# scripts! Additionally, we are also able to send data over a network from Unity to a separate machine running ROS utilizing rosbridge (a package we will install on our linux machine towards the end).
Let's get started by first installing the ROS-Sharp package to our computer. After clicking on the link, click on the releases tab and scroll down to the latest ROS-Sharp version. Then, click on the ROS-Sharp Unity Package.
Now, go ahead and create a new Unity project and call it ROS_Unity. Once the project has loaded up, it's time for us to import our package.
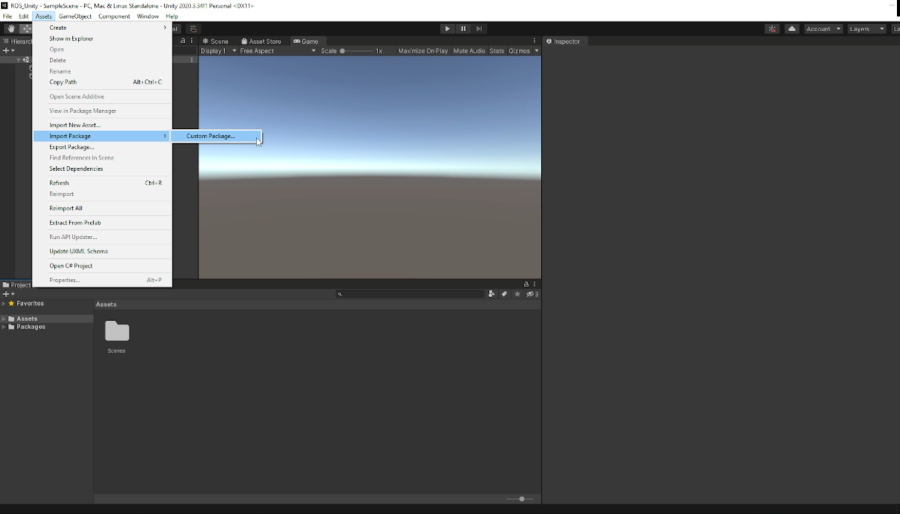
Go up to Assets, hit import package, and then custom package. Once the File Explorer opens up, go ahead and find the location of the ROS-Sharp package that we just installed and import it.
Once it has imported, let's go ahead and create a new empty game object called ROS-Connector. Once it has been created, we will add a new component called Ros Connector. Once it is added, you will notice that it contains a few public modifiable fields:
- Seconds Timeout - This controls how long this connector will wait before it decides that a connection has failed
- Serializer - Converter used to convert to datatypes understandable by sockets
- Protocol - The specified method of communication between Unity and a Linux PC
- Ros Bridge Server URL - The server which our rosbridge runs on (the local IP of the Linux PC)
This ROS connector is in charge of facilitating communications between our Unity scene and the Linux PC. Make sure that before you start making your ROS scripts, you have the Ros Connector script attached to a game object. Now, let's start by creating our first Publisher in Unity!
Writing a Publisher
In this example, let's write a publisher that will publish an integer that increases with every publish. To do so, let's create a new C# script and call it IntPublisher. Once created, go ahead and open it up in Visual Studio.
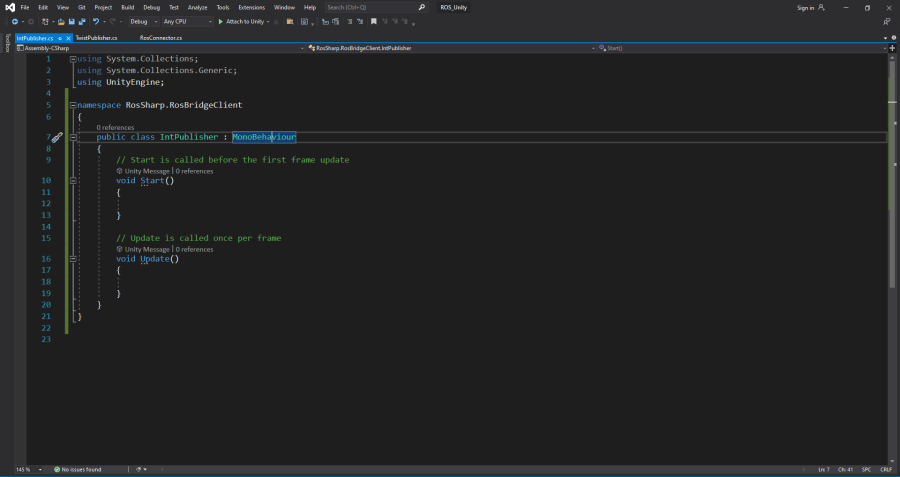
Once it loads up, our first step is to include this entire class into the RosBridge namespace like so:
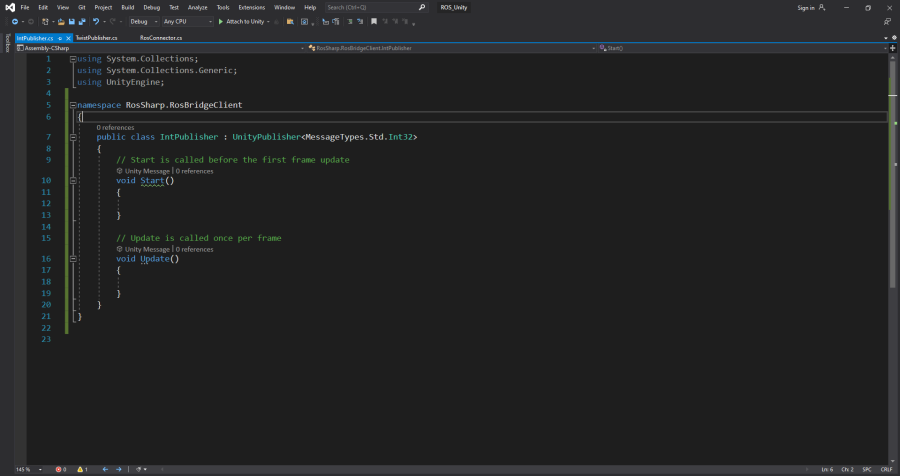
What this does is allow us to have access to the various functions and classes that are available within this namespace. Next, we will be changing our inheritance from Monobehavior to a new class called UnityPublisher.
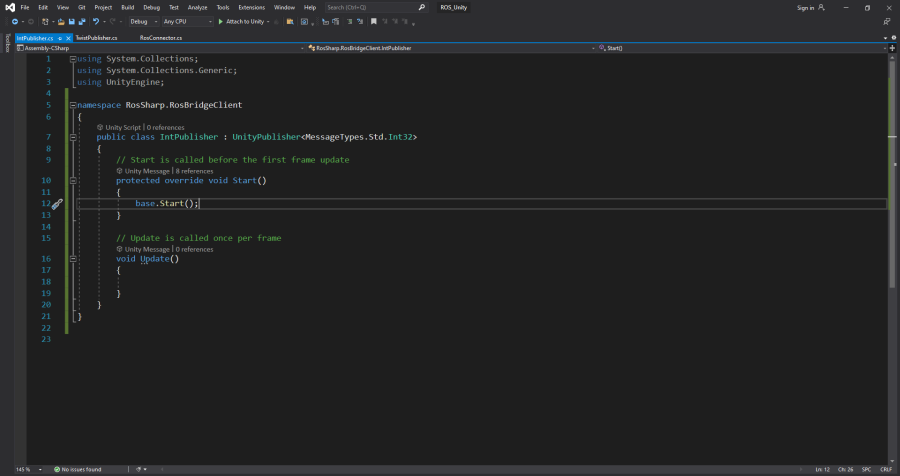
Don't worry, UnityPublisher inherits monobehavior, so by extension, our script still can be a component. We then passed in what message type this publisher will be publishing (just an int32). Next, we call Start so that it can be called by Unity, however, UnityPublisher creates its own version of Start that Unity will still call, but with some additional behavior (this additional behavior being that it will grab the RosConnector component and starts advertising the topic).
Since we wish to call both Monobehavior's version of start and Unity Publisher's version, within our modified start, we write out base.Start() which just tells Unity that we would like to call the original defined version of start (the one we've been working with up till this point).
Now, before we start writing our publisher, let's go ahead and create a new int 32 message and assign it's value in start like so.
This step is crucial! If you forget to initialize your message, you will get error's in Unity stating that you are trying to access something that doesn't exist!
Since we want this publisher to keep running as long as the Unity scene is playing, we can just place the remainder of our code into FixedUpdate like so.
Note: FixedUpdate should be used over Update IF the data you want to send needs to be sent at a consistent rate.
Now that the publisher is finished, it's time to write our subscriber!
Writing a Subscriber
Now, for our subscriber, let's write a script that will subscribe to incoming string data, and simply print it out to the terminal.
The code is more or less similar to the Publisher, with some slight variations. The complete code can be seen down below.
Similarly to the publisher, we must include our class in the ROSSharp namespace, change the inheritance from MonoBehavior to UnitySubscriber, pass in the message type our subscriber will use, and make sure to not only call the UnitySubscriber's implementation of Start, but Unity's as well with base.Start(). The core difference is the function ReceiveMessage which represents your callback function. Note: Make sure to update this to reflect the parameter you want to receive!
Preparing Data Communications
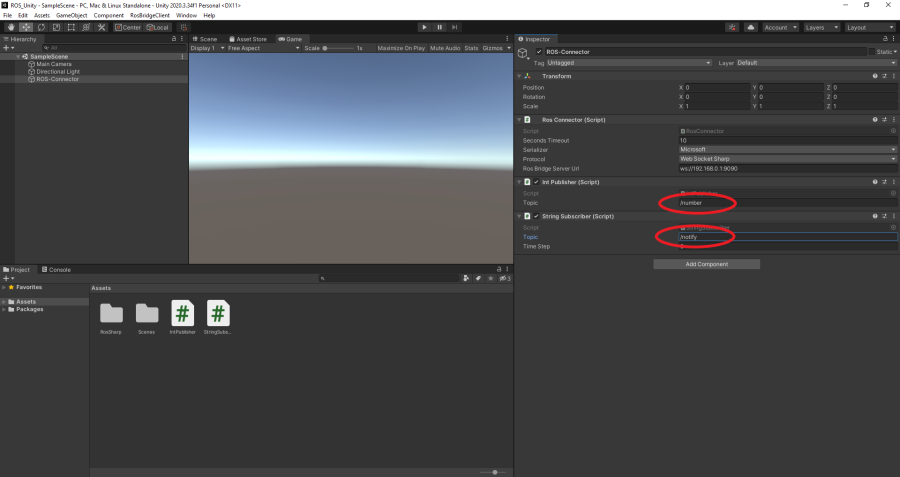
Now that we've gotten our scripts ready in Unity, let's head back to our ROS-Connector game object and add our Publishers and Subscribers.
Once you've added them, you'll notice that there are some new field(s) that generate with each script, namely the topic field. Make sure to specify what topic you're publishing or subscribing to by typing slash, then the name of the topic.
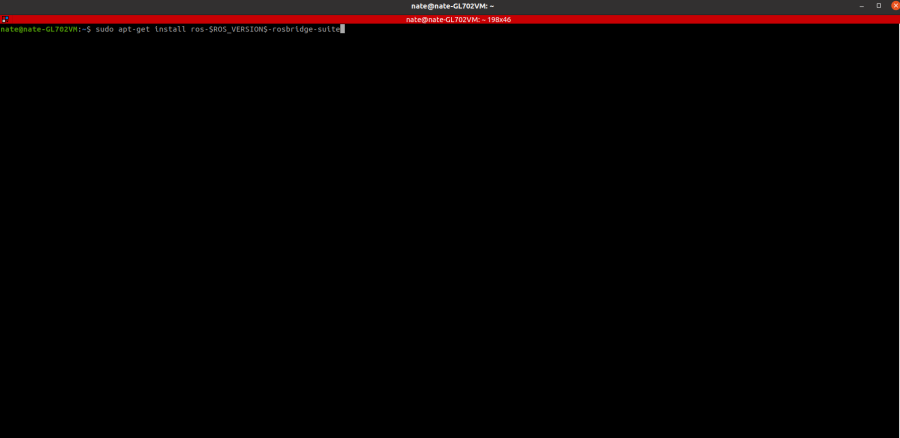
Now, head over to your Linux PC and install rosbridge with the following command:
Once that has installed, write out your Cpp/python nodes which will subscribe/publish to the topics /numbers and /notify respectively. Once they have been created, instead of running ROSCORE to enable local connections, we will be running rosbridge (which does run roscore, but also enables communication between ros nodes over a network connection).
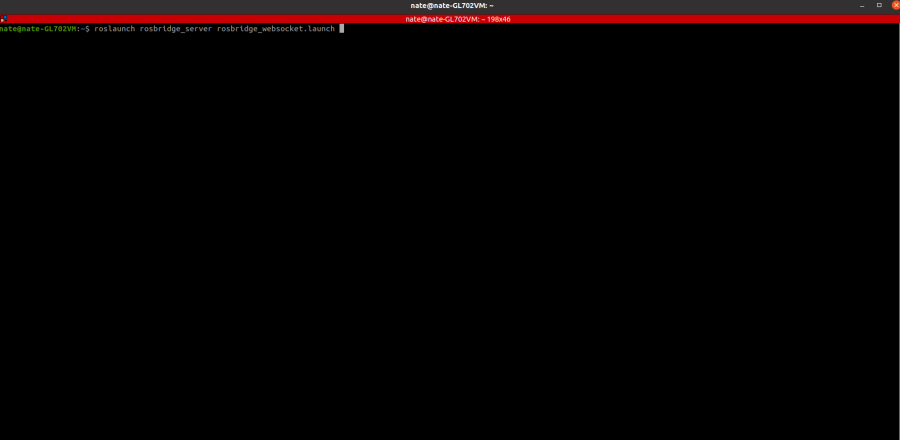
Before we run the rosbridge server, we first need the IP address of the Linux machine. To get the ip, type in the console ifconfig and grab the ip address. Make sure to input this into the ROSbridge server field in Unity. Finally, run rosbridge with the following command:
Once you've run your nodes in Ubuntu, you may run your Unity scene. You should see in the terminal of Unity the string data that is coming from the Linux Machine and on the Linux Machine, you should be seeing the incremental value printing to the terminal!
Final Words
Congratulations! You've completed the entire Unity crash course. I really hope you learned something after taking the entire course, and please don't let this be the last time you open Unity. With the knowledge gained from this course, you can create small scale 3D games, get immersed in your own VR platform, or utilize Unity as a robotics platform for a project. Regardless, I hope you enjoyed this course!
For questions, clarifications, etc, Email: kassan2@unlv.nevada.edu


