Table of Contents
Getting Started With The Parts
What is a personal tracked vehicle?
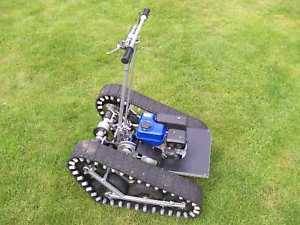
This personal tracked vehicle (PTV) is a single-person vehicle that utilizes tracks for physical ground contact. The advantages of this over a simple wheeled vehicle are that it is better able cope with rough terrain, wet conditions, and other conditions with low traction. While systems to allow wheeled vehicles to work more effectively in these conditions exist, these may be very complex. Tracked vehicles offer a simple and effective alternative.
Build Setup and Requirements
Setup
We'll need a few things, but primarily some build plans. The plans I have used are under copyright, which means I will not be presenting all details, but rather, the general ideas of the build. The plans I have used can be bought here
Within the build plans are the materials necessary, where to find them, dimensions, general guidelines, and many suggestions to improve your build.
Requirements
The plans make note that you must have a considerable mechanical aptitude and that it will take 80+ hours to construct this with the requisite skills. I don't recommend to let that discourage you. I've learned to weld; how to connect transmission components; change engine idle; how to use a lathe; and even some of how to use a CNC mill for this project.
Building the Machine
Below you will find different components of the build. This is just the order in which I put things together. It is possible to do this in another order.
What do we need?
- 1.) Chop saw for cutting our metal (metal cutting blade)
- 2.) A welding machine (I used MIG)
- 3.) An angle grinder with a grinding wheel and/or a wire wheel
- 4.) Ideally, a welding table would help.
BUILDING A FRAME
Cut the Metal
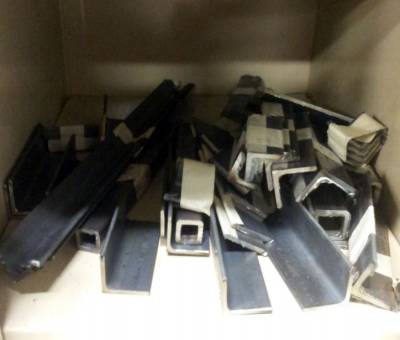
First we need to get our parts cut. Select which portion of the frame you'll be welding first and find the cut list for that. Then, start cutting. In this case, we're using mild steel.
To make things faster, do not go straight down the list. Select a specific size and shape of metal that you'll cut first and find all cuts that use the same metal extrusion. Otherwise you'll be switching from angle, to tubing, to flat, over and over again like I did at first.
I spent several hours and only had this much cut the day I began.
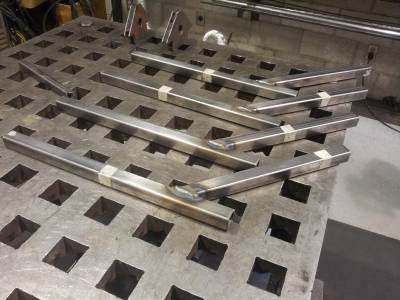
I did get to the end of it though.
Main Frame Welding
So with your parts all together, we have to get welding. My advice to a beginner, though this may seem like much more work, is to go through all of the parts you've just cut in the plans. The plans will tell you if they need a fillet, a certain degree cut, holes, etc..
Another valuable thing to keep in mind is that until the project is going to be driven and isn't supporting a person's weight or wheels, it does not need to be fully welded. That means it can be tacked together to keep things in place until one is absolutely sure all the parts are in the correct place.
Because I did not do this, some pieces are out of alignment, and if I had taken the time to tack everything in place, I could even ensure the welds were stronger because a more experienced welder could be asked to quickly finish the job.
I didn't do those things, but it would have saved at least a little time, and definitely some grief.
I decided to attack the larger pieces first. So the main frame for the project was where I started.
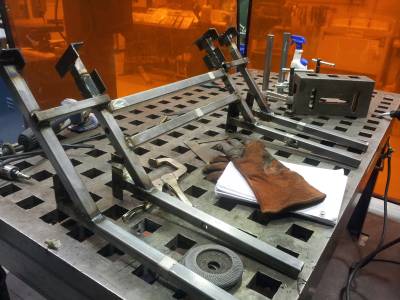
This is where I made a bigger mistake, at least for a beginning welder. It would turn out that to improve a skill you must practice, and some of my earliest practice was on these important structural welds on the PTV.
While my welds were strong enough, they could be better. Ideally, one should practice their welding on scrap first, or have a more experienced welder do some of this project. If that isn't possible, I'd start with less important details first.
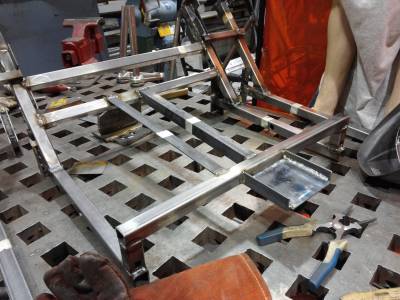
So we can see a place for the engine to sit in the photo above. I have waited to get all power transmission parts mounted before deciding exactly where to place the engine.
For now though, we sit the engine on the frame to see if we're headed in the right direction.
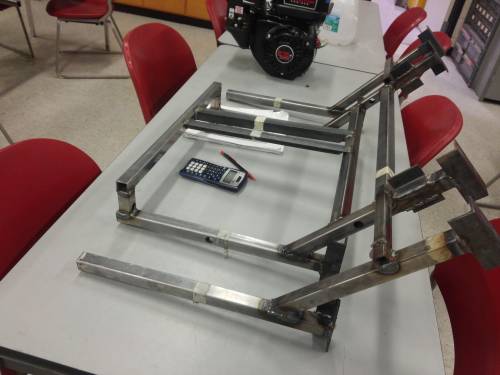
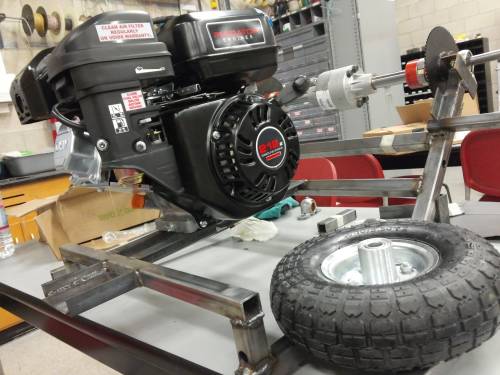
Looks about right to me!
Almost finished with the frame now. Part of the frame holds the back wheels in tension against the tracks. This is accomplished with a simple telescoping of two tubes.
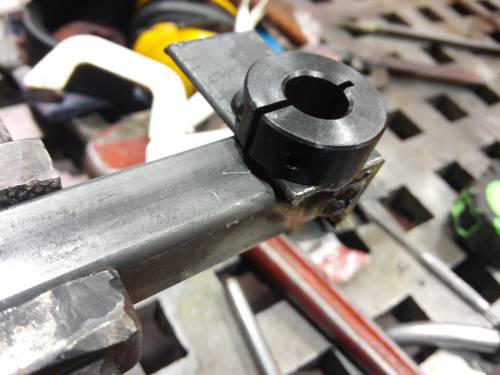
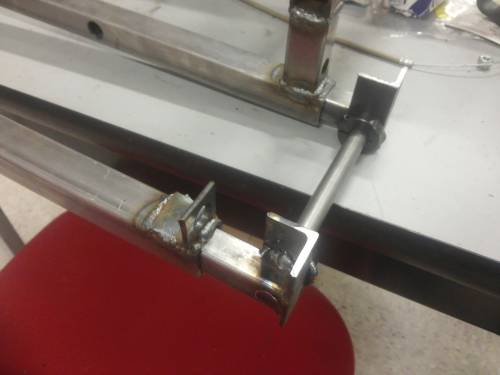
As you can see, those shaft collars are welded to this piece and have a hole drilled through them to allow our shaft to go through.
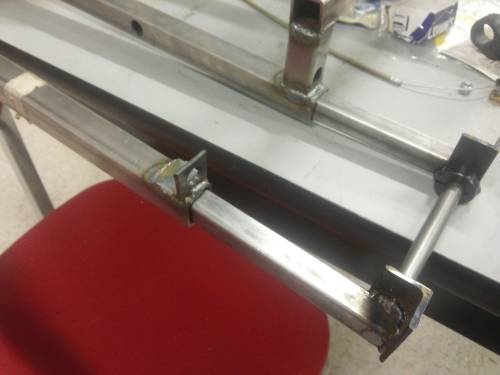
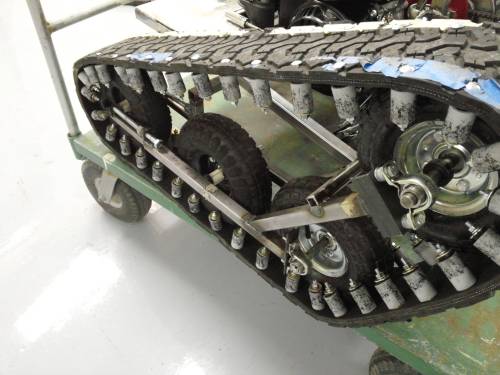
When the wheels are on, they will be kept in tension by a nut welded to the frame and a bolt.
You can see this happening in the next photo.
Let's test the engine!
Because we all love hearing things go vroom, and being sure our engine will move things in the future is important.
Excellent! On to the next item.
How does this thing get going?
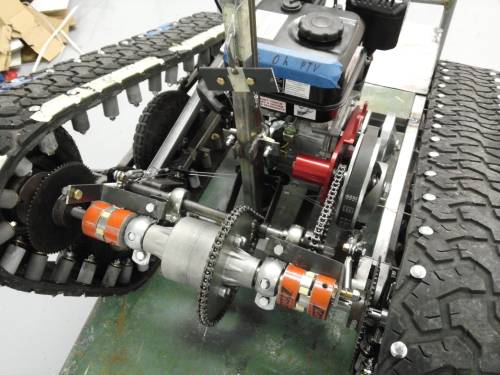
This is quite simple actually, the motor turns its crankshaft, which is connected to a continuously variable transmission (CVT), also known as a torque converter. From the CVT the power turns a chain that is attached to the jackshaft via a sprocket. The jackshaft has two sprockets, and serves as an intermediary unit to transfer power to our differential. This transfer is done via another chain to a sprocket which is attached to the differential.
This is an open differential, meaning the two sides can turn in completely opposite directions without locking up, if desired. These two sides are connected to wheels that turn the tracks from the inside, which ultimately move the vehicle.
What was required for this part of the project?
I trust that you understand the necessity for nuts, bolts, and other simple fasteners. A few other items are needed for this portion.
- 1.) A CVT: Mine was purchased from gokartsusa.com. It is a GTC TC2 3/4“ bore.
- 2.) A differential: Mine was the heavy duty differential from Northern Tool, made by Peerless Gear.
- 3.) Sprockets: Honestly, mine differs from plans and so will yours most likely, but they should all utilize the same 5 foot length of #35 size chain that the CVT uses.
- 4.) About 3 feet of 3/4” diameter and 5 feet of 5/8“ diameter driveshaft stock with keyways.
- 5.) Lovejoy spider couplers. 2 with a bore the size of the differential, and another two with a bore the size of your final driveshaft. These will also need the plastic spiders to go between them.
- 6.) 8 pillow block bearings appropriate for the size of your driveshafts and jackshaft.
Various tools were used for this. A chopsaw with a metal cutting blade, a socket set, a bandsaw, a drill, a lathe, a keyway broach, a cordless drill, even a mill. However, I'm sure if I put more thought into it, I could have finished this portion with a cordless drill, chopsaw, and a socket set.
ONWARD!
Okay, how does it steer?
Well, we use the properties of an open differential to our advantage here. If one side is braked, fully or otherwise, the other is still (more) free, which means more power is then transferred to spin the wheel on that side. With one track turning more than the other, we actually turn the whole vehicle.
There is one downside; that is that we cannot run one track backwards to have an in-place turn. This isn't a big deal as we still come close.
Let's BUILD it!
So we have an engine, a CVT, a differential, and wheels to move. The goal is to connect our power source through the pieces to move the wheels. We have almost all of the parts.

Since moving is the prime directive, I began work on the final drive component first.
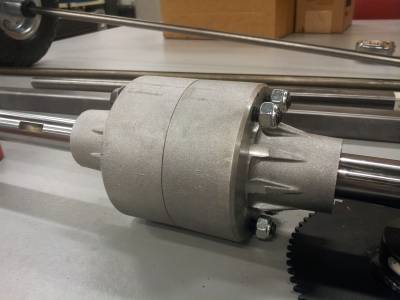
That involves adapting this differential to our space requirements. It must connect to our smaller diameter drive shafts that actually turn the wheels.
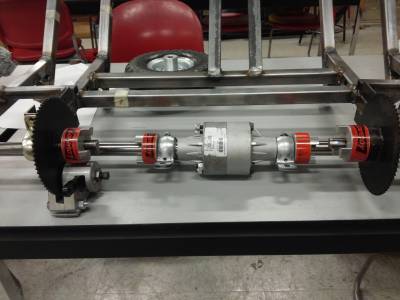
What is sitting on the shafts of the differential are pillow block bearings and Lovejoy spider couplings. Two of these spider couplings come together to couple two separate driveshafts, and in between these go Hytrel spider inserts. There are two reasons for using these on our build. The first (and most common) reason is so that we can allow for some misalignment between two shafts. The second reason is so that we can allow the larger shaft of the differential to drive the smaller shaft that turns the wheels.
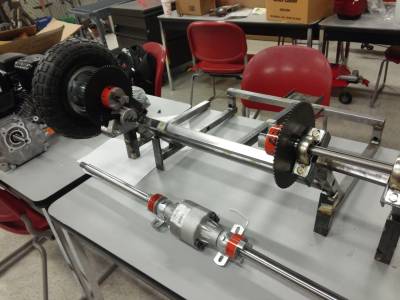
In this picture it can be seen that the differential is significantly longer than the space it is intended to fit in. Thus, I need to cut it to size. However, I need some length on the ends of the smaller shafts to fit our brakes, our spider couplings, and the brake “disc” (I say brake “disc” because we are using larger sprockets for brake discs in this build). The discs must also be in an ideal location for the brake calipers.
To find the right size to cut the differential, I first mounted the shafts that will drive the wheels. I then moved the shafts around a bit, as well as the brakes with the couplings, to see what would work. I measured the gap between the two shafts, and cut to that length.
On my particular differential, there is a keyway that only goes partially up the shaft, and I must cut past it. Luckily, there is a second set of keyways for Woodruff keys that are closer to the center of our differential.

Note that this is not my final length. I can cut more, but I can't weld pieces back on, so this is for test fitting.
It fits fairly well with everything. Now to make the mounts for the differential, attach the jackshaft, and then motor.

This is an issue I ran into; the sprocket that I bought was not compatible with the differential. Either I could adapt it to fit (when it could then fail or compromise my differential), or I could purchase another. I simply bought another.
Here is a quick video of the whole transmission running at idle:
The Wheel Problem
I have very simple and easy to find 4.10/3.50-4 pneumatic wheels for the PTV. These happen to have a 5/8” bore bearing in them. The problem with these are, well, nothing, except I need to actually turn the front wheels. The wheel hubs that I am working with look like this:
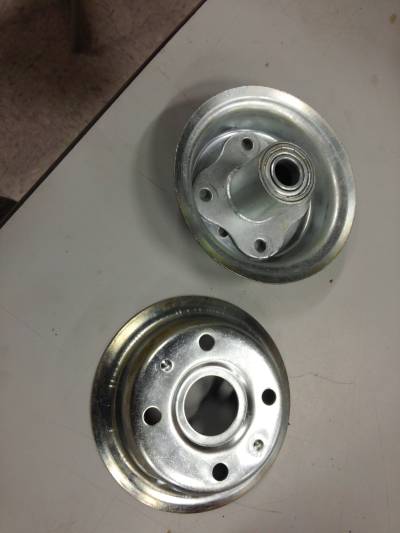
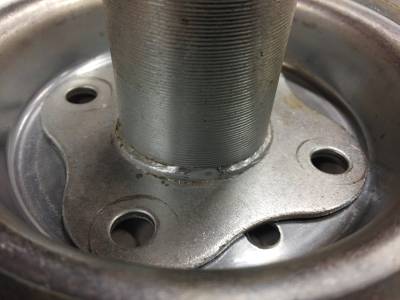
This middle part you can see in the hub above, have bearings in them and will only smoothly roll on an axle. These will not turn with the axle to drive the wheel. I need one that looks more like this:

You can see that in this hub there is a keyway, the most important part that allows me to drive the wheel. I cannot find the correct size for my wheels, so I will fabricate those pieces to attach to my wheels.
I was advised that I will not need to make my hub perfect so instead I have made it an aligned cylinder, with a bore to fit my shaft, and a keyway. I then drilled and tapped holes for my bolts.
picture to go here picture to go here
I was confused as to how to cut keyways, but there is a simple tool called a keyway broach that allowed me to easily create them. It utilizes a press.
The Steering Assembly
The PTV steers by braking one side or the other of the differential. This transfers more power to the side that is not being braked, and thus the vehicle turns in the direction of the track that is being braked.
Let's begin track construction!
So what are the tracks actually made of?
Well, regular used tires (new ones may be utilized, but it's unnecessary).
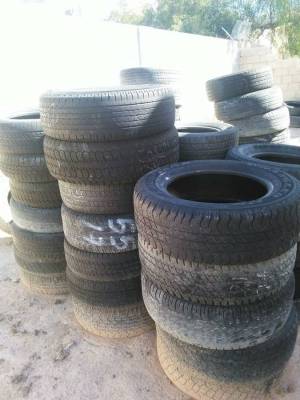
Sourcing used tires can possibly be quite difficult. I was looking for used tires shops, where you can actually purchase used/refurbished tires. People seeking used tires for their vehicles often have tires that should not be refurbished, and will be thrown away; that's where you come in. If you're up for the adventure, lots of people list free used tires on sites like Craigslist as well.
I got lucky that a friend was throwing away tires for a shop. A couple were given to me. For this design I needed an inner tire diameter of at least 30 inches or so.
Once we have procured our tires, we'll need to cut them.
The tracks need to be a bit more than 6 inches wide with this design. So we can't just cut off the sidewalls (it's easy to do that with a razor blade though.).
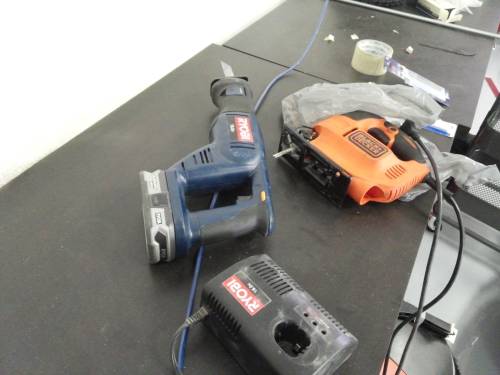
We will actually cut all the way around the tire's tread to make a belt. That sounds insane, yes, but it is possible. I found the best tools to use are metal cutoff wheels on an angle grinder (I recommend AGAINST the cutoff wheel though), a jigsaw, or an oscillating saw. I recommend the oscillating saw; they generally have more power.
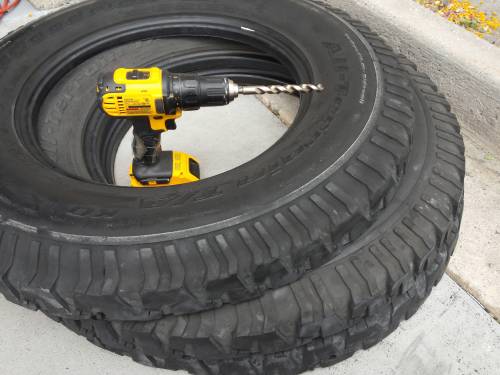
You'll also need a drill with a sizeable bit to make a hole in the tire. This is necessary to give your saw blade a place to start.
Get several blades as the tires will eat them all. Specifically, you'll need metal cutting blades with coarse teeth.
I used these:
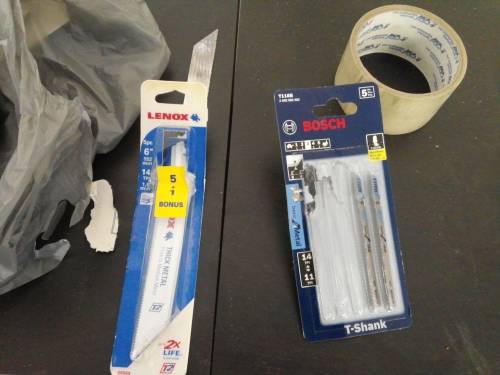
T118B T-shank blades for the jigsaw, and course metal cutting blades for THICK metal for the oscillating saw.
Tape, or mark somehow where you want to cut, and follow your line around the tire. I used tape.
This WILL take up a lot of time.
WEAR SAFETY GEAR FOR THIS PART
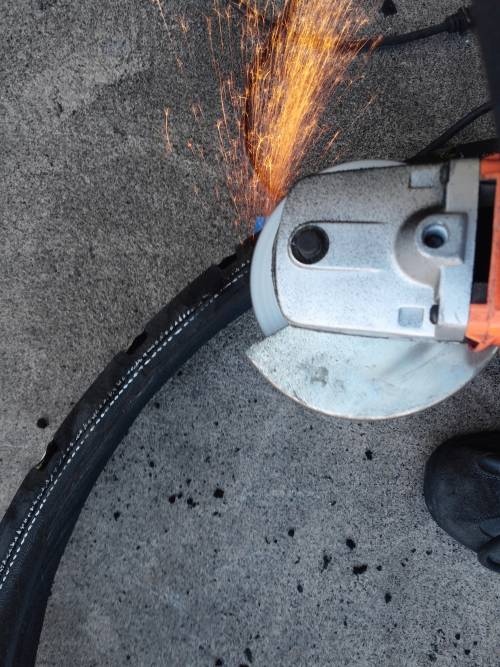
The blade heats up and sends molten tire bits into the air. If using a cutting wheel, they may become unstable and explode; shrapnel is not fun. Also, the steel wire inside the tire WILL slice you without protection. My arms began to turn red while I was cutting, as if I was being hit by something. All that was being done was violent shaking. Heads up: wheel, jigsaw, or oscillating saw, they are all very uncomfortable, so take frequent breaks to let your hands and arms recover; check your tool blades, and so on.
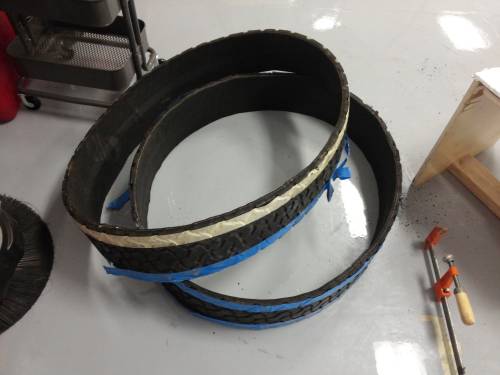
Once cut, we want to make the tracks a little safer to handle, so use an angle grinder to grind off the wires sticking out of the side of the cut tires. This also lets you smooth out the edges and make them a little straighter, for aesthetic purposes.
Track Guides
The track guides are each made of 9 pieces.
These are:
- a piece of pvc conduit (3/4“ should work)
- a piece of smaller diameter low pressure water piping
- 2 flat washers
- 2 countersunk washers
- 1 carriage bolt
- a lock washer
- 1 nut
Here is a visual, which is much easier than explaining it in depth.

The bolt goes through the tire.
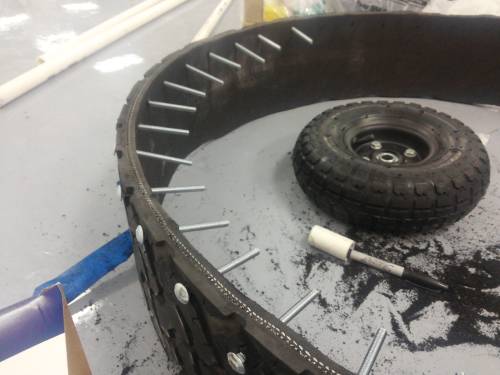
Before that though, you need to mark where the bolts will go through. The first side you install on should placed such that the conduit will be within the area of the tire, not extending beyond the edge (so about a half inch from the edge of the tire).
To space them around the tire, you don't want them right next to each other. About 40 guides are appropriate for our dimensions, but this design works in general with about 2.5 inches from bolt center to bolt center. Use a square to mark lines all the way around the inside of the track.
It was recommended to use a paint marker, but a chalk marker, or permanent marker in silver also works. I could not find any one of those, so I used a bit of Elmer's glue like a pen and it worked just fine.
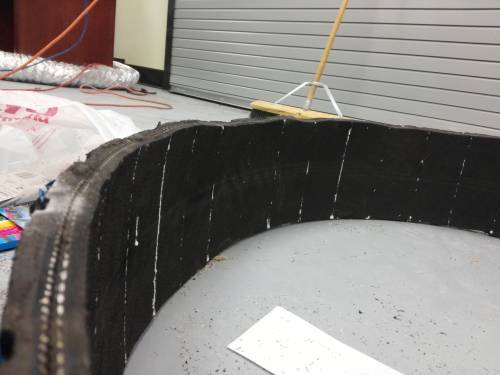

The rest goes on the inside, with the lockwasher and nut tightening it all down. The idea is for the slightly longer piece of pipe to mushroom on the ends, allowing the piece of PVC conduit to slide around it as it rubs against the wheels of the vehicle.
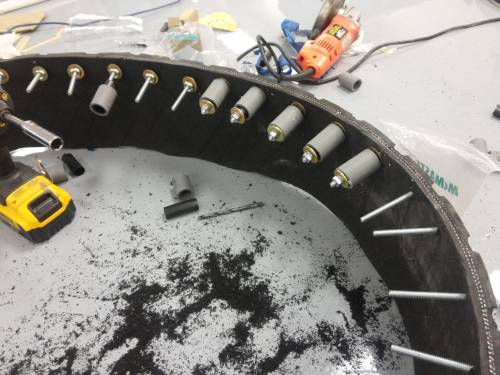
The wheels will roll in between the two rows of track guides on the tires. With the wheels I've used, a space of about 4 inches between the two rows seems to work best.
End Notes
I found that in the end, if basing another project off the same principles, you'll likely have a few issues.
The first is that the brakes need to be bolted in a place such that they have a solid bite. I had to space my wheels up, and that compromised the bite of my calipers.
The track guides NEED to be spaced correctly. I am losing way more track guides on the side with a half inch less space between rows than the other. The whole track could suddenly fall off this way.
The wheels used to drive the tracks will probably get torn apart fairly quickly, but they seem a lot more like a consumable than a permanent part anyway.
Exclamation Marks!!!!!!!
Let's see the test run!! It wasn't supposed to be amazing. I just wanted to demonstrate it running, turning, and most importantly…stopping.

