
Table of Contents
Getting Started
Author: <Nathan Kassai> Email: kassan@unlv.nevada.edu
Date: Last modified on <01/29/2023>
Keywords: <Unity, Tutorial, Step-by-Step>
Time to complete - 50 minutes
This first section of this Unity crash course involves the following:
- Brief introduction to Unity
- Installing Unity
- Installing Visual Studio
- Understanding the layout and some key terminology
- Writing our first “Hello World” script
- Final Words
- Refresher Questions
Prerequisites
Before starting this tutorial, it's best that you have a PC with the following requirements:
| Minimum Requirements | Windows | macOS | Linux |
|---|---|---|---|
| Operating System Version | Windows 7, and Windows 10 (64-bit version only) | High Sierra 10.13+ | Ubuntu 16.04, Ubuntu 18.04, and CentOS 7 |
| CPU | 6-Core CPU | x64 architecture with SSE2 instruction set support | x64 architecture with SSE2 instruction set support |
| Graphics API | DX10, DX11, and DX12-Capable GPUs | Metal-capable Intel and AMD GPUs | OpenGL 3.2+ or Vulkan-capable, NVIDIA and AMD GPUs |
| Additional Requirements | Hardware vendor officially supported drivers | Apple officially supported drivers |
Brief introduction to Unity
On June 8th, 2005, the popular game engine we all know and love today, Unity, was released. Originally, Unity was solely designed to be just a game engine; a collection of tools, libraries, and assets to prototype a 2D/3D game. Why as a roboticist then would you benefit from learning Unity? Well, over the course of its existence, Unity expanded from a mere game engine to a platform capable of virtually anything! Virtual/Augmented reality applications, generating 3D visualization tools, film production, generating browser/console applications, touch screen applications, and more recently, robotic simulations and teleoperation!
In this crash course, I plan on teaching you the basics of Unity: understanding how Unity works, learning how to write scripts to implement custom behaviors, general terminology, etc. With these basics, by the end of the course, we will then learn how to send joint data to a robotic arm using ROS!
Without further ado, let us begin with the installation process.
Installing Unity
First things first, download Unity Hub here and click on Download for Windows.

After downloading, run the executable to install the Unity Hub. Once the installation has finished, you should see the following:
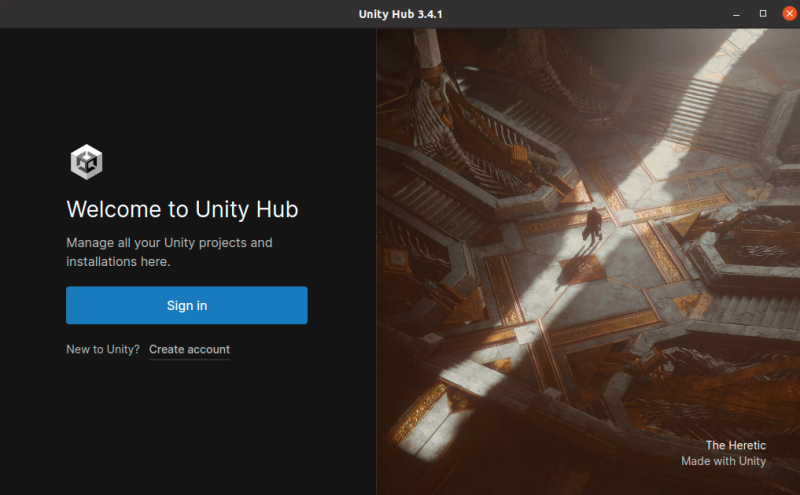
Once you have reached this page, you may either login with the DASL Unity account, or you may choose to make your own.
After logging in, it will ask if you would like to install the latest Unity editor. Press Skip Installation (we will be downloading an earlier Unity Editor version). Finally, Unity will ask you to activate a personal license, press Agree and Get Personal Edition License.
Once you have finalized the Unity Hub installation, you should see this page.
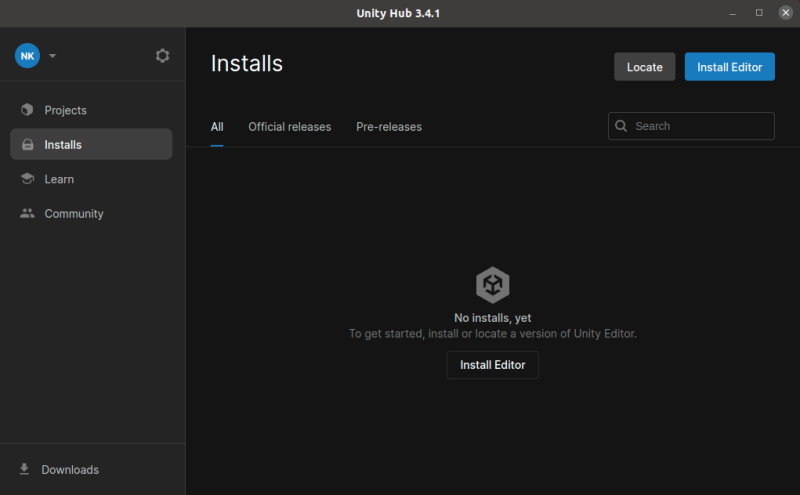
As previously mentioned, this is known as the Unity Hub. The Unity Hub is where you are able to manage all of your created projects, as well as install versions of the Unity Editor. The Unity Editor is where we actually create our applications. We cannot create a project in Unity if we do not have a Unity Editor!, so, lets us install a 2020+ version.
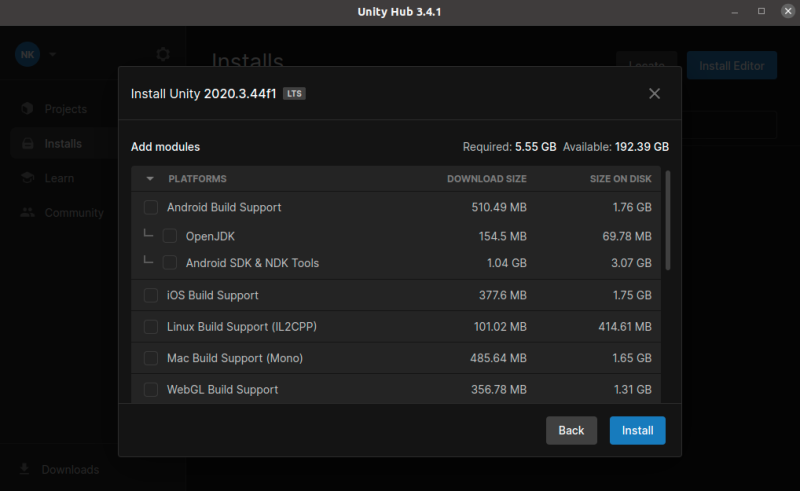
To do so, click on Install Editor located at the center of the Unity Hub. Once pressed, scroll down to the Long Term Support (LTS) section and click install on the 2020.3.44f1 Unity Editor version. After pressing install, it gives you options to install additional packages. For now, we do not need any of these packages, we will just press install (this can take 10-20 minutes).
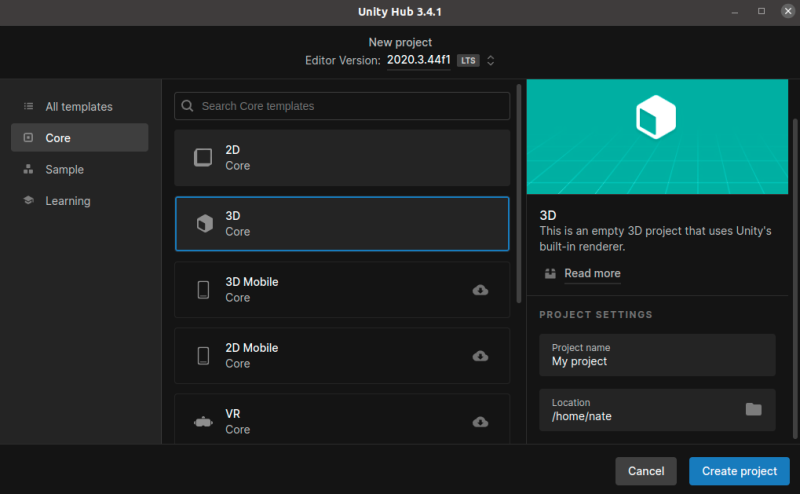
After the installation has completed, switch over to the Projects tab and press New Project.

The template that we will be using for this project is 3D Core! Press the core tab and press 3D Core as seen here. Once you select it, give your project a name, and choose where you would like this project to be stored. Once you have done that, press create project.
Once it has loaded, you should see this screen:
Now that Unity has been fully installed, it's time we take a look at the layout of Unity.
Installing Visual Studio
Before we continue, let us install Visual Studio which we will be using to write our scripts with.
First, click here to install Visual Studio (make sure to click on community).
Once it gets to this page, scroll all the way down until you see Game Development, then select Game Development with Unity. After that, hit install.
Understanding the Layout and Some Key Terminology
Congrats! You've loaded up into your first project. Now, before we do anything else, let's talk about what is currently on screen.

- Scene Window: In this center rectangle, we have the Scene Window. This gives us a view as to what is located inside this current Unity Scene. For instance, as we add to this scene later on, you can visualize what you're adding through this window. If you wanted to see what the player sees, click on the tab right next to Scene.
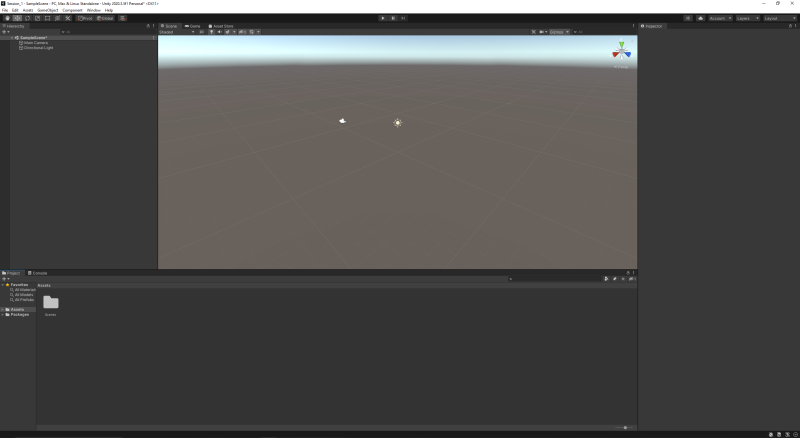
- Hierarchy: On the left side, you can see two objects, Main Camera, and Directional Light. What the Unity Hierarchy does is neatly organizes all of your Game Objects in one area. Every object added to this scene will show up in the Hierarchy.
- Inspector: Right now, the inspector is empty; let's change that! Click on the Main Camera, and watch the inspector fill up with information. The inspector allows you to monitor what Components are added to each of your game objects.
- Project Management: Down below, we have the project manager. This area is simply used to store and access all assets added to your Unity project! Those assets could be music files, 3D models, images, materials, etc.
- Play, Pause, and Step: When you would like to test your game, you must press the Play button. To stop, press the play button once more. To pause your game, press the pause button. If you would like to move frame by frame, press the step button.
- Tool Bar: Looking at the top left, we have the tool bar. Starting from left to right we have the:
- Hand Tool - Moves the scene camera around to help you get a better view of the area
- Move Tool - Moves any object currently selected in the Hierarchy
- Rotate Tool - Rotates any object currently selected in the Hierarchy
- Scale Tool - Changes the size of an object
- Rectangle Tool - Scale tool, but applies a rectangular scale to the object
- Multi Tool - Combination of scale, move, and rotate tool
- Editor Tool - Allows you to edit certain components of game objects
Now, I have highlighted some keywords in the above section, Game Object and Component. Let us define what those actually mean in Unity.
You can think of a Game Object as a container and by default, these containers are empty. This container could be anything: a cube that could be moved by the player, a video that plays on a TV, maybe it could be the player, etc. What we need to do as developers is to fill those containers with behaviors. Say we wanted a cube to simply fall down and hit the floor. Well, we would need to fill that container with the following behaviors:
- A script to visualize the cube
- A script which allows the cube to experience free fall
- A script which detects that the cube has collided with something
The proper term for these special types of scripts are called Components. A component is a script that contains some sort of behavior for a game object. Previously while we were looking at the inspector for the Main Camera, we saw two components: Camera and Audio Listener. These two components are scripts written by Unity developers that allow us to define what a Camera is! Thankfully, Unity provides a large number of components free to use without having to code!
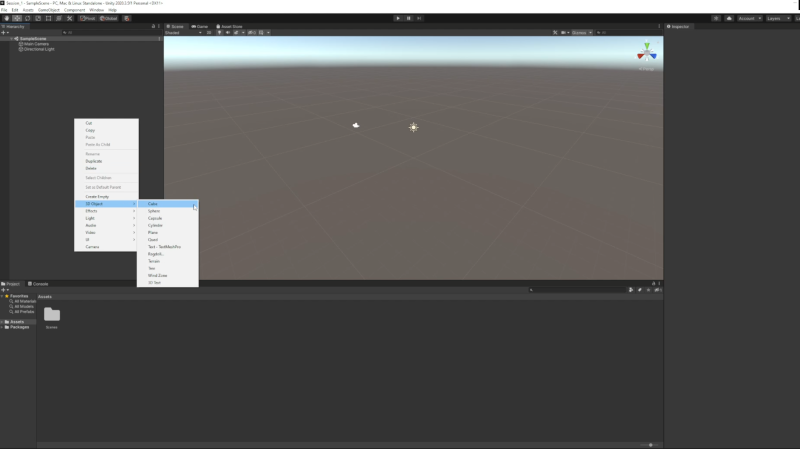
Let's try and get a cube to fall! To do this, we must first add the cube game object to the Hierarchy. To do so, bring your mouse to the Hierarchy, right-click, hover over 3D object, and then select Cube.
Once the cube spawns in, click on it in the Hierarchy. As you can see in the inspector, there are different components that define what makes up this cube. If you were to hit play now, nothing happens; the cube stays suspended in the air. Well, let's fix that by adding a new component to our cube called, Rigid Body. This allows our game object to experience external forces (including gravity!). To do so, go to the inspector and click on Add Component; a text box will appear with a large list of components. Type in Rigid Body and hit enter (or click on it) to add it to the Cube.

Now, hit play again, and watch as the cube falls forever.
Go ahead and spend some time playing with the other components and add other game objects to the scene!
As I mentioned previously, Unity Devs added a large number of components to streamline developing various applications. However, what if we wanted to add a custom behavior? One that isn't defined by Unity? For instance, what if I wanted to have the cube stop moving if it hit a certain height, or maybe I want the player to control the gravity with a slider, or maybe for every space bar press, a new cube spawns from a random height? This is where programming comes in!
Unity's scripting language is C# (don't worry, you do not have to have previous C# experience for this course). So, let us create a script and write our very first component!
Before we do that, let's get Visual Studio connected with our Unity project!
To do so, go to the top left of Unity, select the Edit tab, and hit preferences.

Next, hit the External Tools tab, scroll down to External Script Editor, hit the drop-down, and select Visual Studio.

Once that has been updated, we are now ready to write our first script!
Writing Our First "Hello World" Script
All we need to do to create our first script is to right-click in our project management area, create, and then C# script.

For this script, call it HelloPrint.
Next, double-click the HelloPrint script and wait for it to load in Visual Studio. It should look like this after it has loaded:
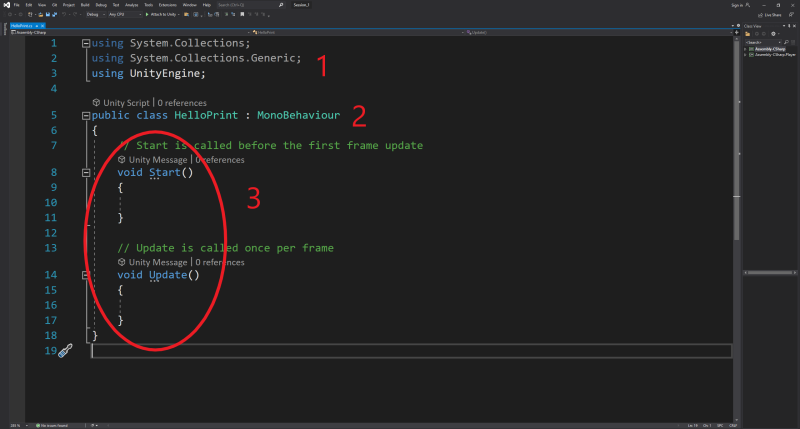
At first, it can be pretty intimidating, as there is already some code written for you without a clear reason why. For this tutorial, I will explain what each line does at a higher level, but next tutorial, I will explain in depth what each line is actually doing.
- These lines allow us to call C# and Unity functions to implement in our code.
- This line defines a new Class called HelloPrint Note: The name of this class MUST be the same as the file you created, if not, there will be errors when trying to apply this component to a game object. Additionally, we are inheriting another class called MonoBehavior. Inheriting MonoBehavior makes this script become a component and gives us access to a plethora of functions that a component might need. If you write a script and forget to inherit MonoBehavior, you would not be able to add it as a component.
- Start and Update are special types of functions. As seen by the comments, Start is a function that is called right before the first frame update. In other words, when you hit play, before the first frame is played, this function is called, and whatever code is inside it will run. However, this function is called once for every script that it is attached to. Update however is called once per frame. If your Unity scene is running at 60 FPS, this function and all code written inside it will be called 60 times per second.
Let's add a line of code to the start function so that once we hit play on the Unity scene, the phrase, “Hello World!”, will be displayed in the console.
To do so, type in the following line in between the curly braces as seen below:
Debug.Log(“Hello World!”);

Once you do this, hit Ctrl + s to save your script, and head back over to your Unity scene.
Now, if we hit play and switch over to the console tab, we can see that nothing printed out. Remember, this script is now a component; in order for the script to run, we must add it to a pre-existing game object.
Let's add this to our cube. Click on our Cube in the inspector, press Add Component, and type in the name of the script we just wrote HelloPrint, then press enter.
Finally, switch over to the console tab and hit play.
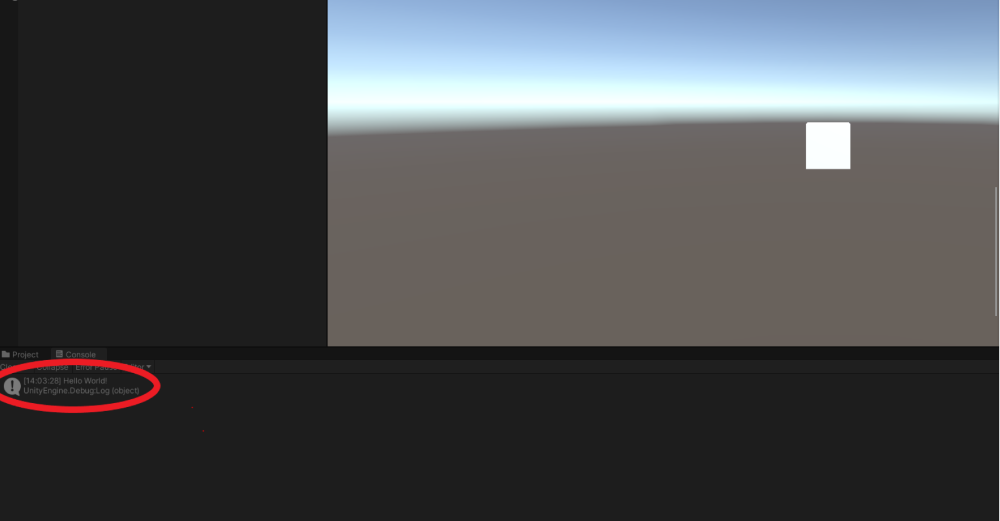
Congratulations! You have written your first Script in Unity!
Final Words
I hope you're excited about this course in Unity as you will learn a great deal about the plethora of features that this platform has to offer (both in game development and especially in robotics/teleoperation). In the next session, we will talk a little bit more about the scripting language and go over some basic programming practices.
Refresher Questions
At the end of each session, I like to ask questions to make sure you were able to understand all of the information provided. I'll either ask you to write a program that goes over what was taught in this session or simply ask true/false and or multiple-choice questions. These are not homework assignments!
- What is a Game Object?
- What is a Component?
- What is the difference between the Start and Update functions?
- What scripting language does Unity use?
- Write a script that will print “Hello!” on every frame.
For questions, clarifications, etc, Email: kassan2@unlv.nevada.edu