Table of Contents
Rotorcraft Tutorials
Basic Helicopter Setup with Ardupilot
This section of the tutorial will cover how to set up the DASL T-Rex 450 pro with an Ardupilot and a Spectrum DX7s radio system;
Connecting the Ardupilot
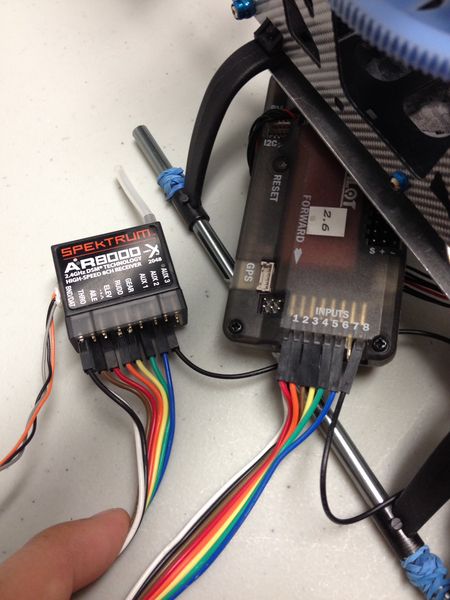
Begin by connecting your Spectrum receiver to the arrdupilot. The pins should be connected in the following way:
- 1 - Aile
- 2 - Elev
- 3 - Thro
- 4 - Rudd
- 5 - Gear
- 6 - Aux1
- 7 - None
- 8 - Aux2
These connections should be made on the signal row of pins on both the ardupilot and the receiver. The positive and negative rows of pins must be connected to the receiver and the ardupilot. However, this only needs to be done for one column (receiver channel) of pins.
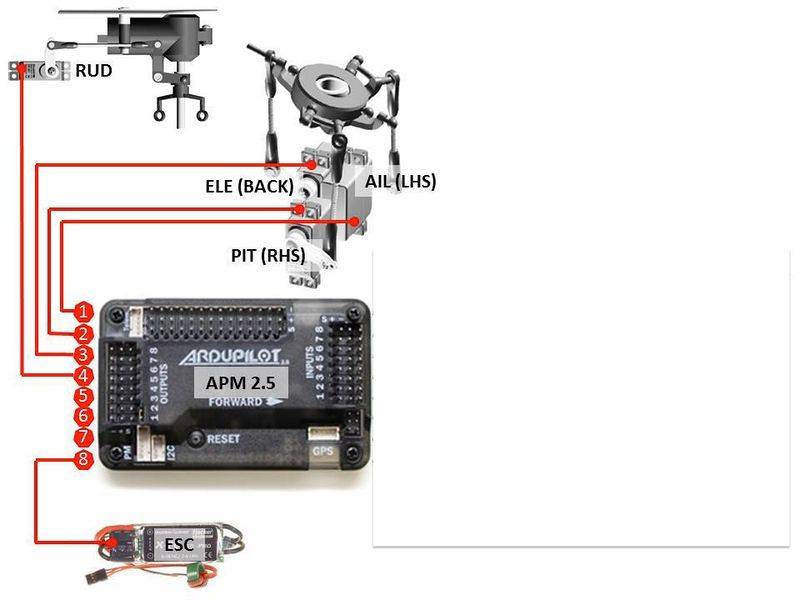
Next, connect the swashplate and tail servo as show in the image.
For more information on these connections you can visit the APM tutorial on connecting the APM
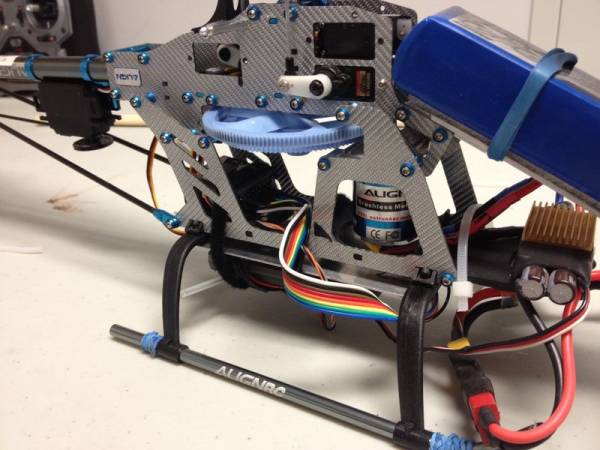
After all the wire connections have been made it mount the Ardupilot in the upright position and facing foreword. Because the Ardupilot has a built in IMU it is critical to mount it securely, upright, level, and facing foreword. The image at the right shows my mounting solution for the APM.
Basic Configuration
Begin by going to the Ardupilot homepage and download the latest version of APM mission planner and install it on your computer. You will most likely need to install some USB drivers for your system as well. I will not go over that here as it is likely to change and is Operating system specific.
Also before continuing make sure you bind your receiver and your transmitter. Refer to your radio's operators manual for instructions on how to do this.
Setting up the APM
Binding The Transmitter
Preparing for your test flight
The first test flight
Tuning the PID values
Tuning autolevel mode


