Table of Contents
Creating a New AL for DRC-HUBO
Author: Dylan Wallace Email: wallad3@unlv.nevada.edu
Date: Last modified on 11/19/16
Keywords: Humanoid, HUBO, Software
This tutorial is designed to teach DASL members about how to create a new AL for HUBO, and how you can use these ALs with HUBO to perform custom commands.
What is an AL?
An AL is a user-created program that allows the user to perform custom commands for DRC-HUBO. The ALs communicate with HUBO's shared memory, covered in the Software Tutorial, so it is easier for the user to program HUBO without having to communicate directly with the Daemon or GUI. There are some ALs that already come with PODO: WalkReady, Omniwheel, Freewalking, and Manualmove are some of the most important. However, in order to specify our own functions for HUBO, we must create a new AL to perform these.
Creating a New AL
Setup
Before creating the AL, we must first make sure that PODO is setup properly within Qt. Make sure that you add all the required project to Qt according to the Software Tutorial. Make sure that all projects are set to Release, and not Debug.
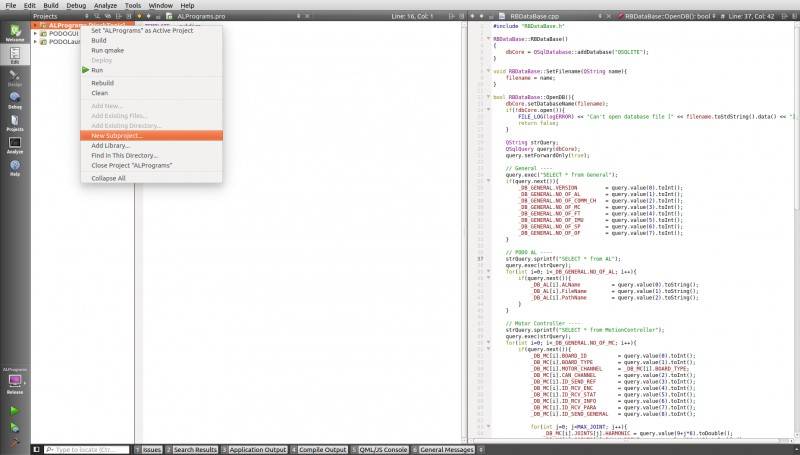
Once all of the projects are setup, right click the ALPrograms project, and select “New Subproject”.
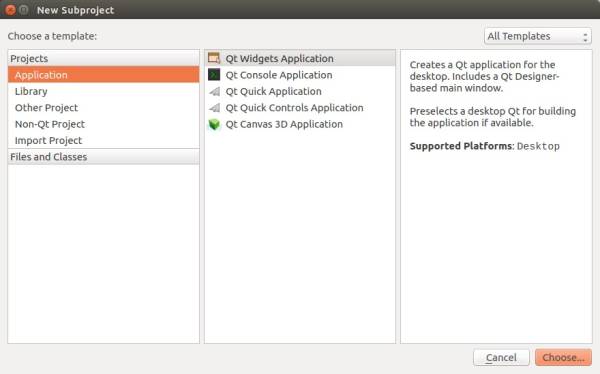
Now, for the template, select “Application” in the “Projects” area, and then “Qt Console Application” in the template area.
Finally, name your project.
Now, you are ready to create you new AL.
Copying the Tutorial Files
In order to get your new AL to work properly, we must copy over the necessary code and files from ALTutorial to ensure the necessary commands/functions are included.
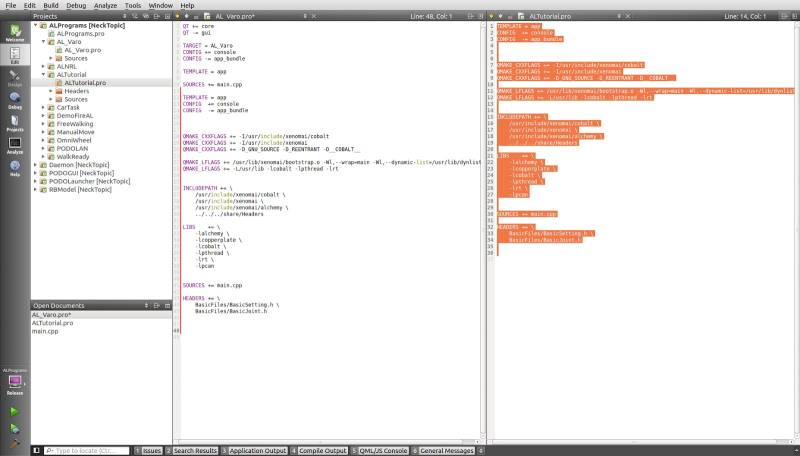
First, copy the text from the ALTutorial.pro file to the .pro file for your new AL.
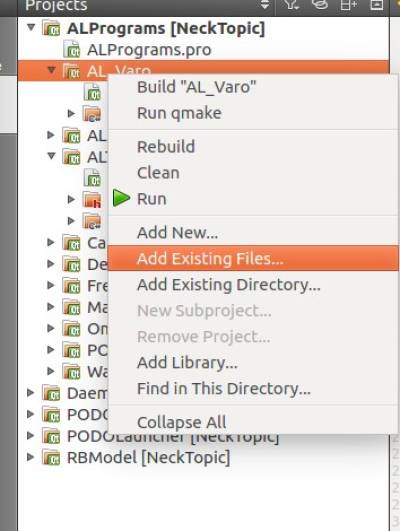
Next, right-click the new AL project and select “Add Existing Files…”.
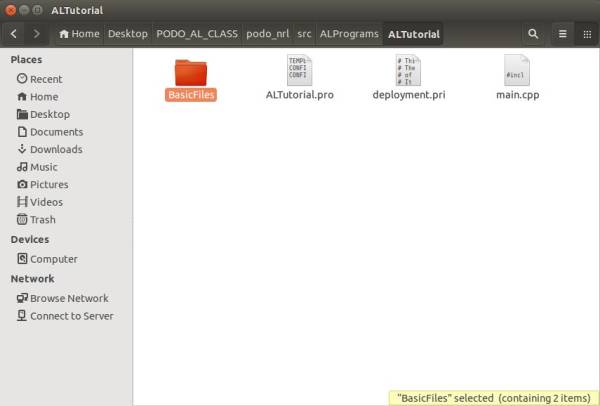
Navigate to ~/Desktop/PODO_AL_CLASS/podo_nrl/src/ALPrograms/ALTutorial and select the folder “BasicFiles”.
Finally, copy from the ALTutorial main.cpp to your new AL's main.cpp
Changing Commands
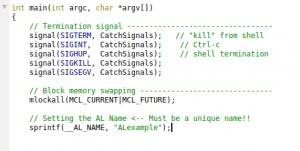
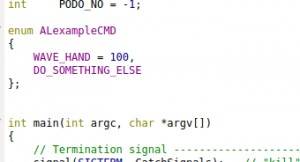
Once you have correctly setup and added files to your AL, you will need to make modifications in the code to give your commands unique names. See the photos below as a guideline.
Some guidelines that must be followed when naming and creating commands:
- Commands must start at 100+, or else they will conflict with other commands
- Make the command names unique to any other already existing
- Make sure you use the same name anytime you reference the command
Interfacing with the GUI
Once you have finished renaming and creating your commands, you will now need to interface you AL with the GUI.
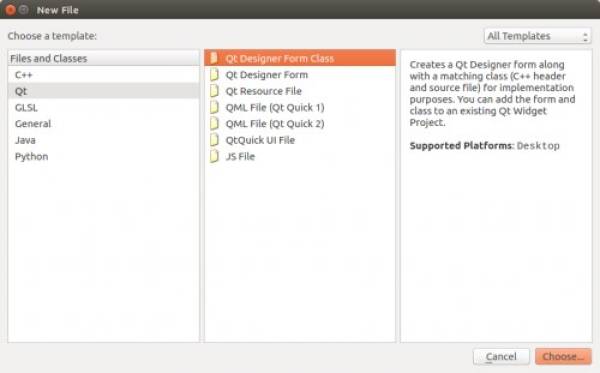
First, right-click the PODOGUI project and select “Add New…”. In the pop-up, select Qt int the “Files and Classes” section, and then select “Qt Designer From Class” in the template section. Name the class as you choose, but use the word dialog in the name.
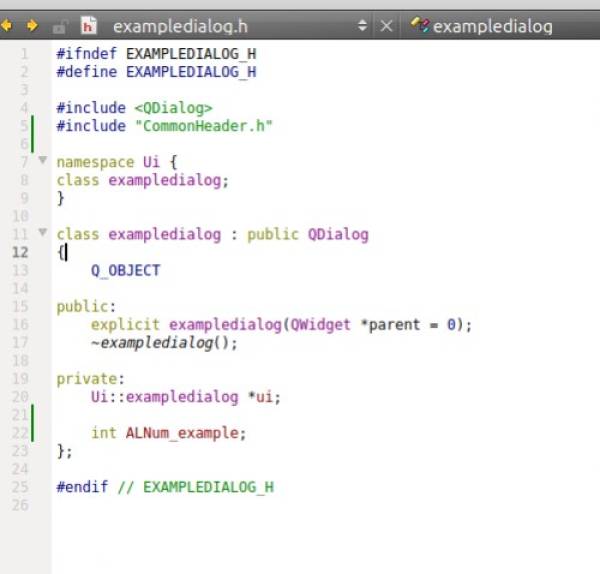
In the new .h file, include “CommonHeader.h”, and in the private section declare a new integer value (name it ALNum_<your desired name>.
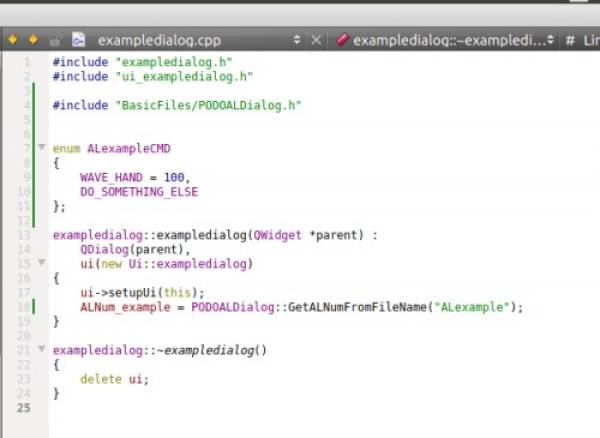
In the new .cpp file, include “BasicFiles/PODOALDialog.h”. Next, add the enum from you AL command. Finally, initialize the ALNum integer as PODOALDialog::GetALNumFromFileName(“<your AL filename>”).
Adding a GUI Button
Now, we need to add a button to the GUI for our command.
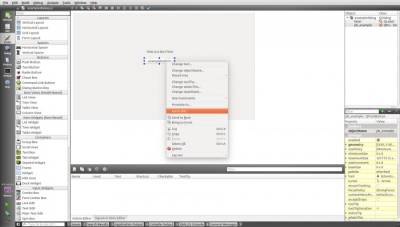
First, go to the Design tab and edit the .ul file for your new dialog. Drag out a button and rename it. Next, right-click the button and select “Go to slot…”.
Now, add the following to the code, and save the file:
USER_COMMAND cmd;
  cmd.COMMAND_DATA.USER_COMMAND = *command from enumeration declaration*;
  cmd.COMMAND_TARGET = ALNum_example;
  pLAN->SendCommand(cmd);
Now, we need to make the button appear in the GUI. Open the “GUIMainWindow.h” file and include your dialog.h file. Under the “user dialog” comment, add a <your dialog> type pointer in the list.
Open the “GUIMainWindow.cpp” file. Under the “Expandable dialogs” comment, add your own init mehtod and tab method for the GUI. Base these methods off of the others in the list. The string that you choose will be the name of the tab.
Now, edit the database in the exe folder. Go to Al→Data and add a row with the names for your AL. The directory is the build directory for your AL. Go to “General→No. of Podo Al” and add 1 to this number.
Testing
Now you are ready to test your AL. Make sure that it does not break the other ALs that PODO uses. Also make sure that it performs as you have desired. Now you are ready to use you AL!
Final Words
This tutorial's objective was to teach the concepts behind creating a new AL for DRC-HUBO. Complete setup instructions for a base AL were provided. Once the concepts were conveyed the reader could successfully create and test their own AL for DRC-HUBO.
For questions, clarifications, etc, Email: wallad3@unlv.nevada.edu

