This is an old revision of the document!
Table of Contents
BeamPro Telepresence Robot
Author: Dylan Wallace Email: wallad3@unlv.nevada.edu
Date: Last modified on 12/21/16
Keywords: BeamPro, Telepresence, Robot, Setup
The BeamPro is a high-class telepresence robot, intended for use in commercial and production environments. The BeamPro utilizes a WiFi connection to allow a user to control the BeamPro remotely, casting their audio and video to the BeamPro's peripherals.
This tutorial covers how to setup the BeamPro, and how to use the BeamPro remotely.
Overview
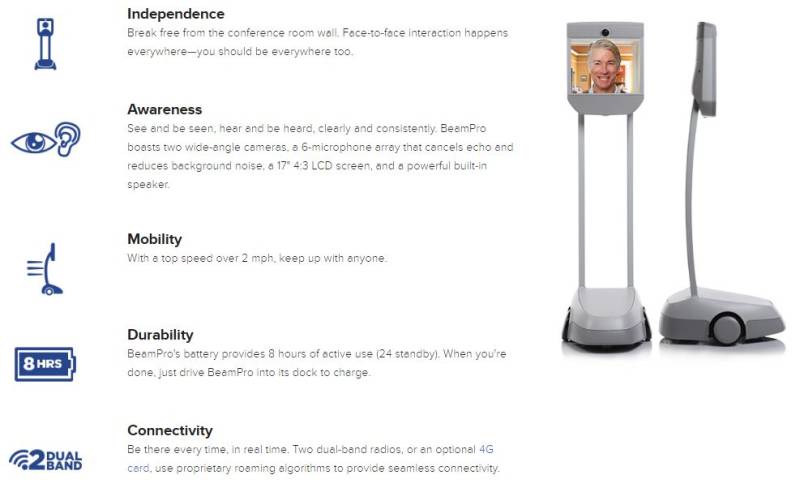
The BeamPro has many features that make it work well in commercial and production environments. These include 2 Dual-band WiFi radios, a maximum speed of 2 mph, and two cameras for optimal control.

Setup
Here we will cover how to setup your BeamPro and the Beam App. If at any time you run into issues, please refer to the troubleshooting section for more information on how to fix these issues.
Robot
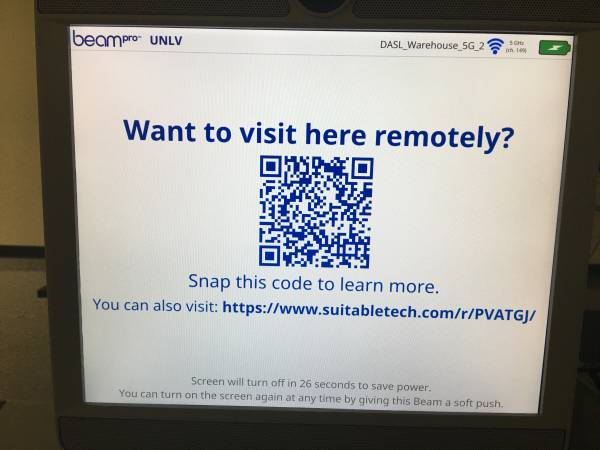
First, you will want to power-on your BeamPro robot. To do this, simply press the green button on the back of the BeamPro, on the base of the robot. Once your BeamPro is powered on, you should see a screen that looks similar to this:

WiFi
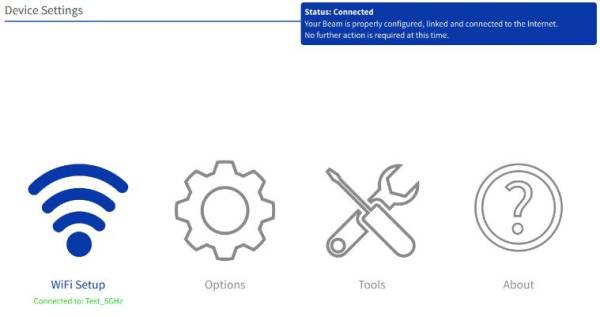
Once you have the robot powered on, you will need to setup the WiFi for the user to communicate with the robot. To do this, first open the hatch on the back of the robot, and insert a USB keyboard into the USB port on the back of the BeamPro. you should see a setup screen like the one below:

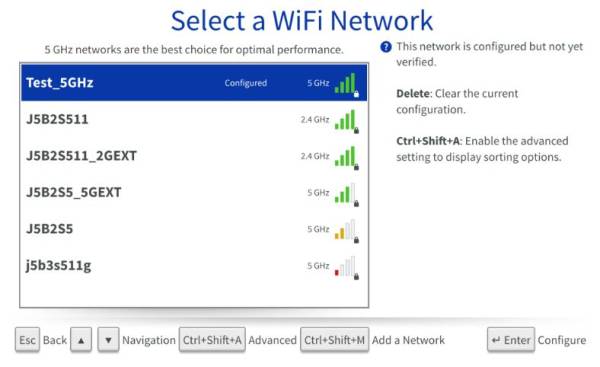
Select the “WiFi Setup” menu, and then a screen similar to this one should appear:

Select the WiFi network that you would like to connect to, and enter the password. If the network is configured correctly, a green check-mark should appear beside the network.
Once you are done, remove the USB keyboard from the back of the BeamPro and replace the hatch onto the back of the robot.
