Table of Contents
Avatar DARWIN Tutorial
Author: Ian Schneweis Email: Schnewei@unlv.nevada.edu
Date: Last modified on <06/22/23>
Keywords: Tutorial, how to, step-by-step, Avatar, Virtual Reality,
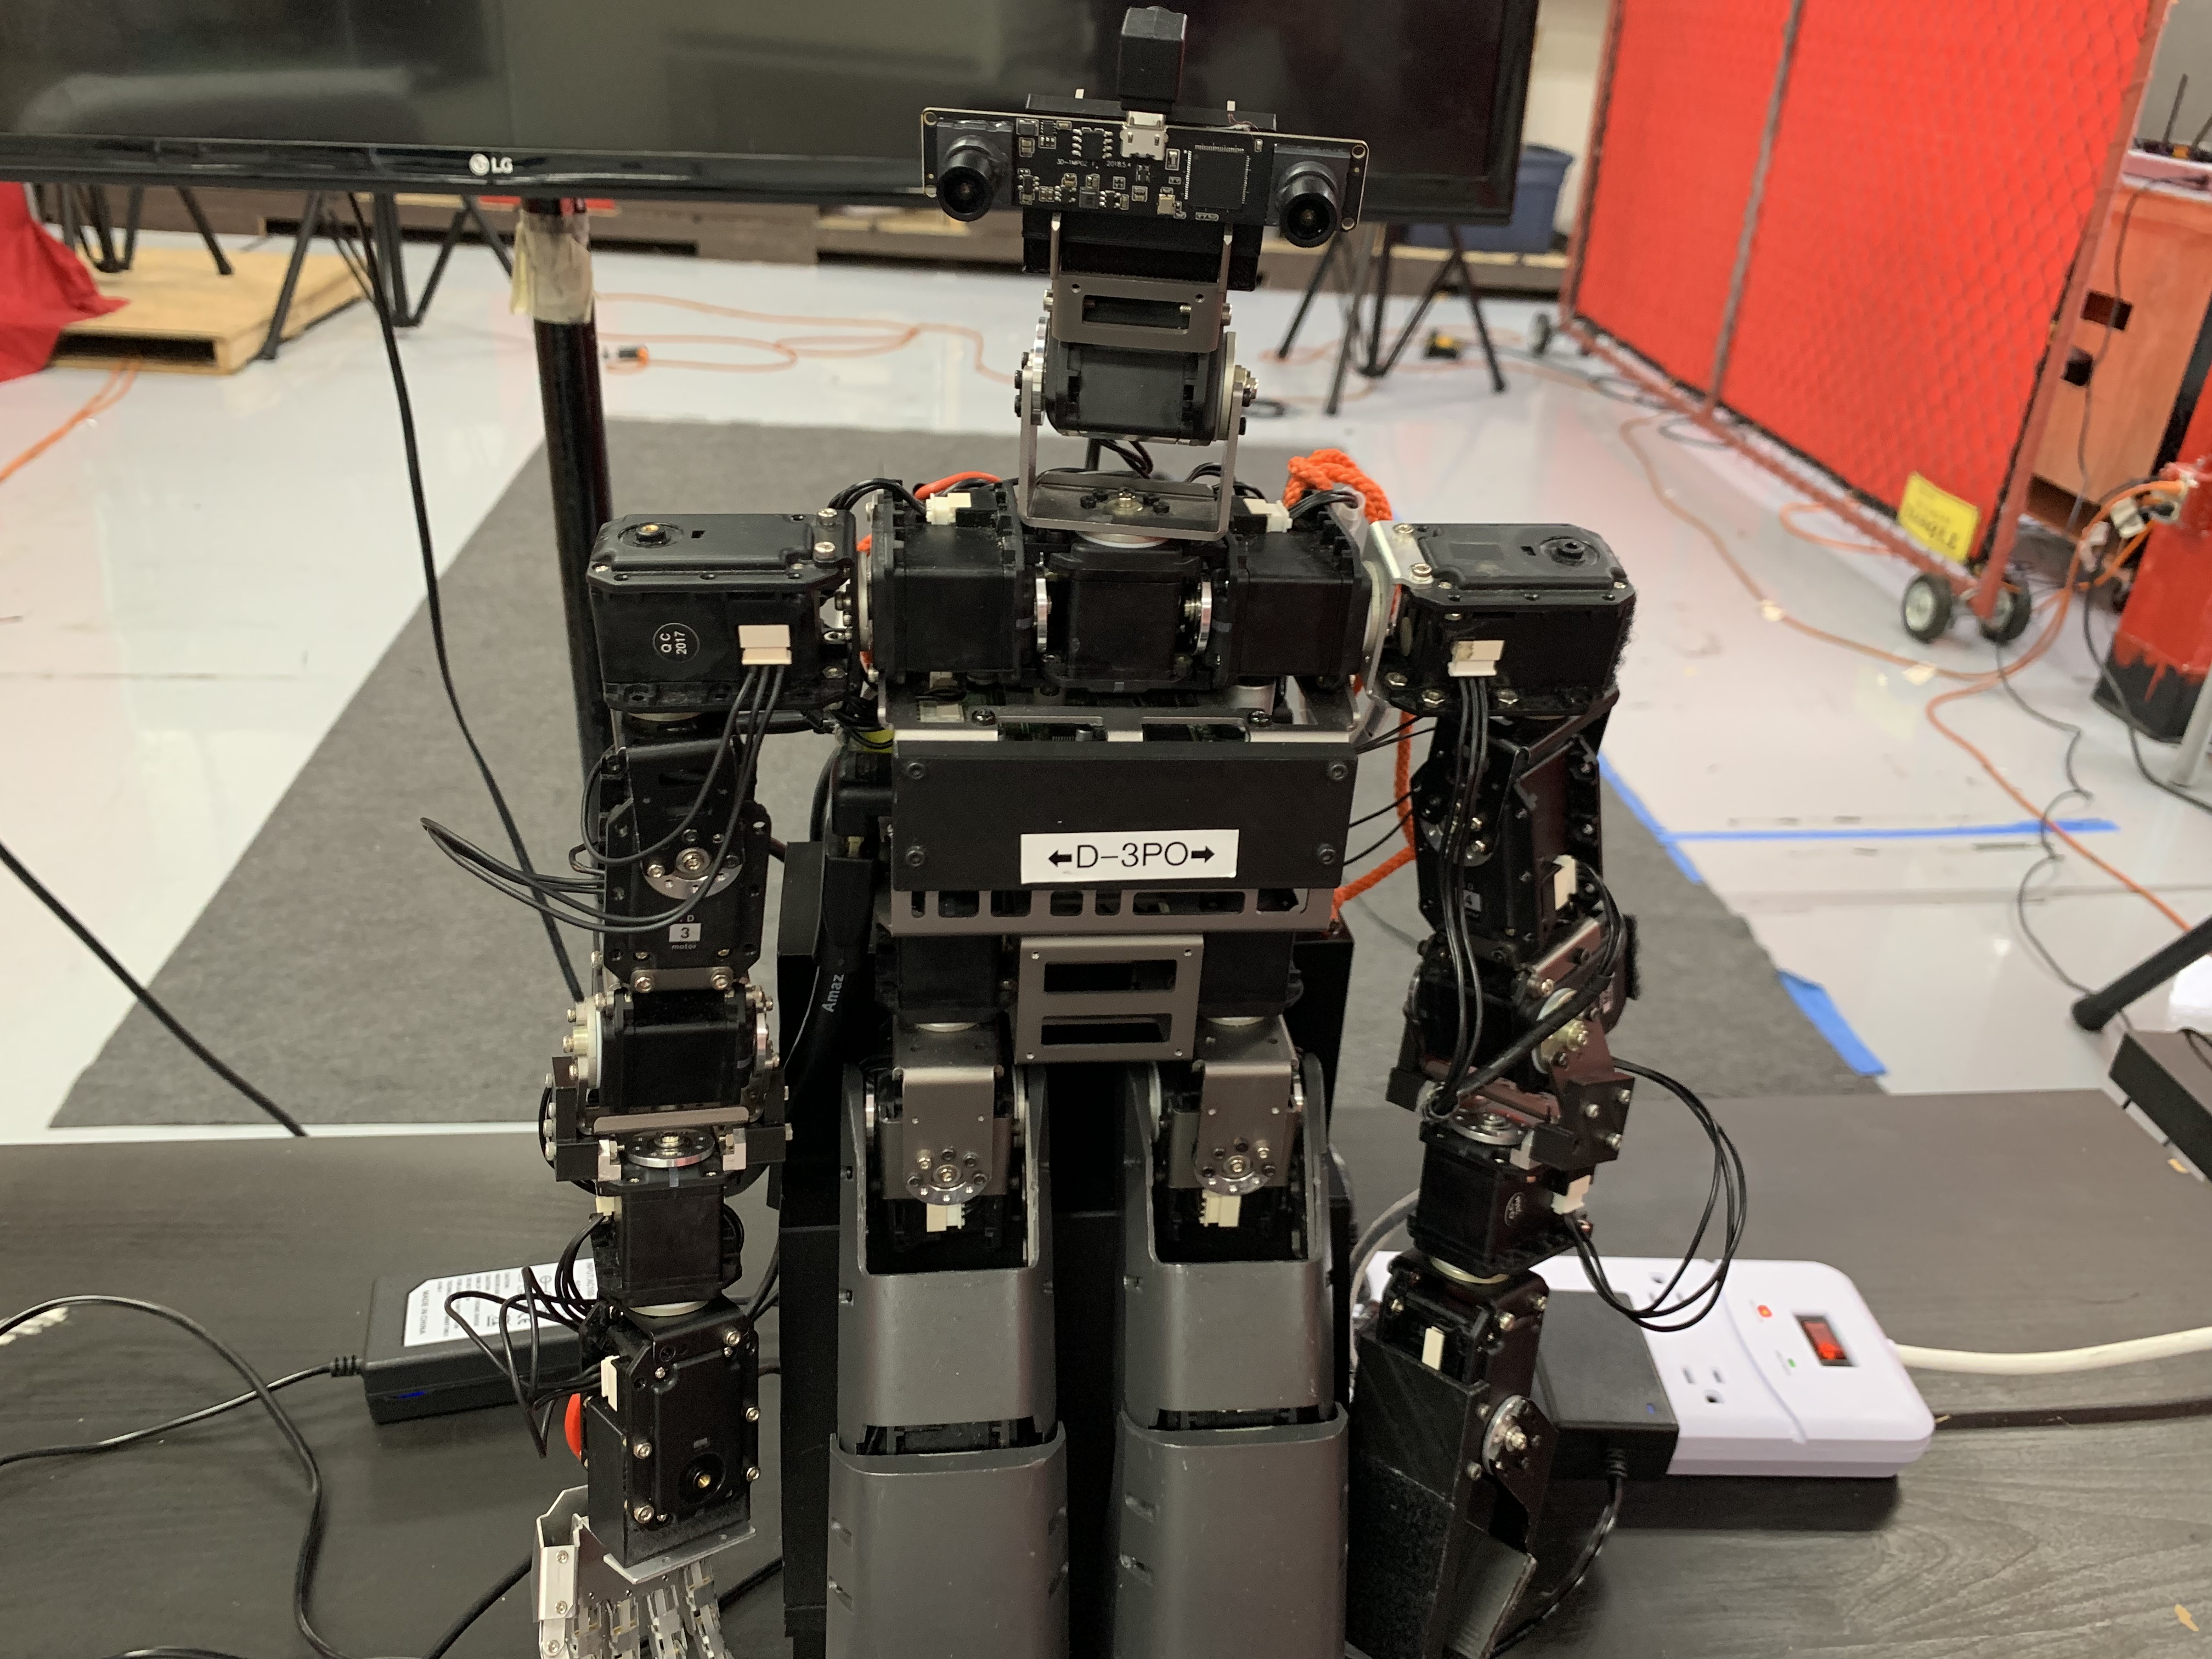
Avatar DARWIN is a platform for testing telepresence which uses a Virtual Reality (VR) set with this DARWIN robot to allow the wearer of the VR set to move the robot as if they were in its place. This guide will show how to plug in and set up Avatar DARWIN for VR control. This tutorial will teach you step by step how to properly plug in DARWIN to be as safe as possible. Then what codes are needed for setting DARWIN’s program up for VR and then how to use the VR Unity Scene. DARWIN is a very important platform for testing out changes regarding VR before they are added to Avatar HUBO.
Avatar DARWIN Videos
Motivation and Audience
This tutorial's motivation is to teach users how to properly turn on and operate Avatar DARWIN. Readers of this tutorial assumes the reader has the following background and interests:
* Know how to use Unity
* Have a basic knowledge of ROS
* Perhaps additional background needed may include using VR equipment
The rest of this tutorial is presented as follows:
- Final Words
Parts List and Sources
US-based vendors to obtain material to complete this tutorial include <list relevant hyperlinks or phone numbers and addresses>.
To complete this tutorial, you'll need the following items
Here is the list as a Google XLS document
Here is the list as a PDF file
Avatar DARWIN Setup
This section gives step-by-step instructions along with photos to plug in and turn on DARWIN
Step 1
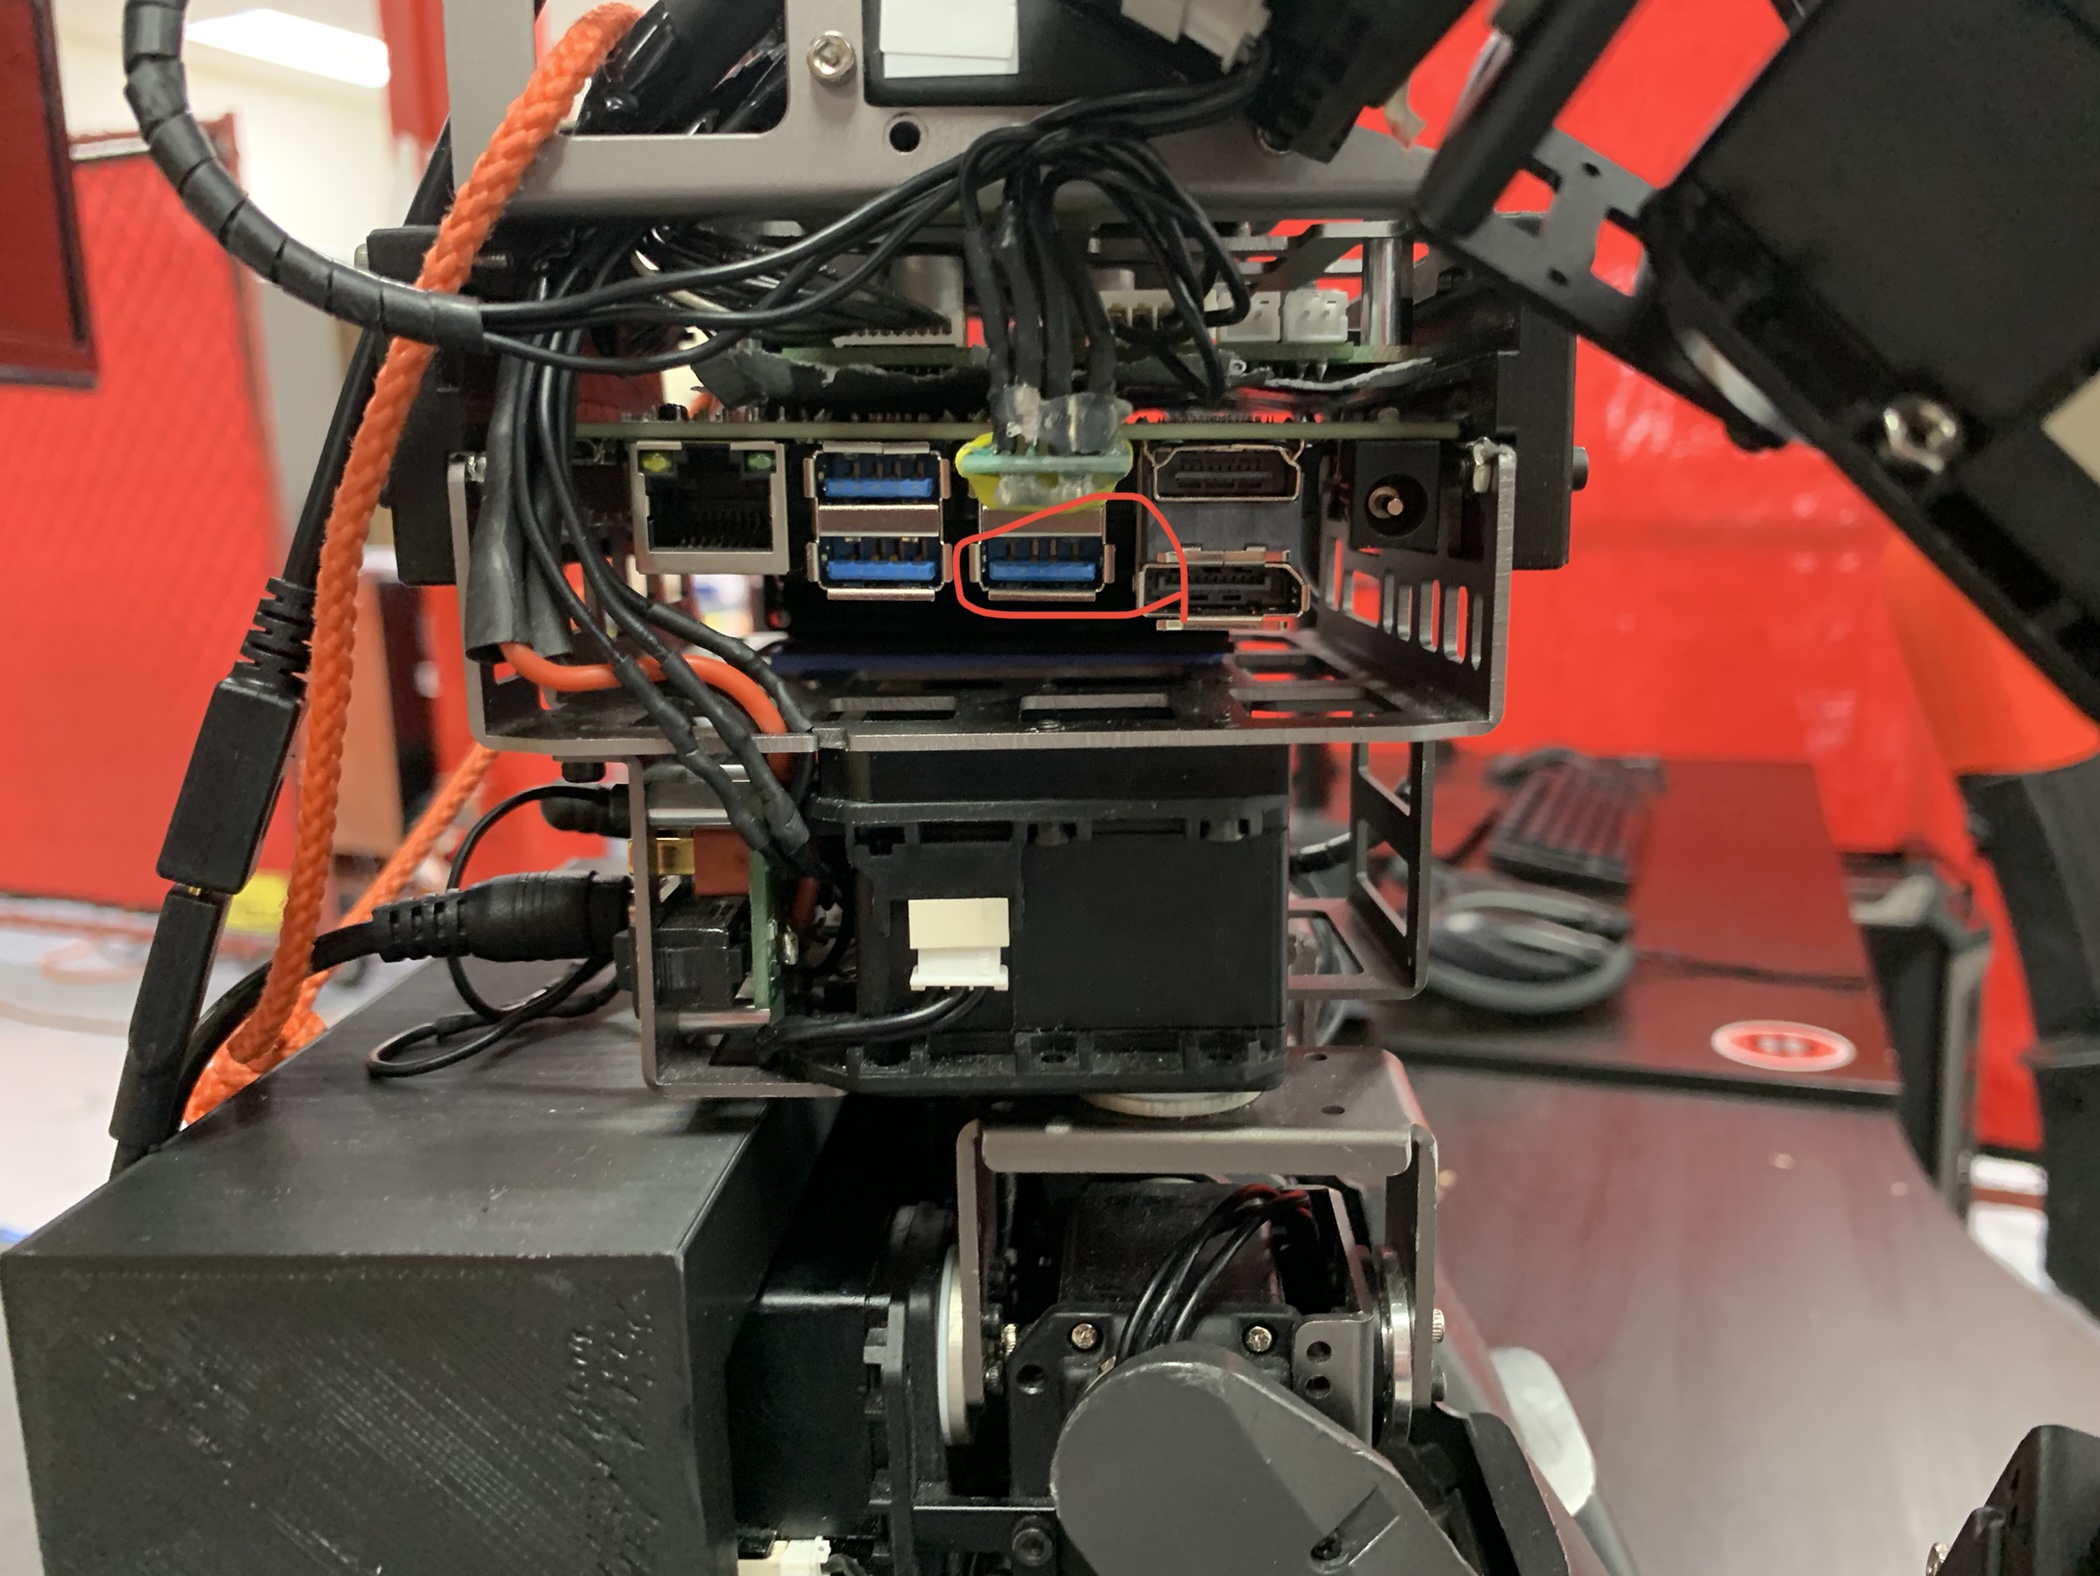
Plug in a USB extension port to the side of DARWIN (circled in red).
(*Make sure to use the 90° degree connector so DARWIN doesn’t accidentally knock it out!)
Step 2
Plug in a keyboard, a mouse and DARWIN’s Camera.
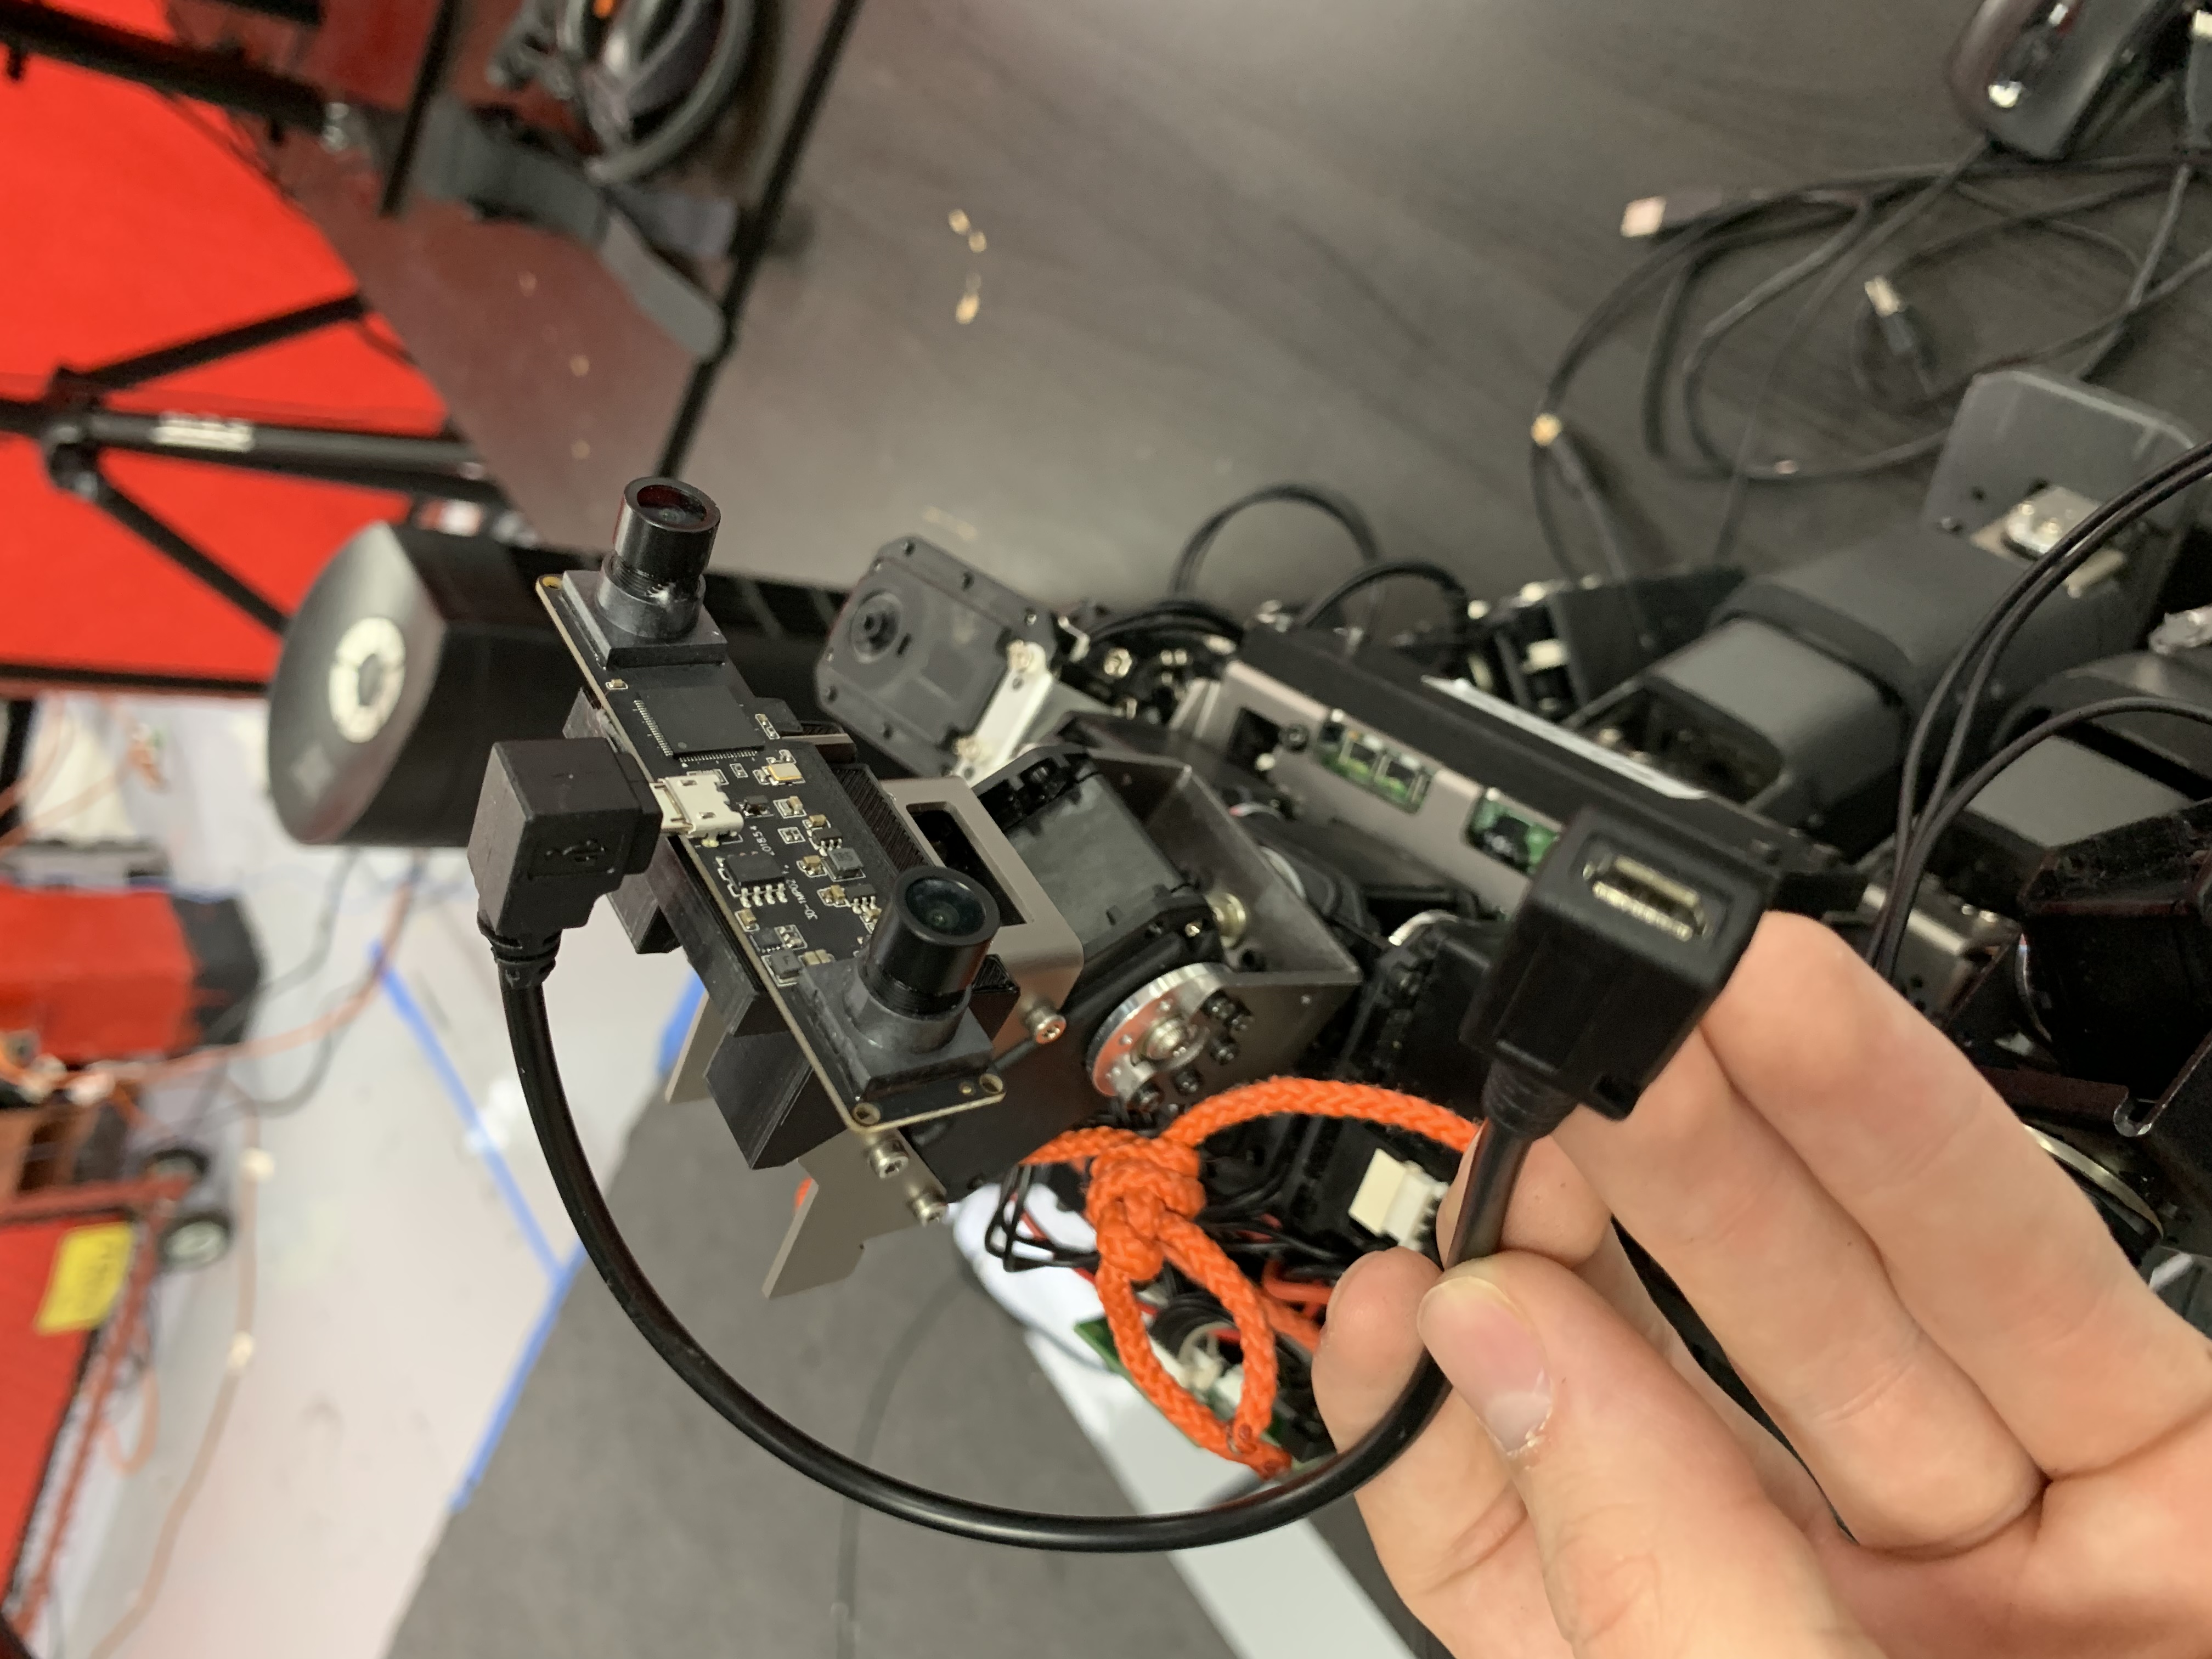
DARWIN’s camera (make sure you have a micro usb to usb connector)
Step 3
Plug in the HDMI connector from the Monitor to DARWIN (circled in red).
(*Make sure to use the 90° degree connector so DARWIN doesn’t accidentally knock it out!)

Step 4
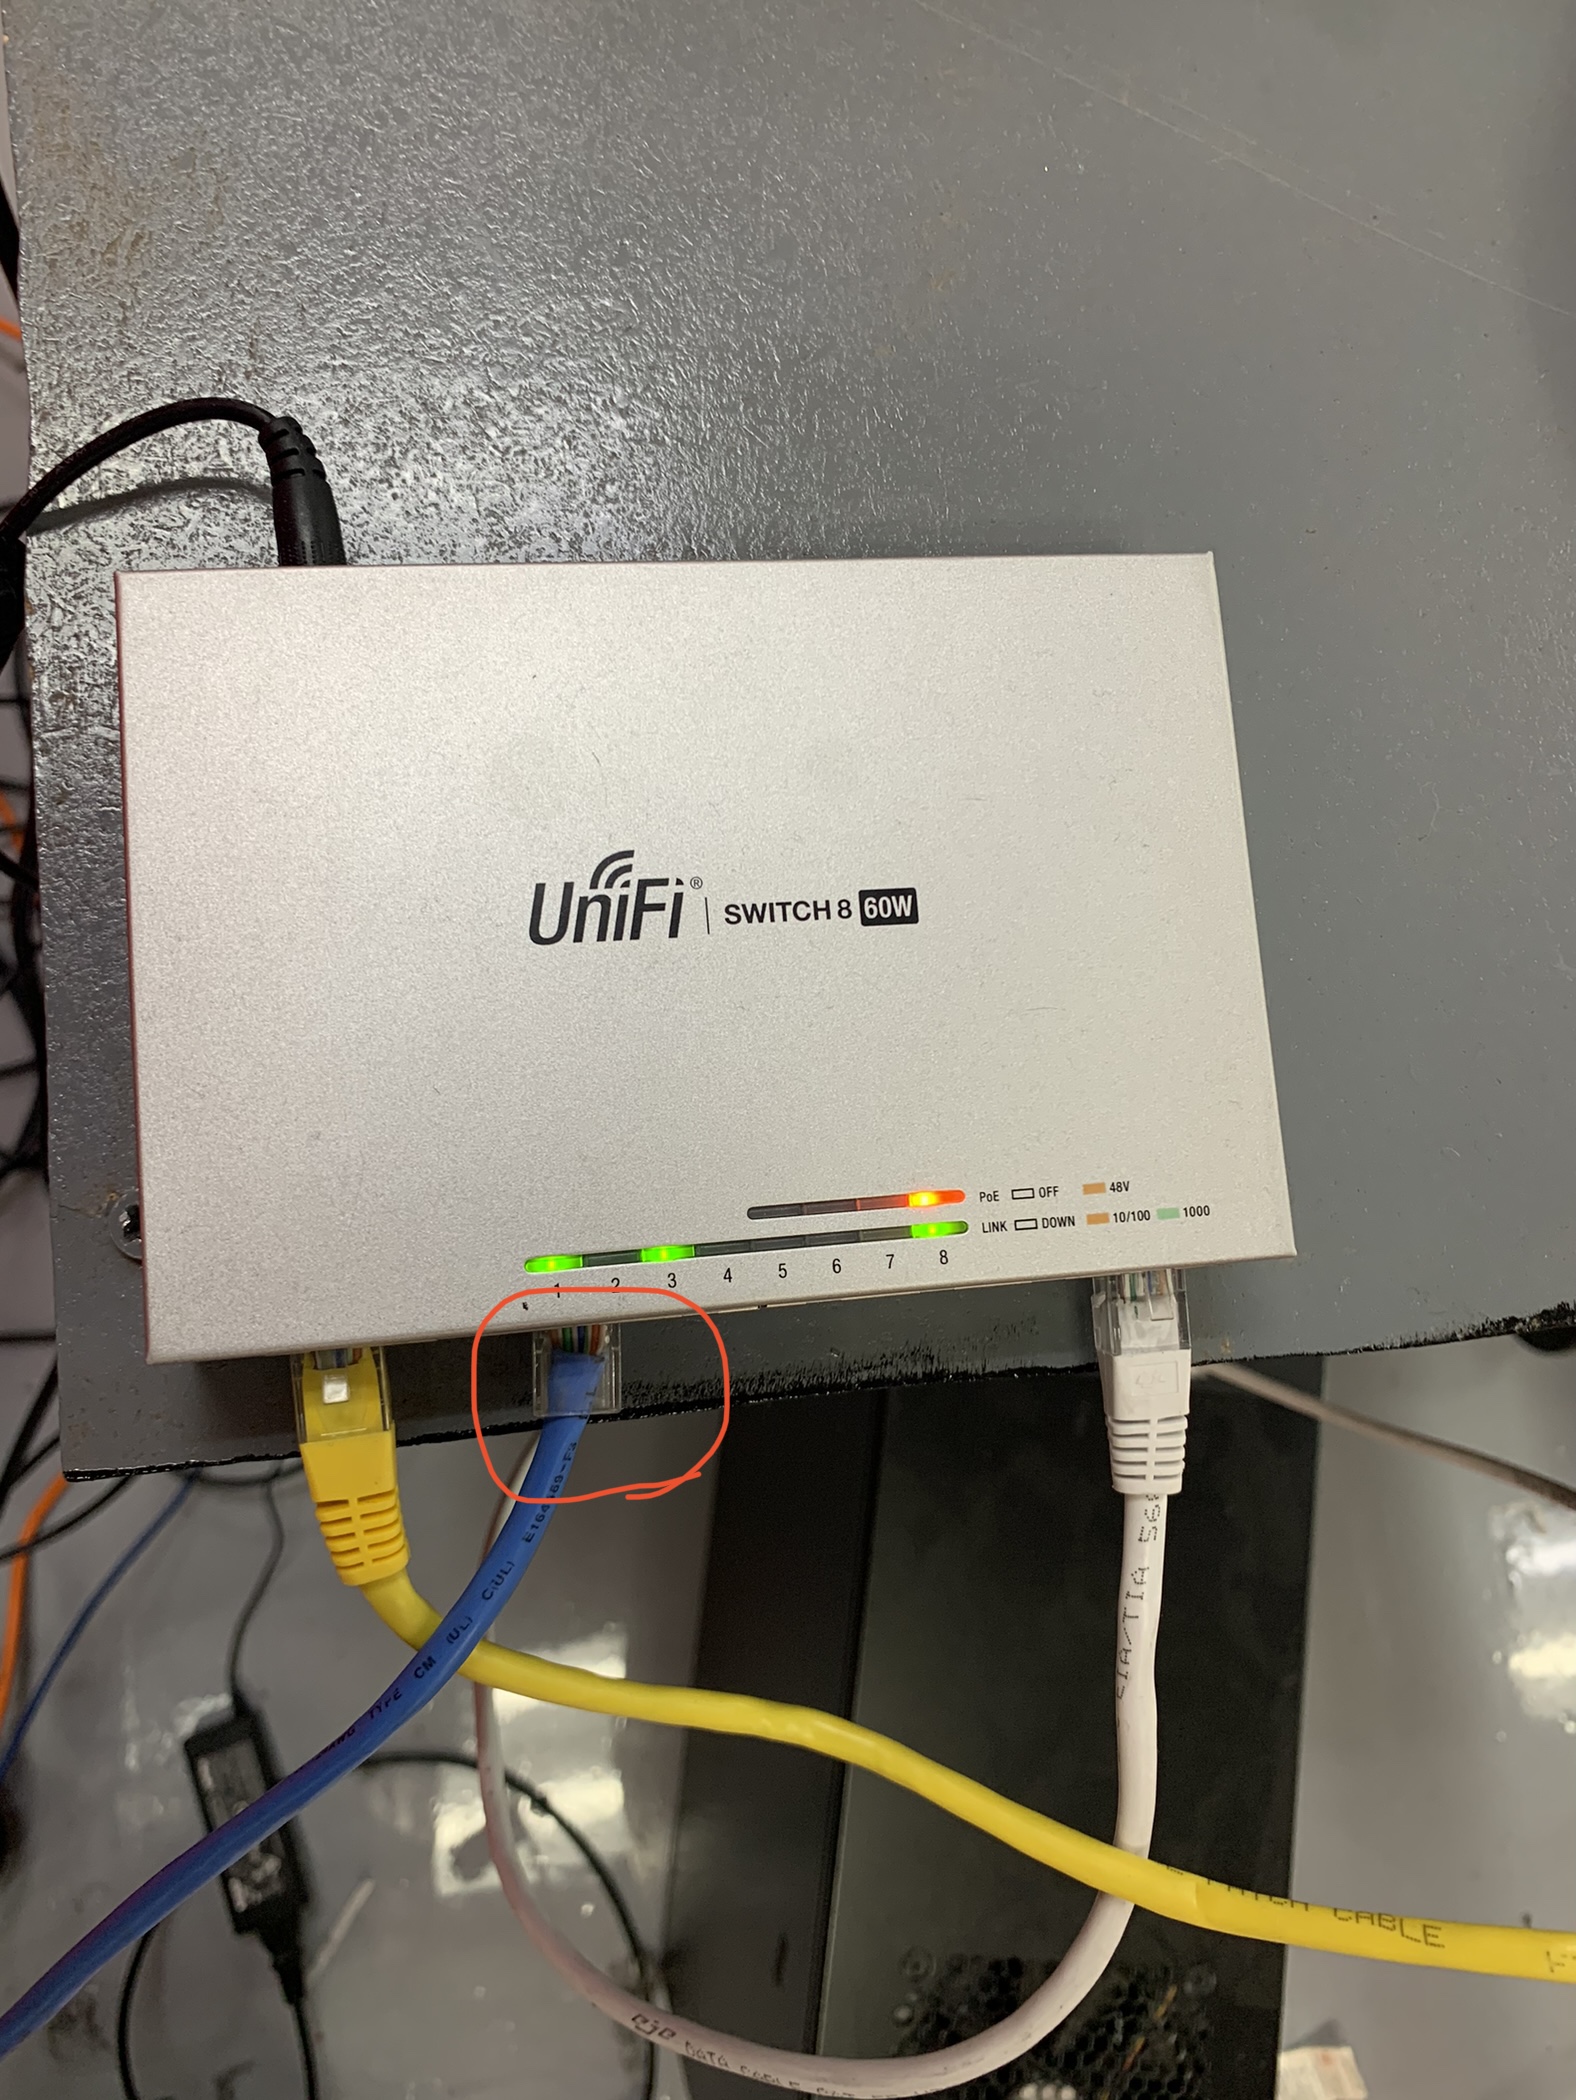
Plug in the ethernet Cable (circled in red).
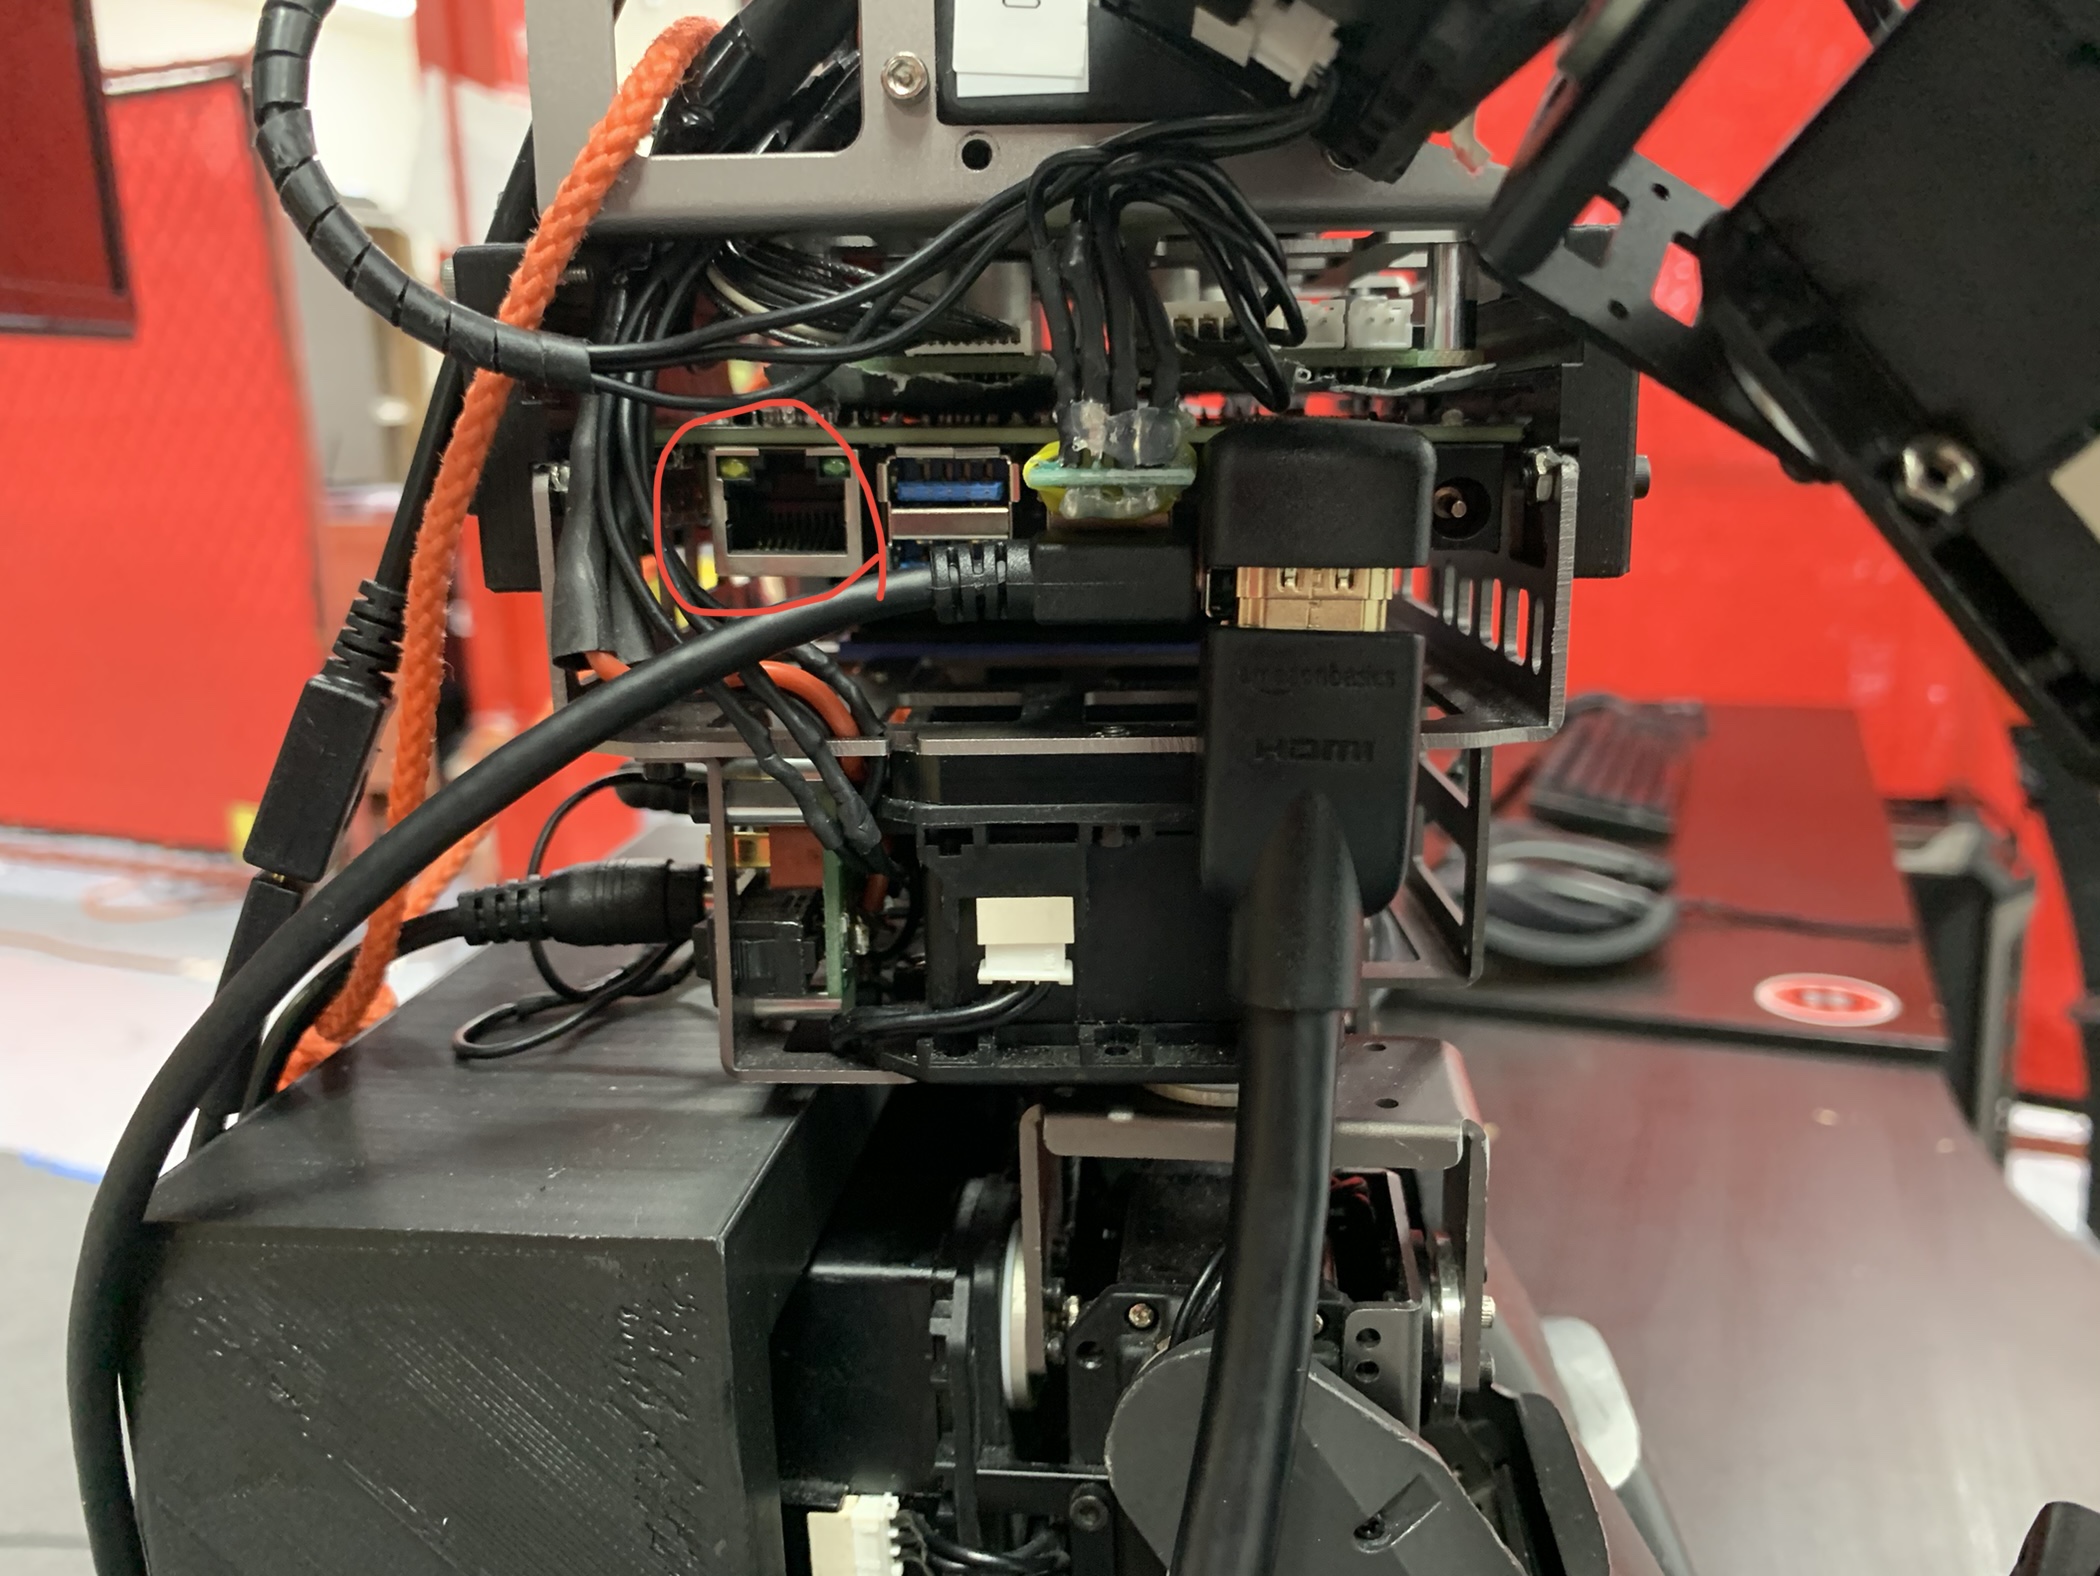
Make sure the Ethernet cable is plugged into the server or ROSbridge will not connect!(Circled in red).
Step 5
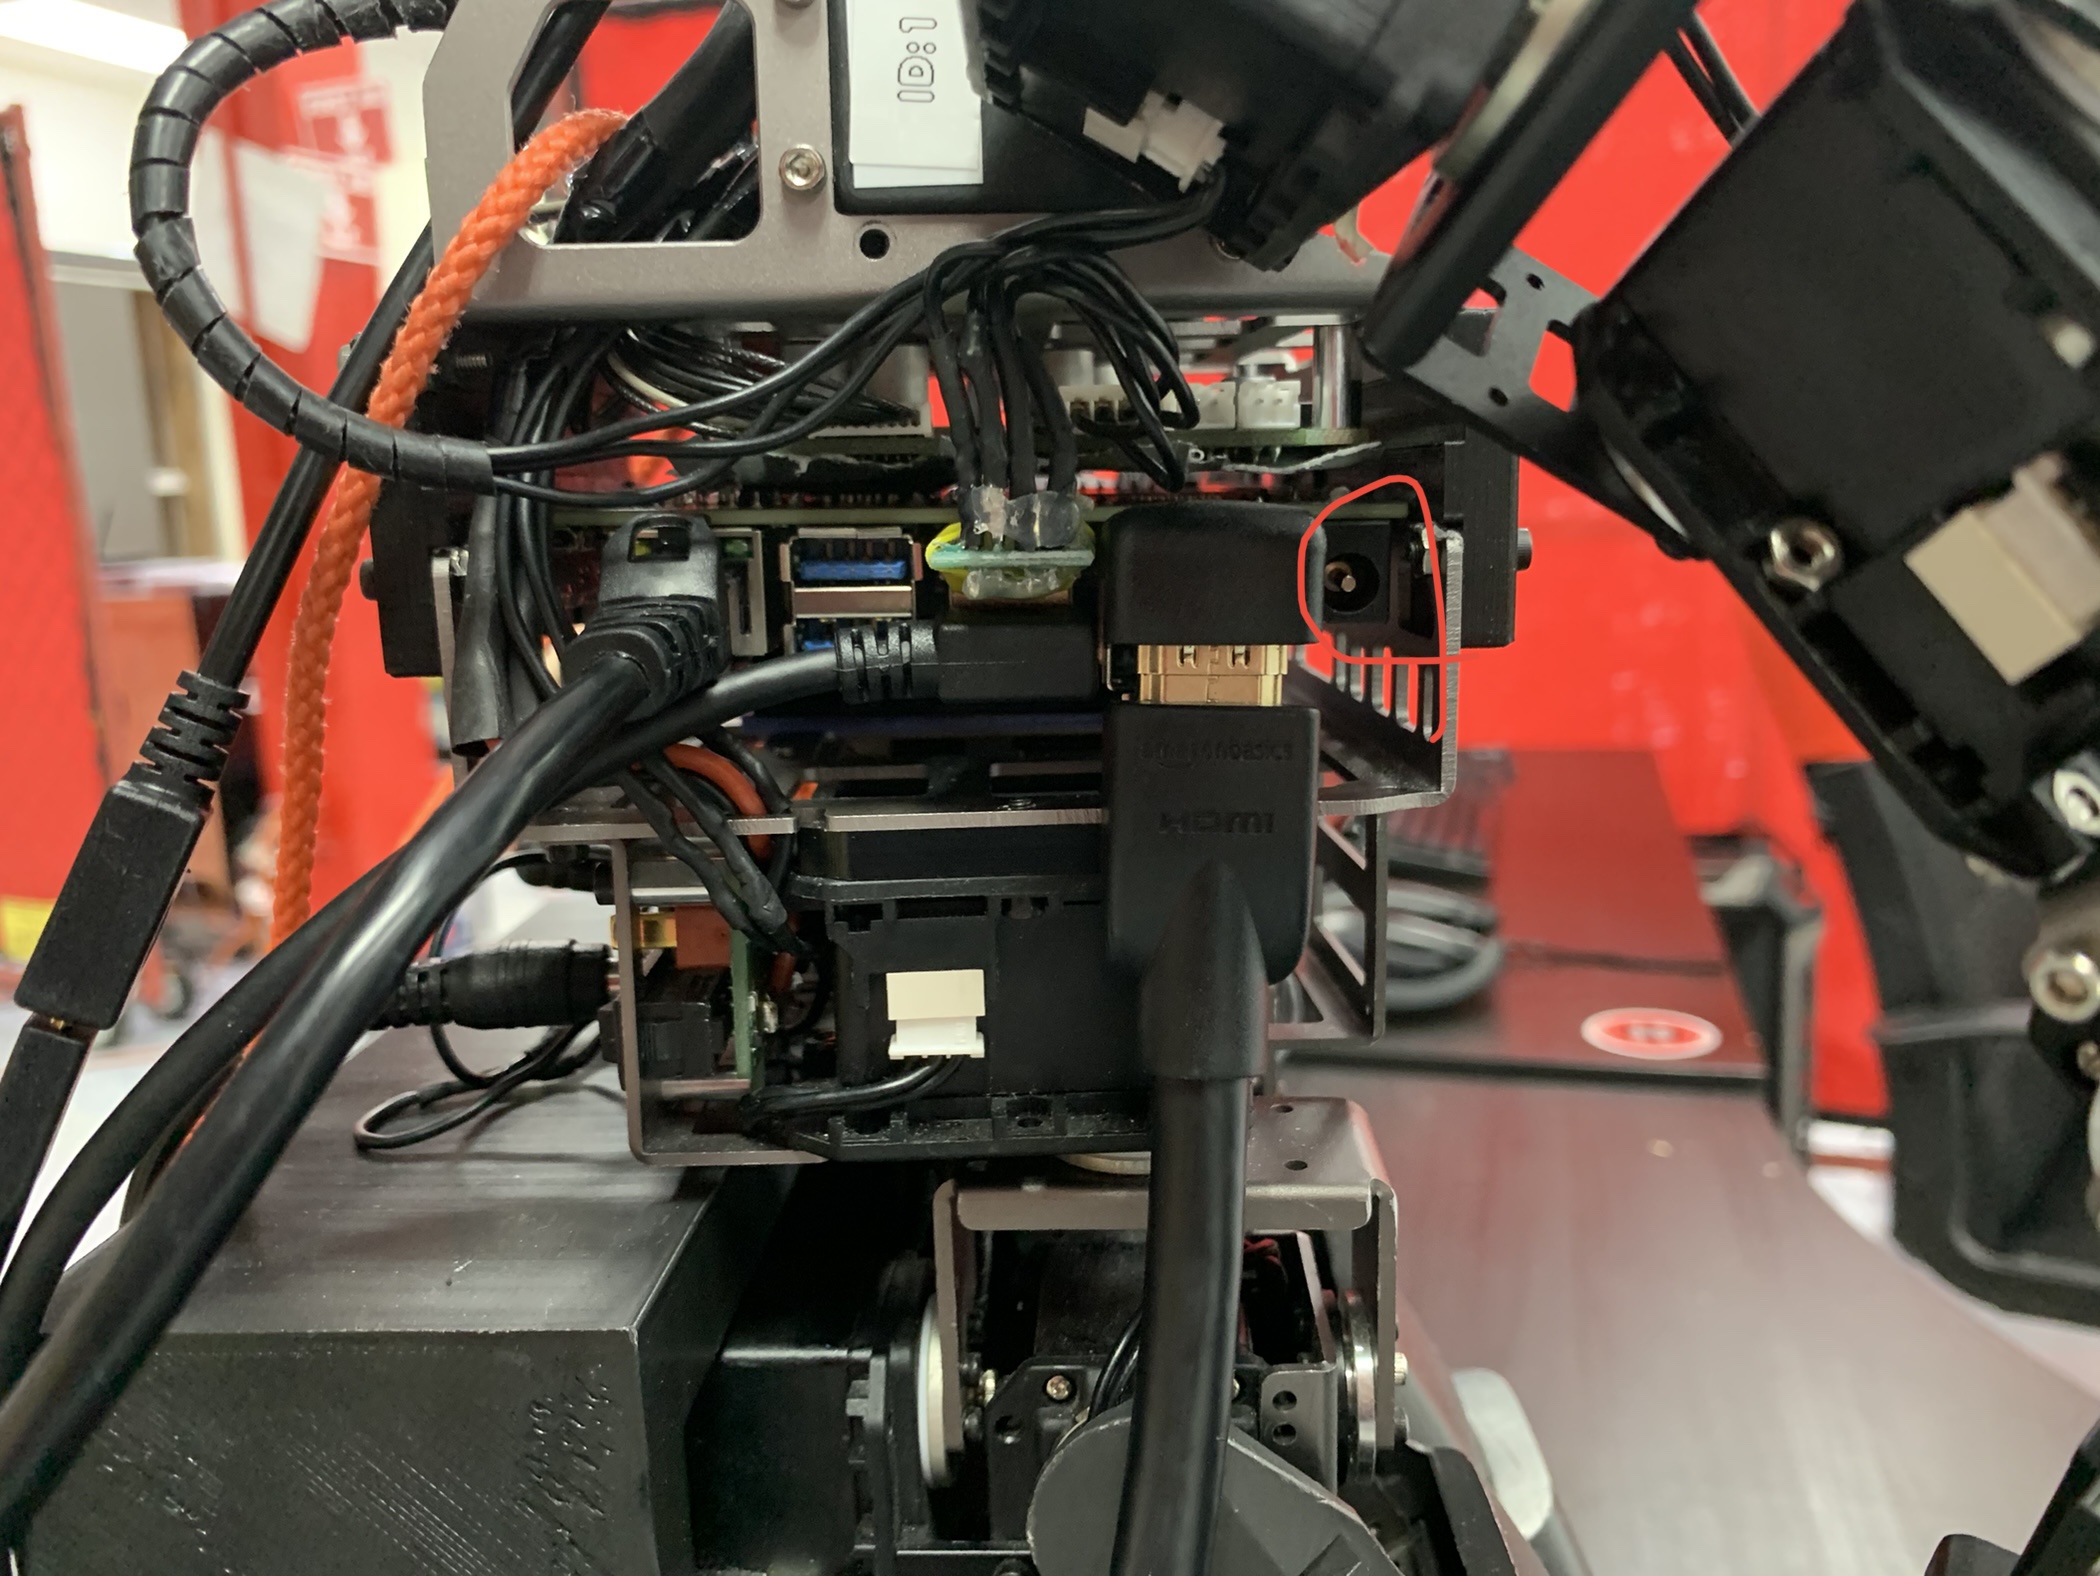
Plug in the 5V-4A barrel power cord to the computer on DARWIN's side NEVER PLUG IN THE 12V-4A CORD OR IT WILL FRY THE COMPUTER! (Circled in red).
Step 6
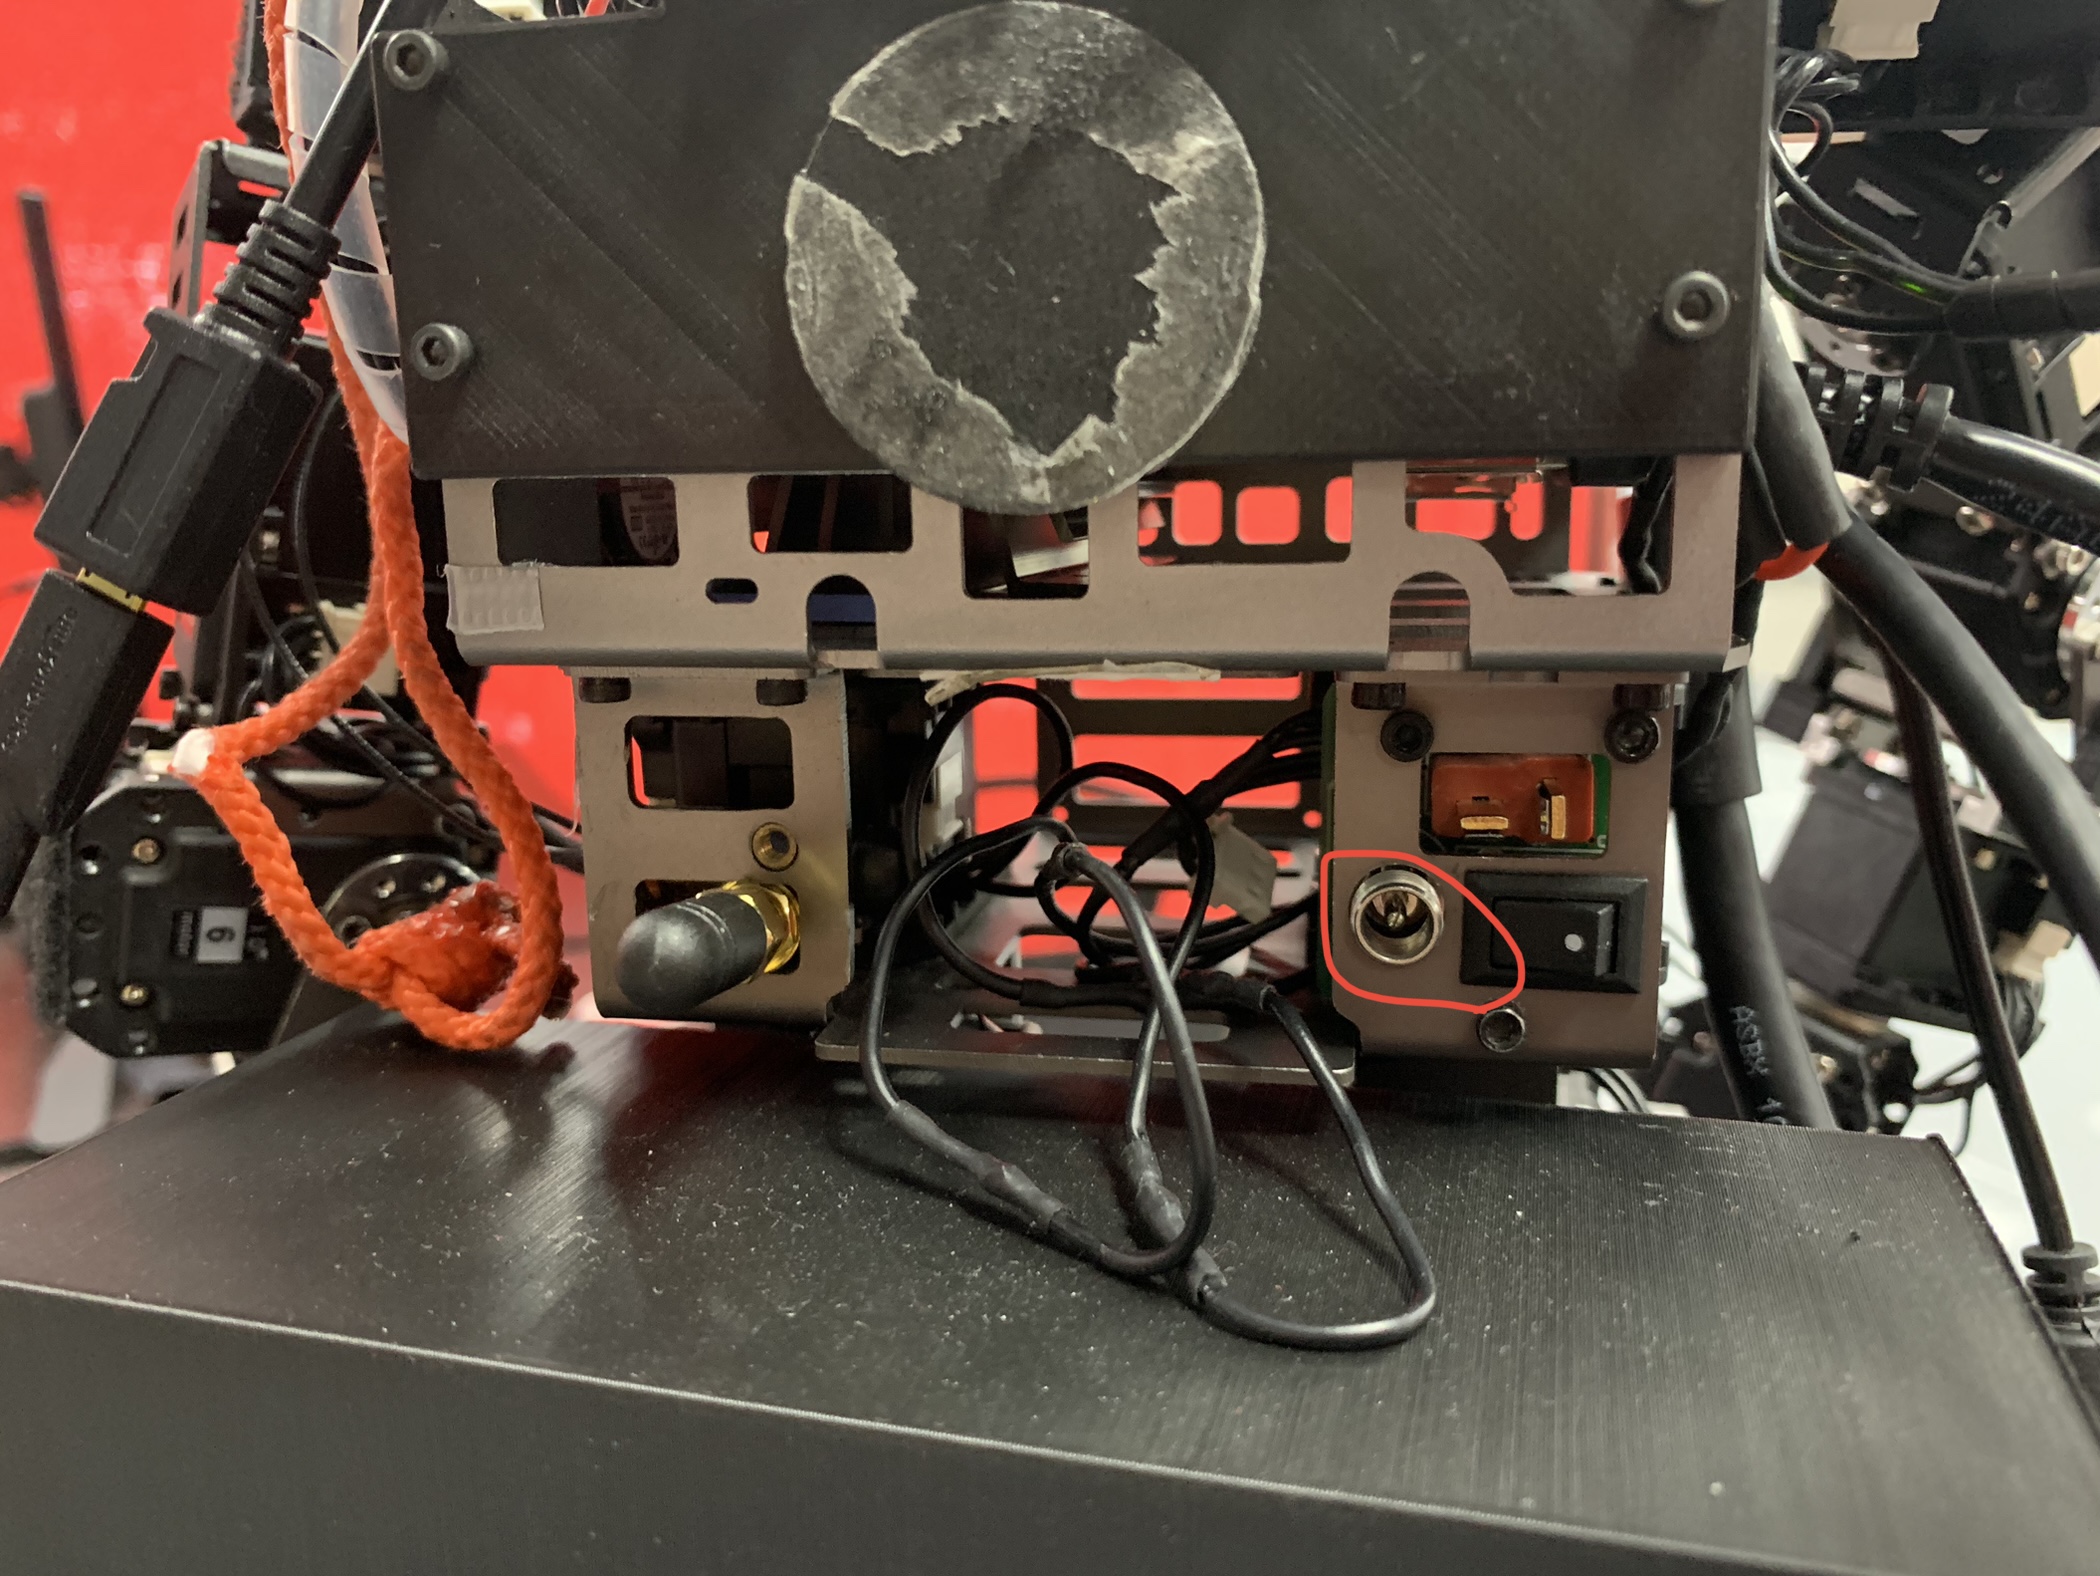
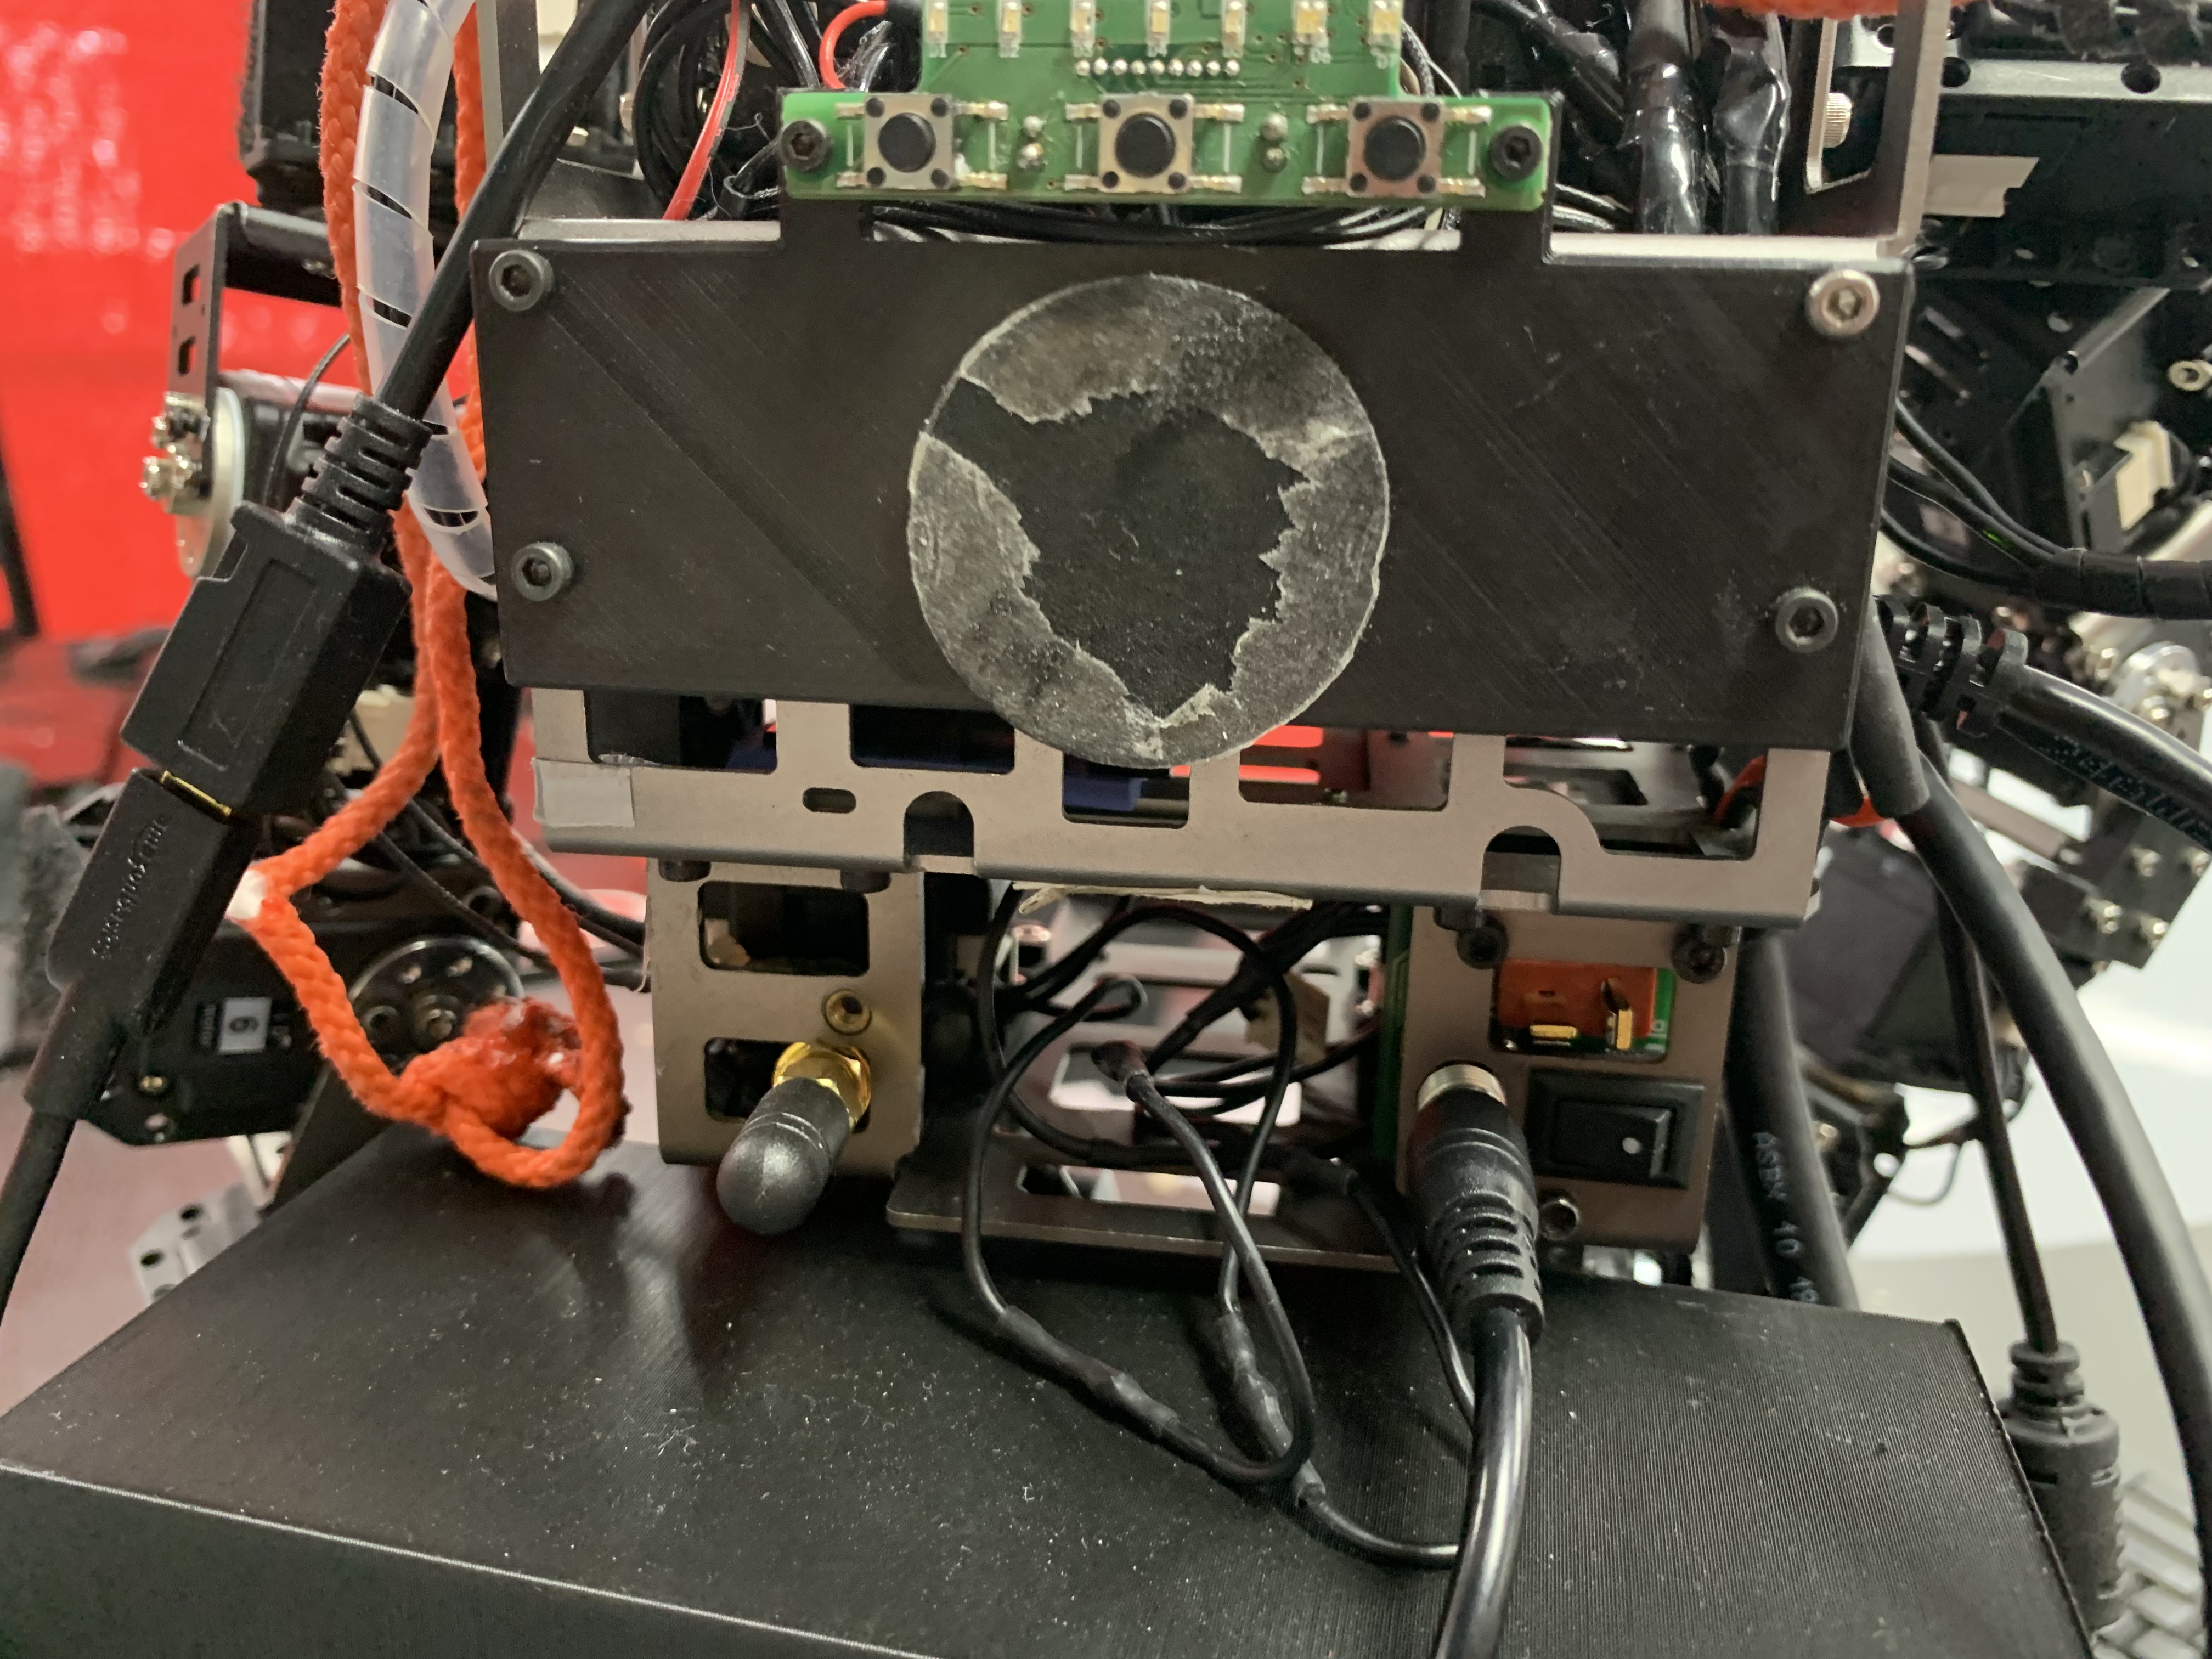
Plug in the 12V-5A barrel power cord to the controller on DARWIN's back (circled in red).
Step 7
Turn on the controller by flicking the switch on DARWIN's Back.
Terminal Commands
Once DARWIN is turned on, turn on your monitor and wait for the computer to boot up. Once it is finished, open 4 terminals, In all 4 terminals type-
<!- sudo bash –>
The terminal will ask for a password which is (dasl), once that is done for all 4 terminals enter in-
<!- source catkin_ws/devel/setup.bash –>
Once that is done create a 5th terminal, enter in-
<!- ifconfig –>
A message will appear looking for the Server address of Darwin; it should be towards the top of the message on the left. (Circled in red)
 The last three digits are the ones to look out for as they are the most likely to change depending on where the robot is. With the address in mind you can navigate to catkin_ws>src>file_server>launch>ros_sharp_communication.launch look for address value = and enter the server number form ifconfig (circled in red)

Once that is done launch DARWIN’s server in the first terminal
<!- roslaunch file_server publish_description_darwin.launch –>
Once the server is launched go to the second terminal and enter
<!- sudo chmod 666 /dev/ttyUSB0 –>
Then in the same terminal type
<!- roslaunch op2_manager op2_manager.launch –>
This command will make Darwin's arms move into initial position, make sure to hold them to avoid them hitting or snagging on anything, If there is an error hit CTRL C and try again then in the third terminal type.
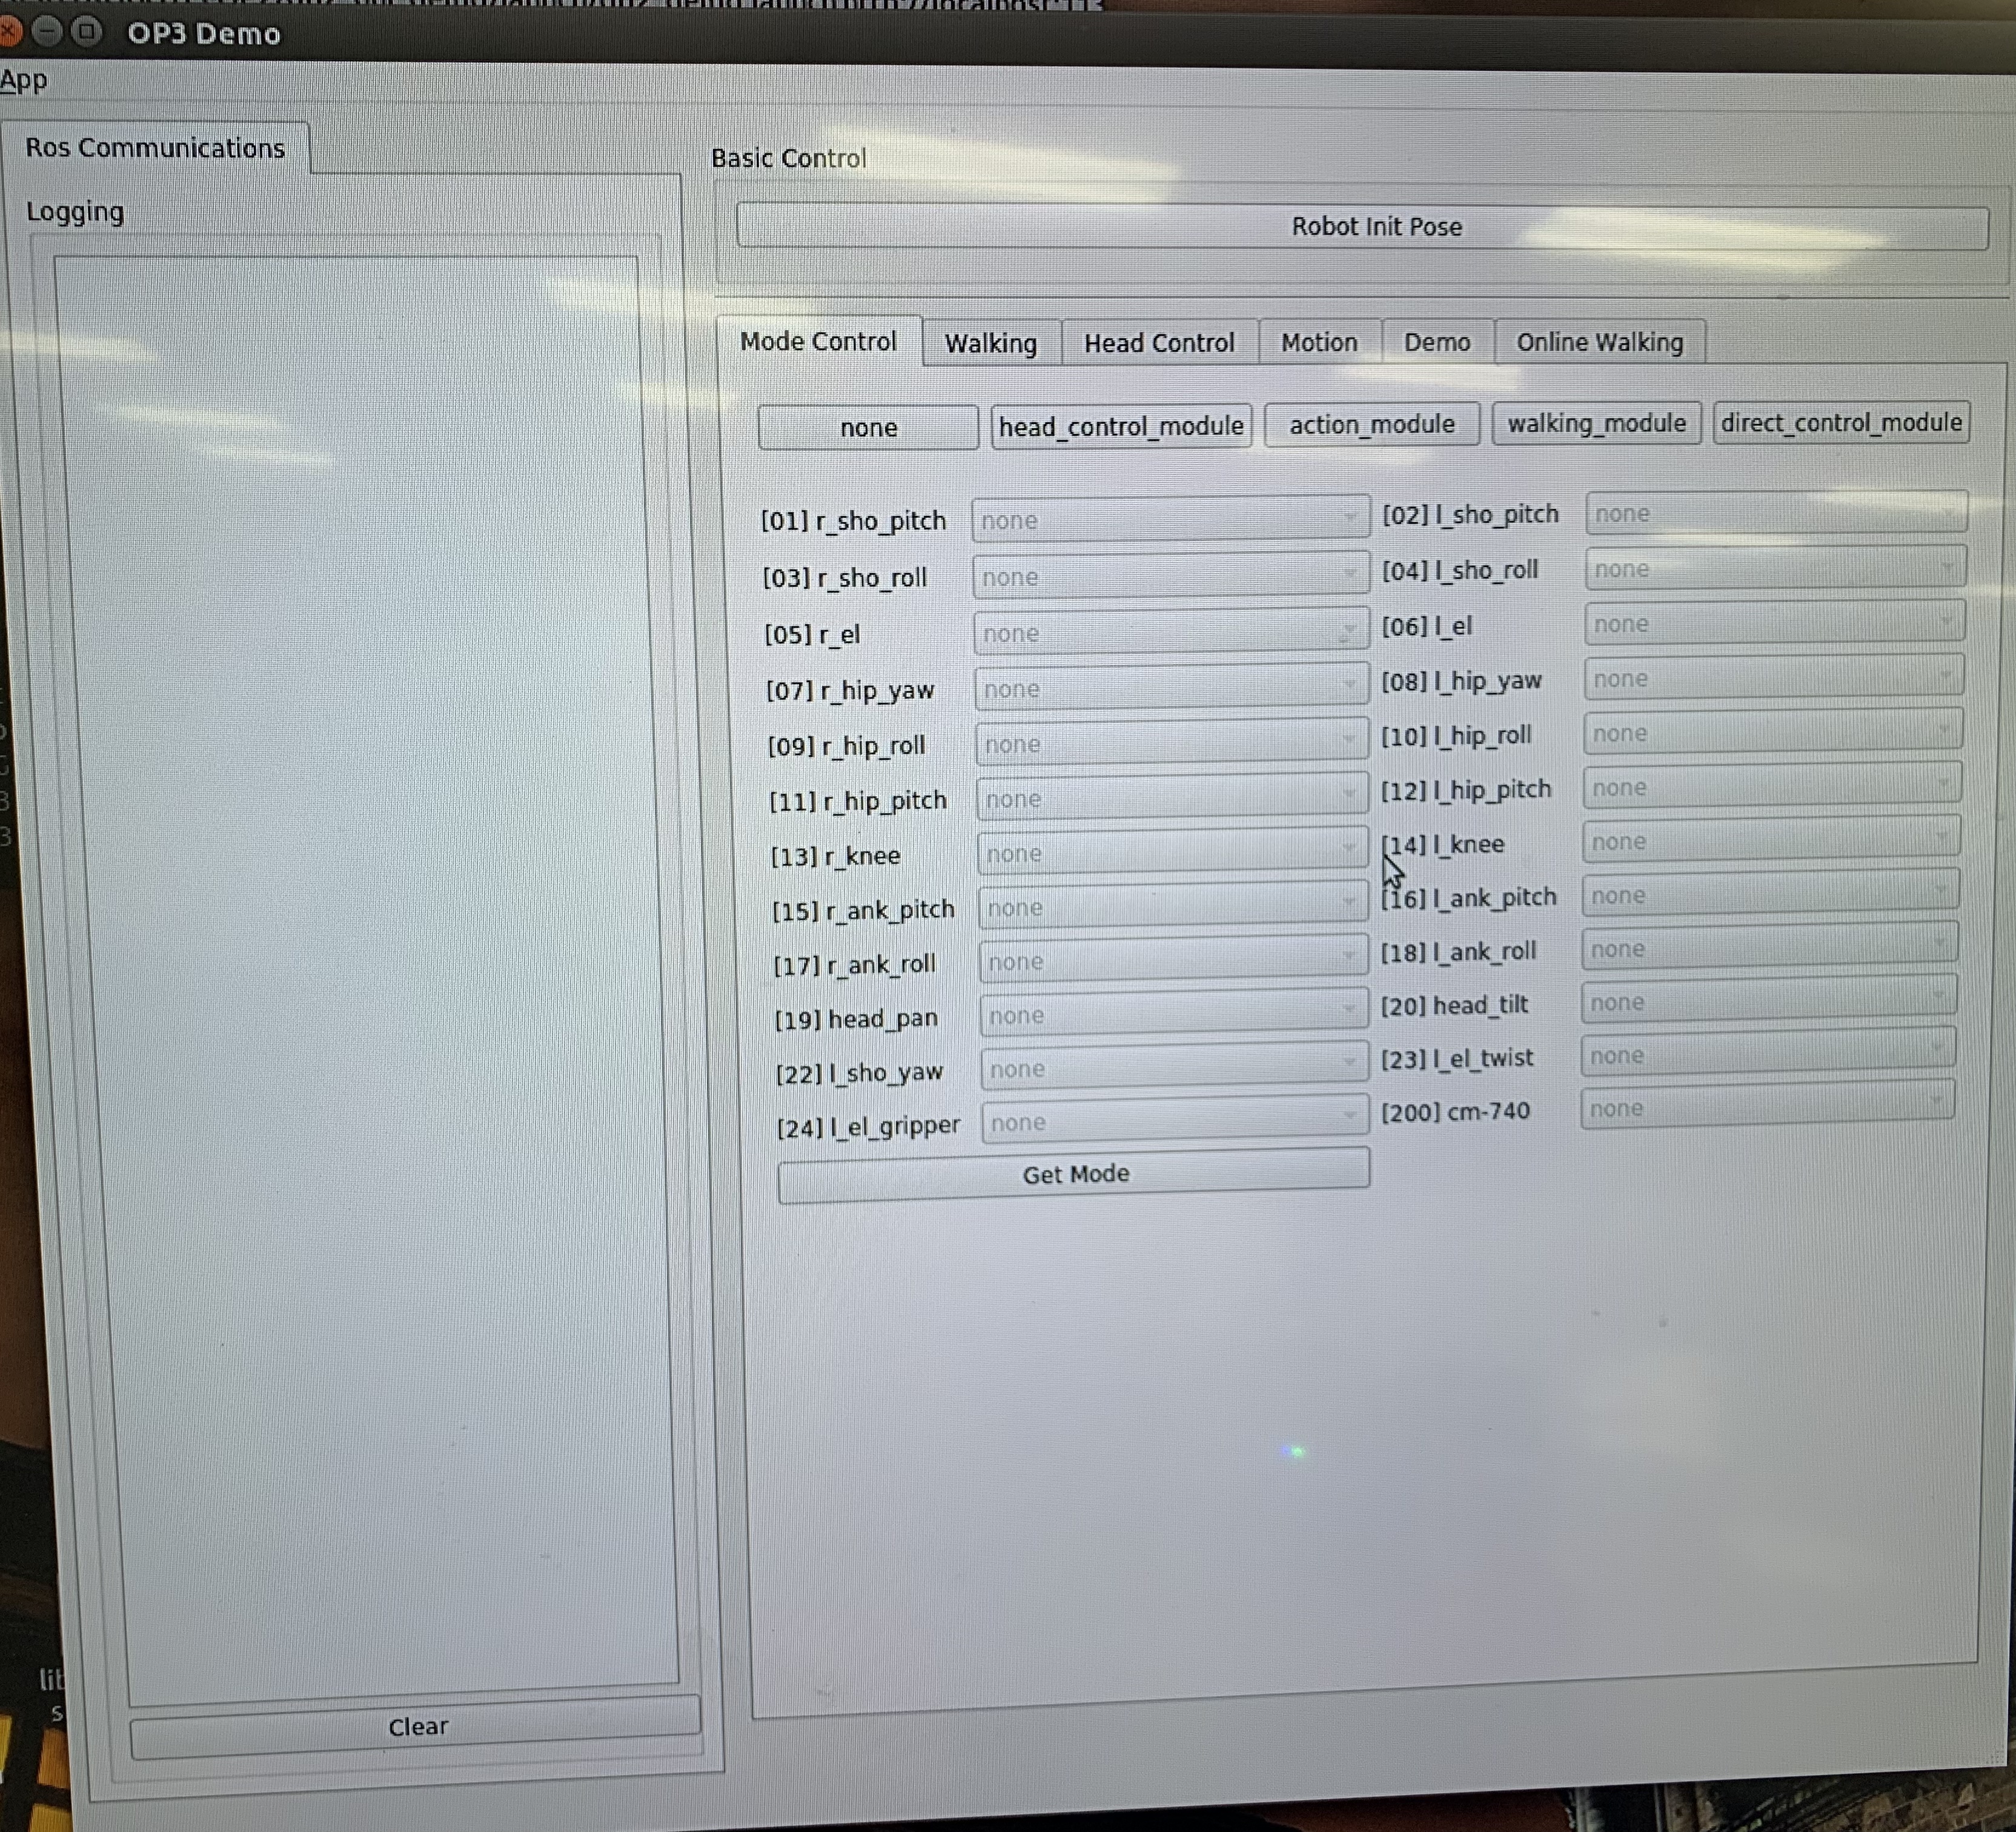
<!- roslaunch op2_gui_demo op2_demo.launch –>
This will open DARWIN’s GUI which will be used to give control over to the unity scene, it should look like this.
 Then in the fourth terminal enter
<!- rosrun usb_img_pub test.py –>
This will send image data to unity
Unity Setup
This section gives step-by-step instructions along with photos to setup the Unity Scene and VR for DARWIN.
Step 1
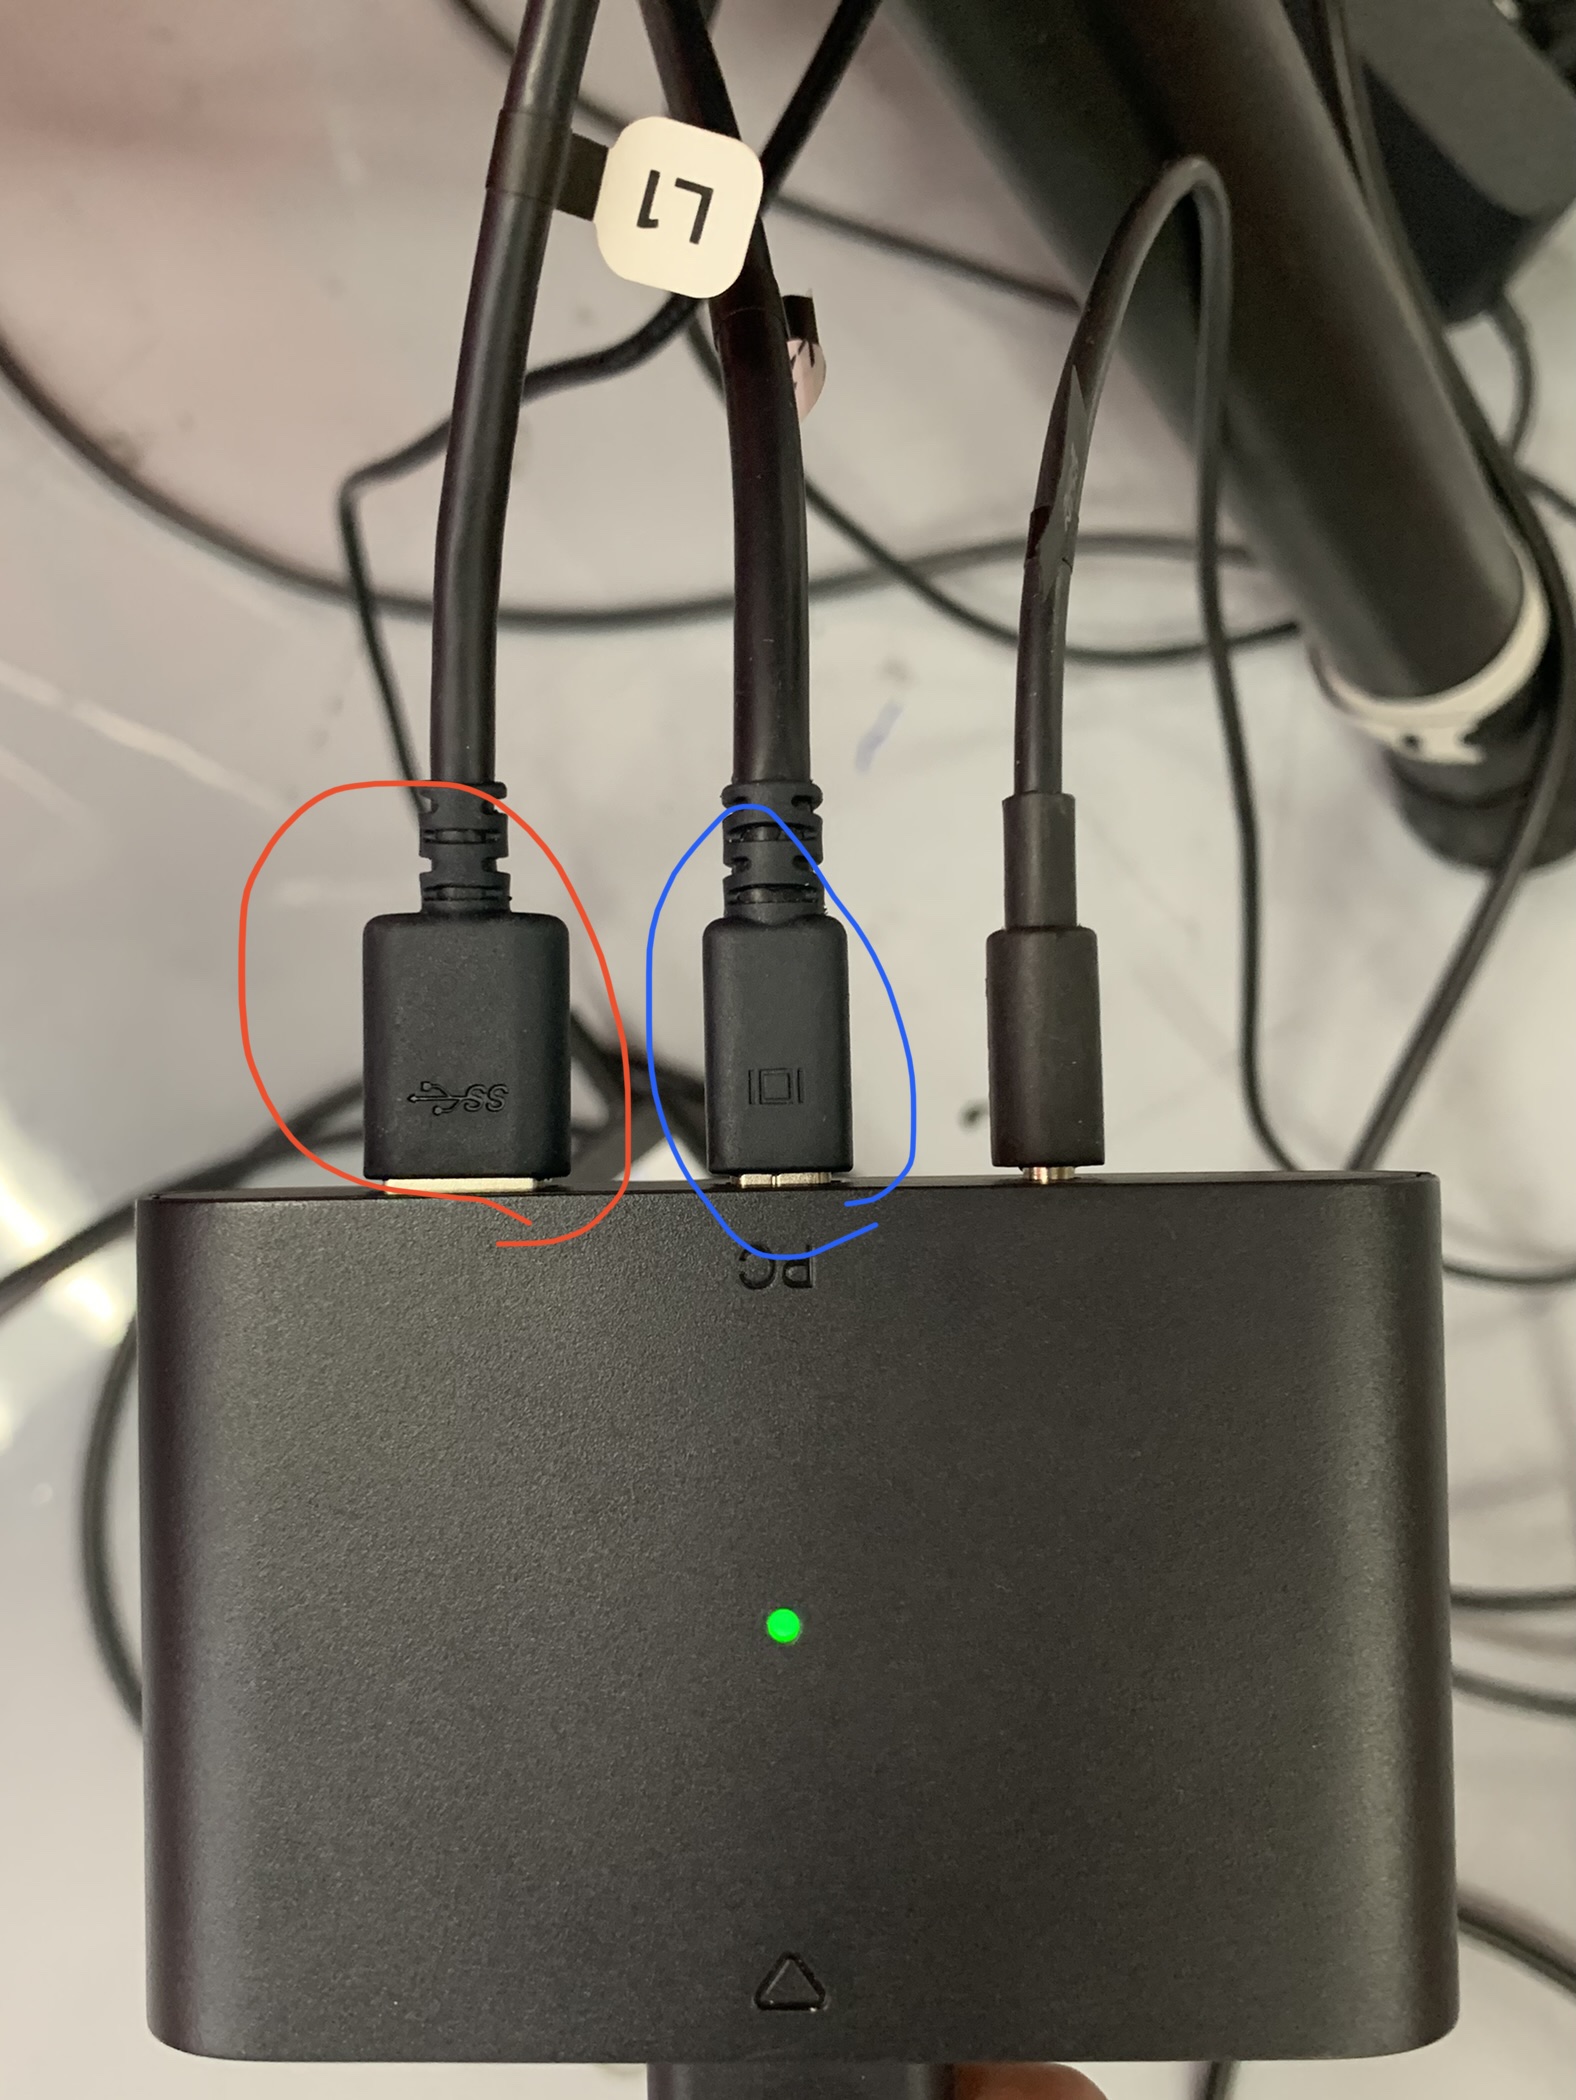
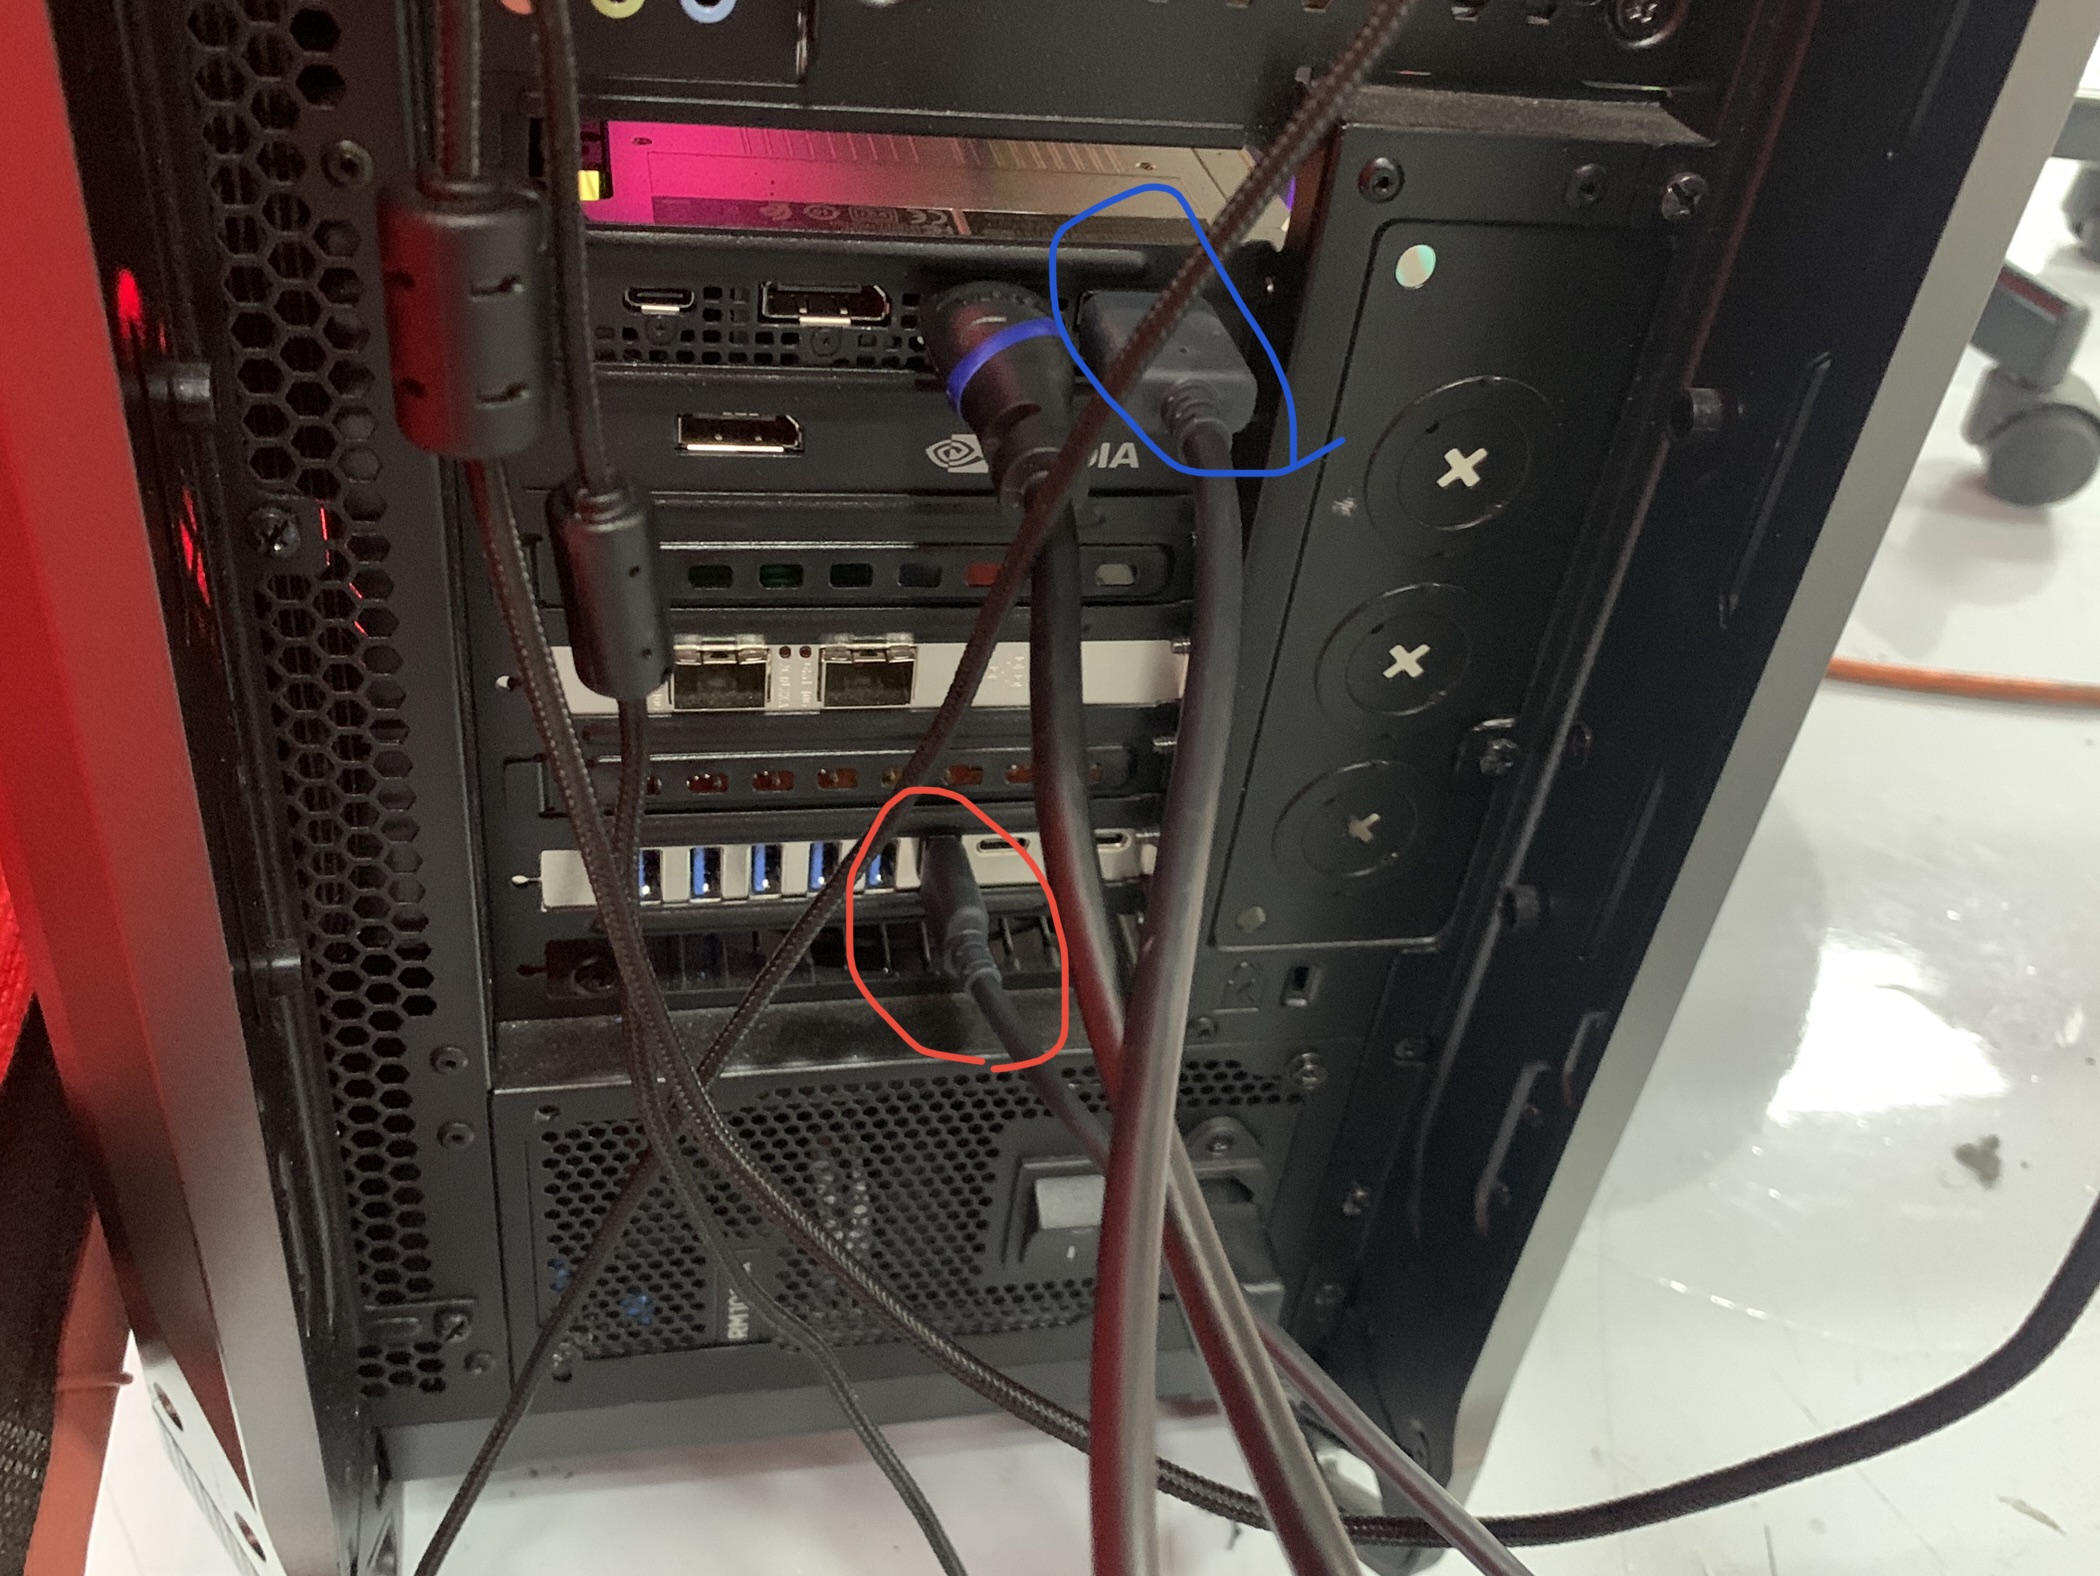
Plug in the VR set to the the computer running Unity there is a USB and Display port. Make sure to plug them into the Graphics card near the bottom of the computer it wont work properly! (red to red, blue to blue)
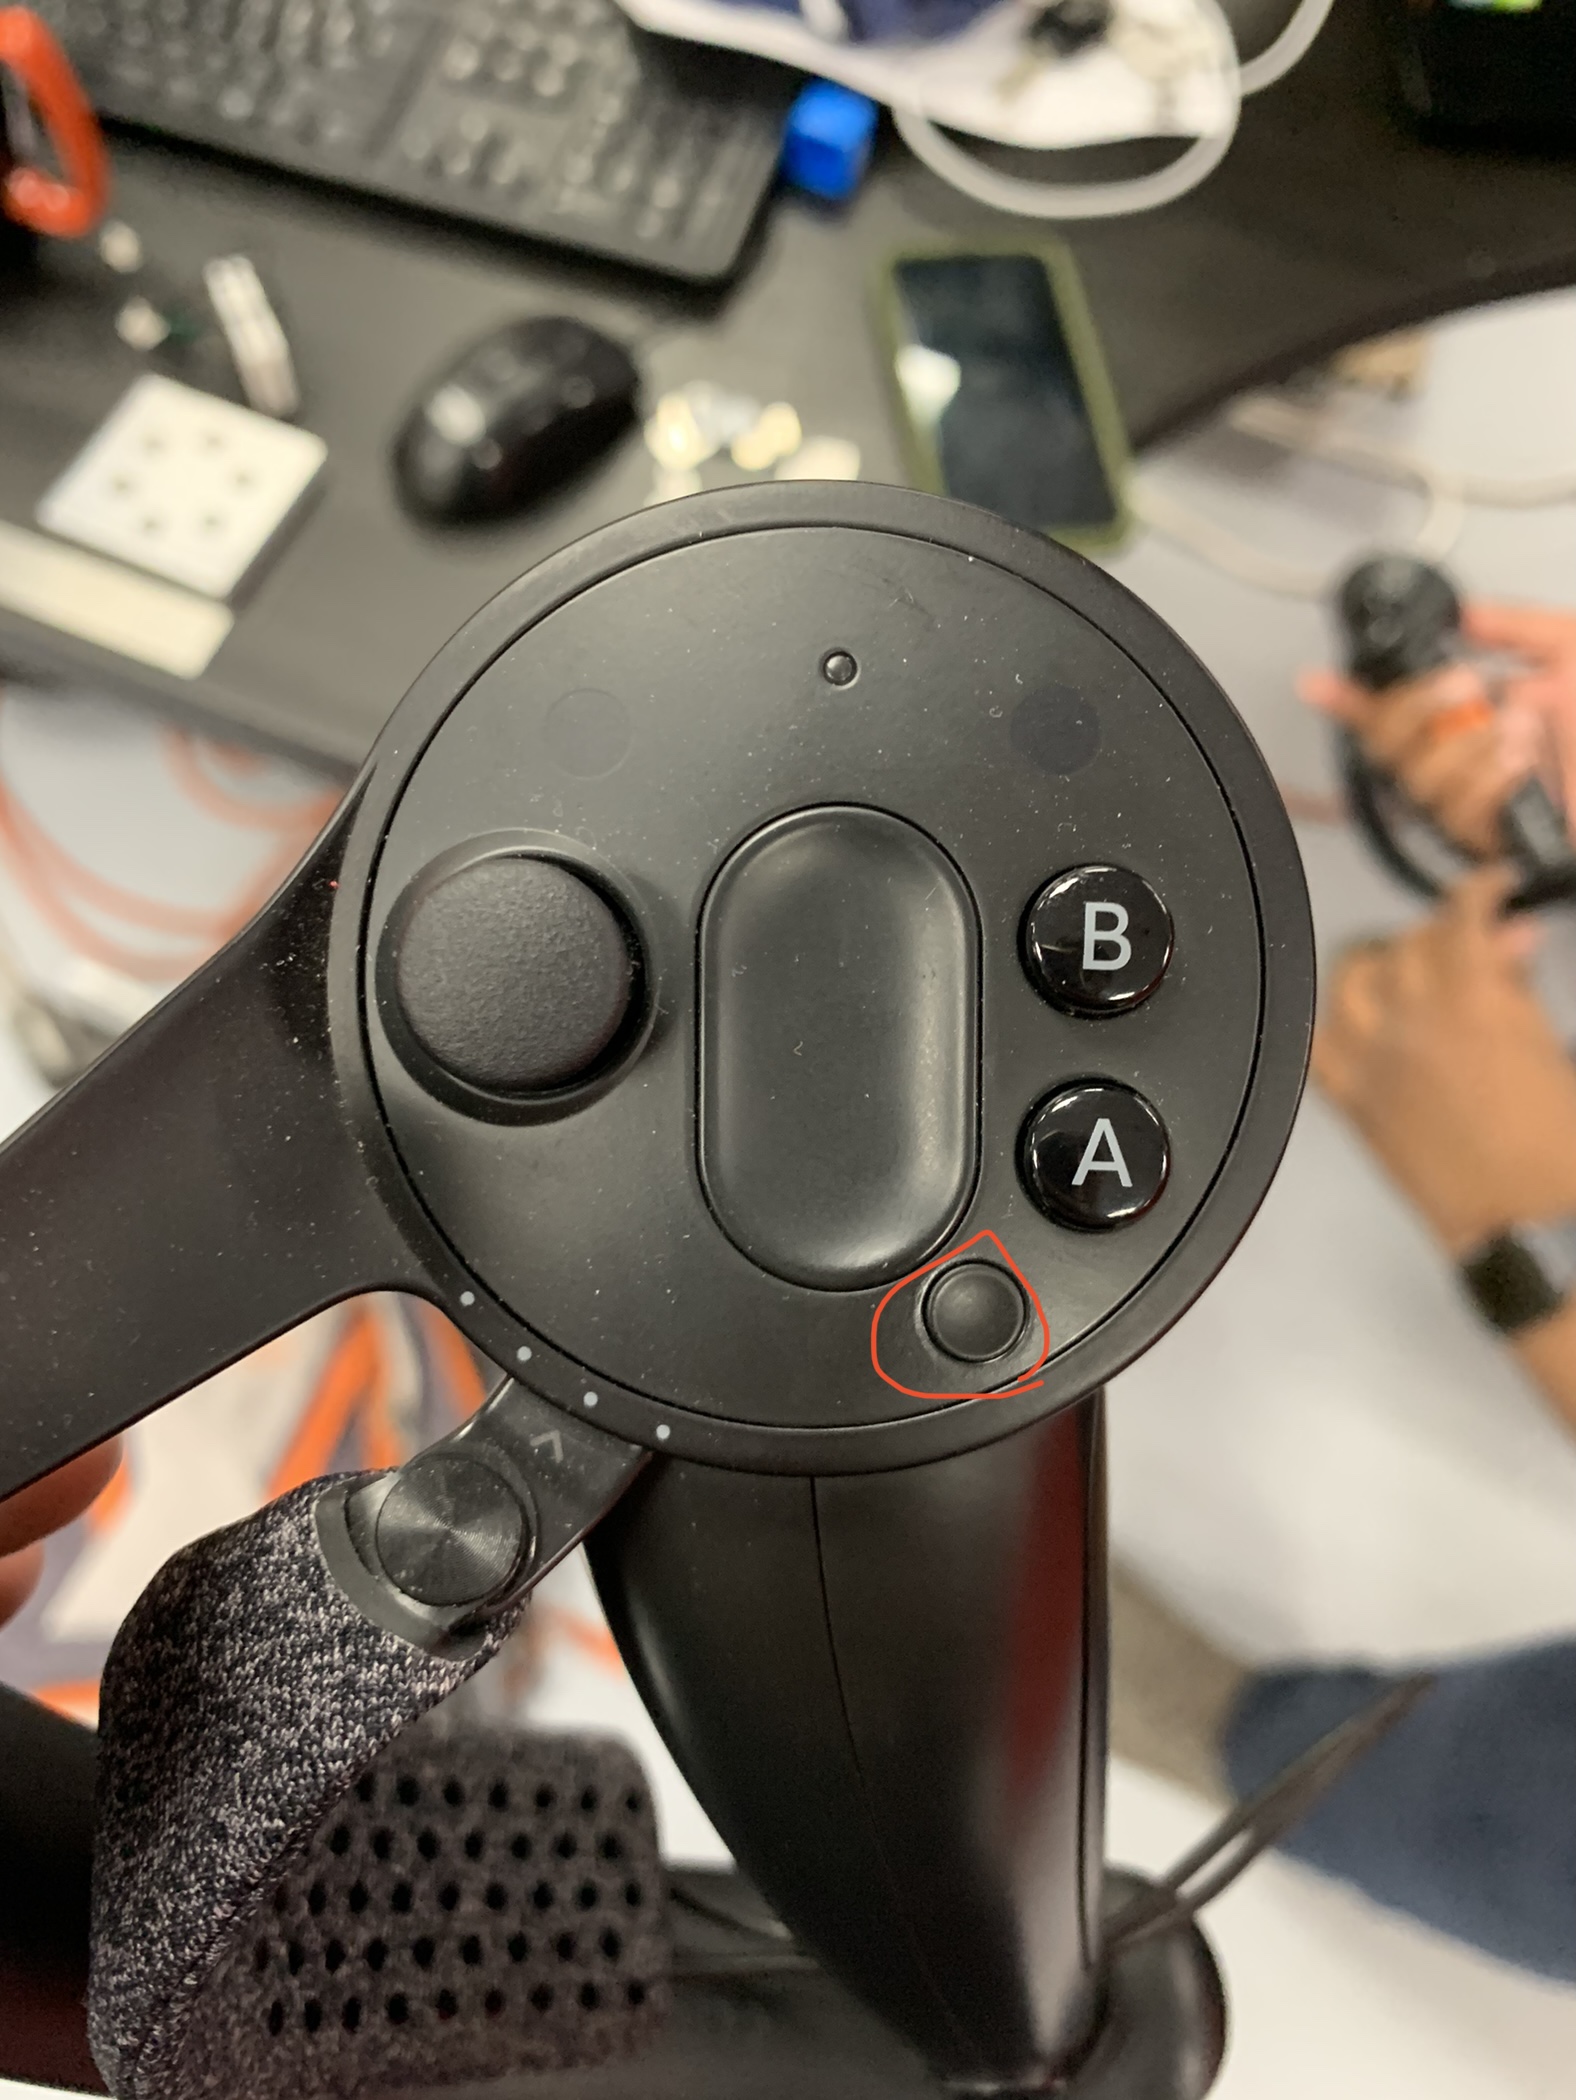
Turn on the VR controllers the power button is circled in red
Make sure Steam VR is running and the VR set and controllers are connected.
Step 2
Open in Unity Hub DarwinVR 3.0 - Final (The Best + URDF)
Step 3
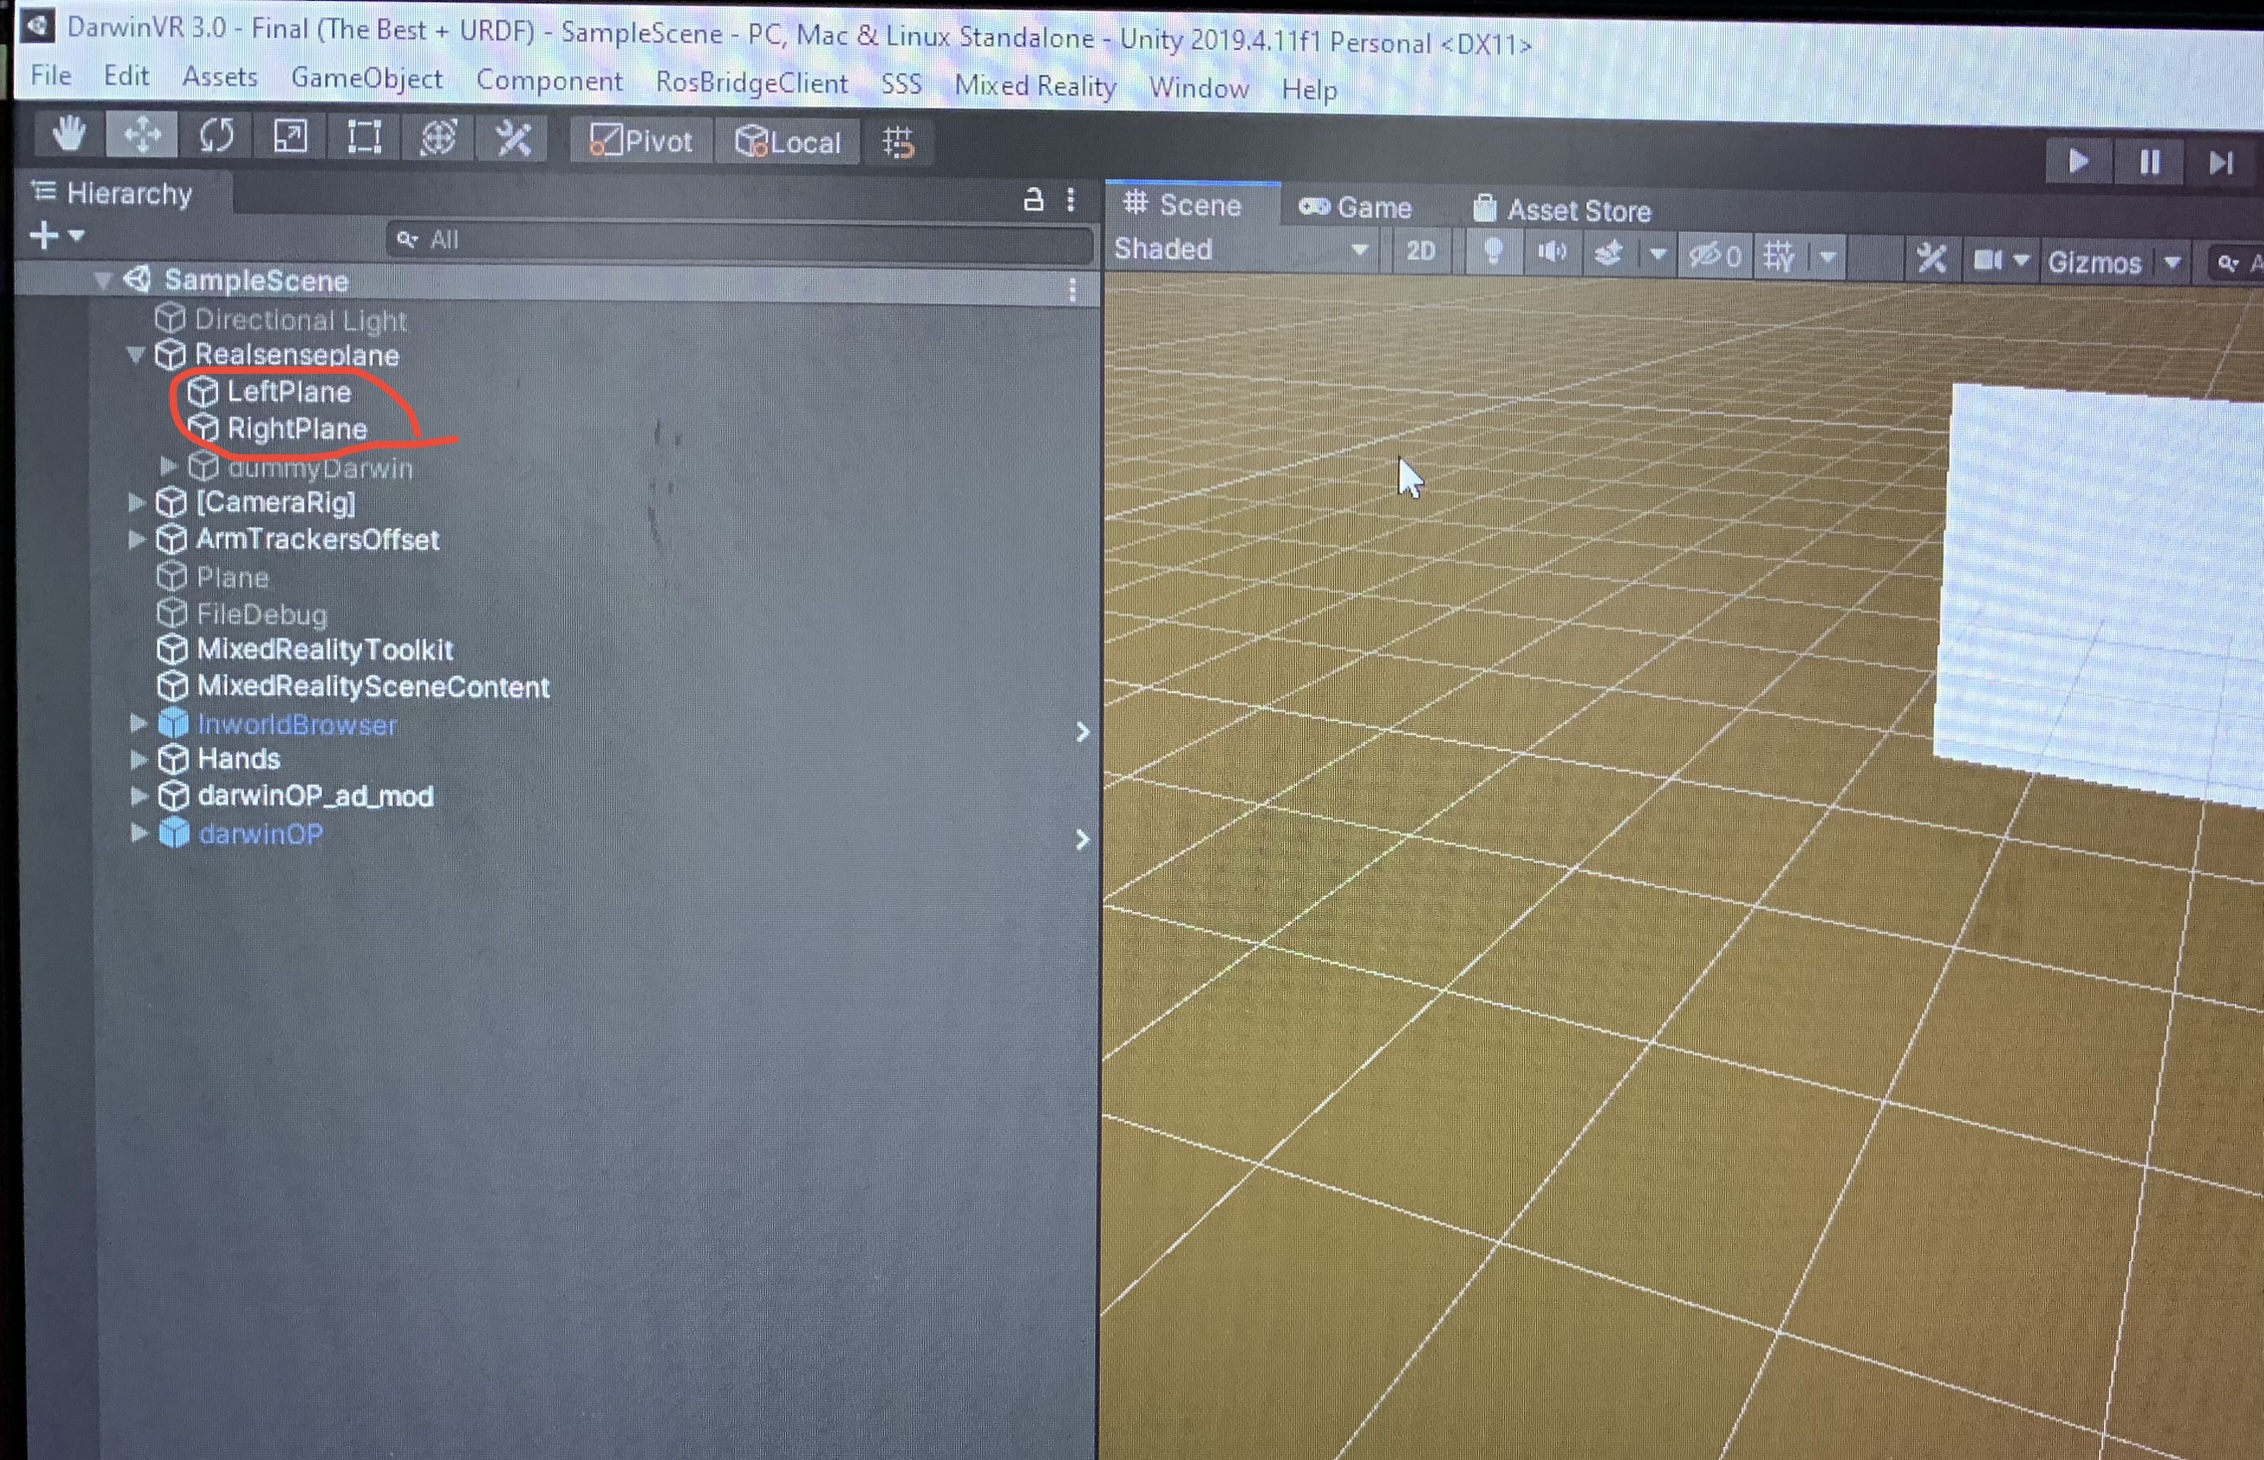
After it is loaded go to Realsenseplane then expand it you should see LeftPlane and RightPlane (circled in red)
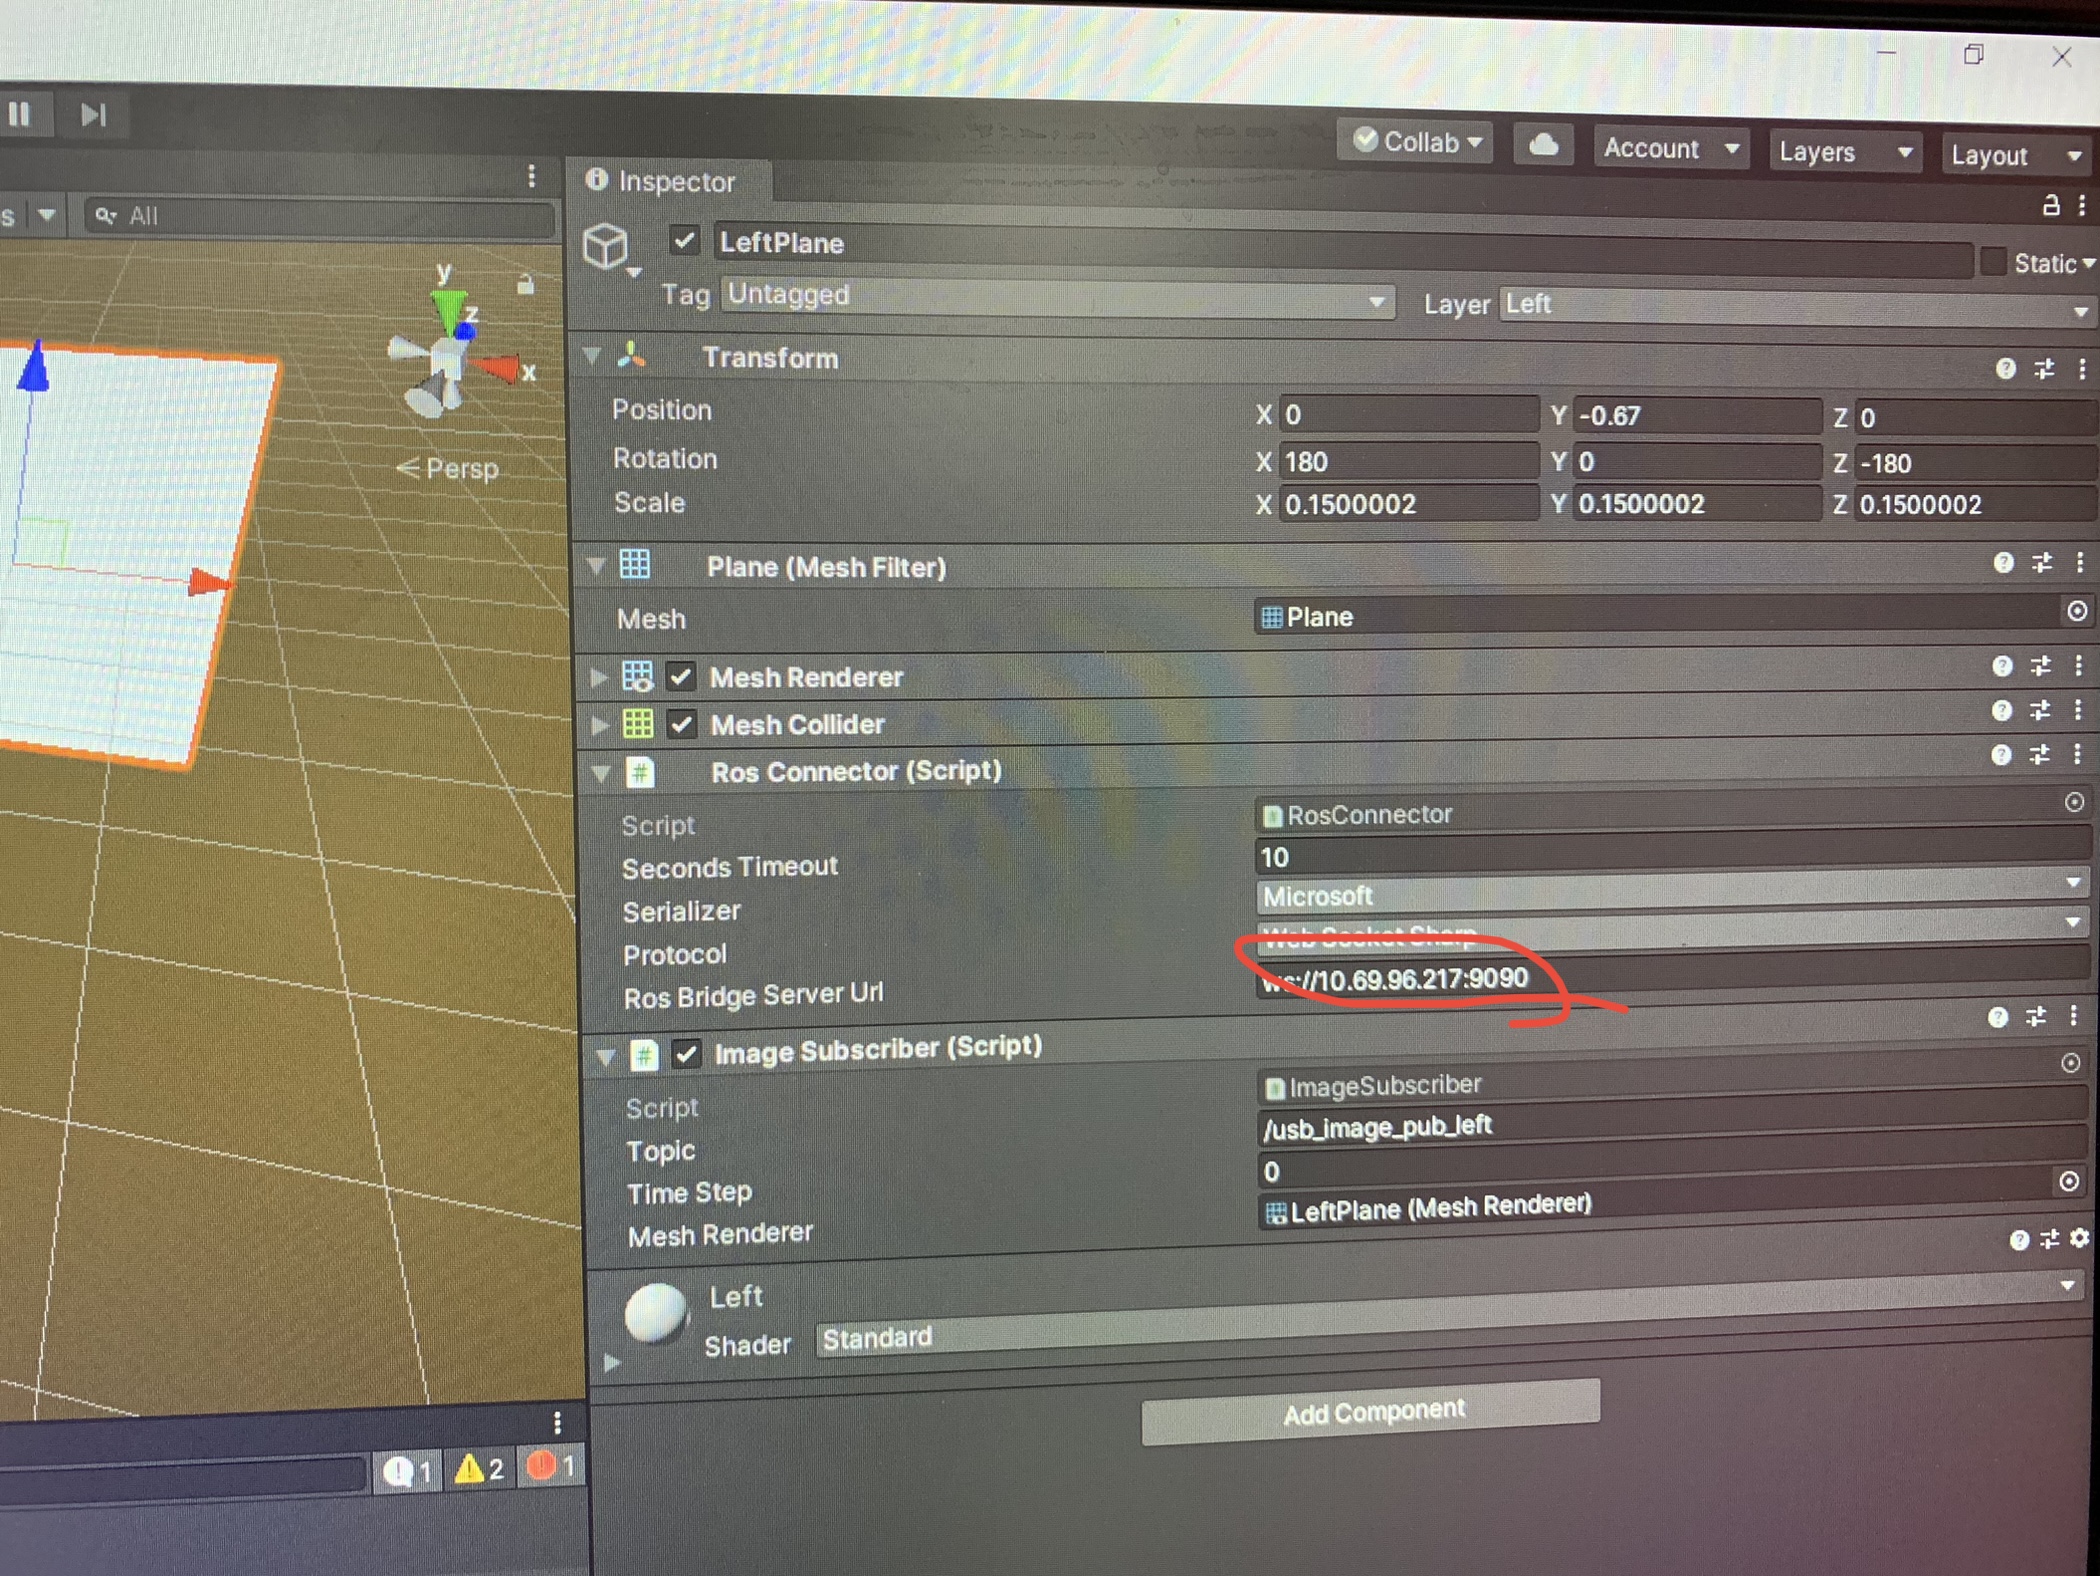
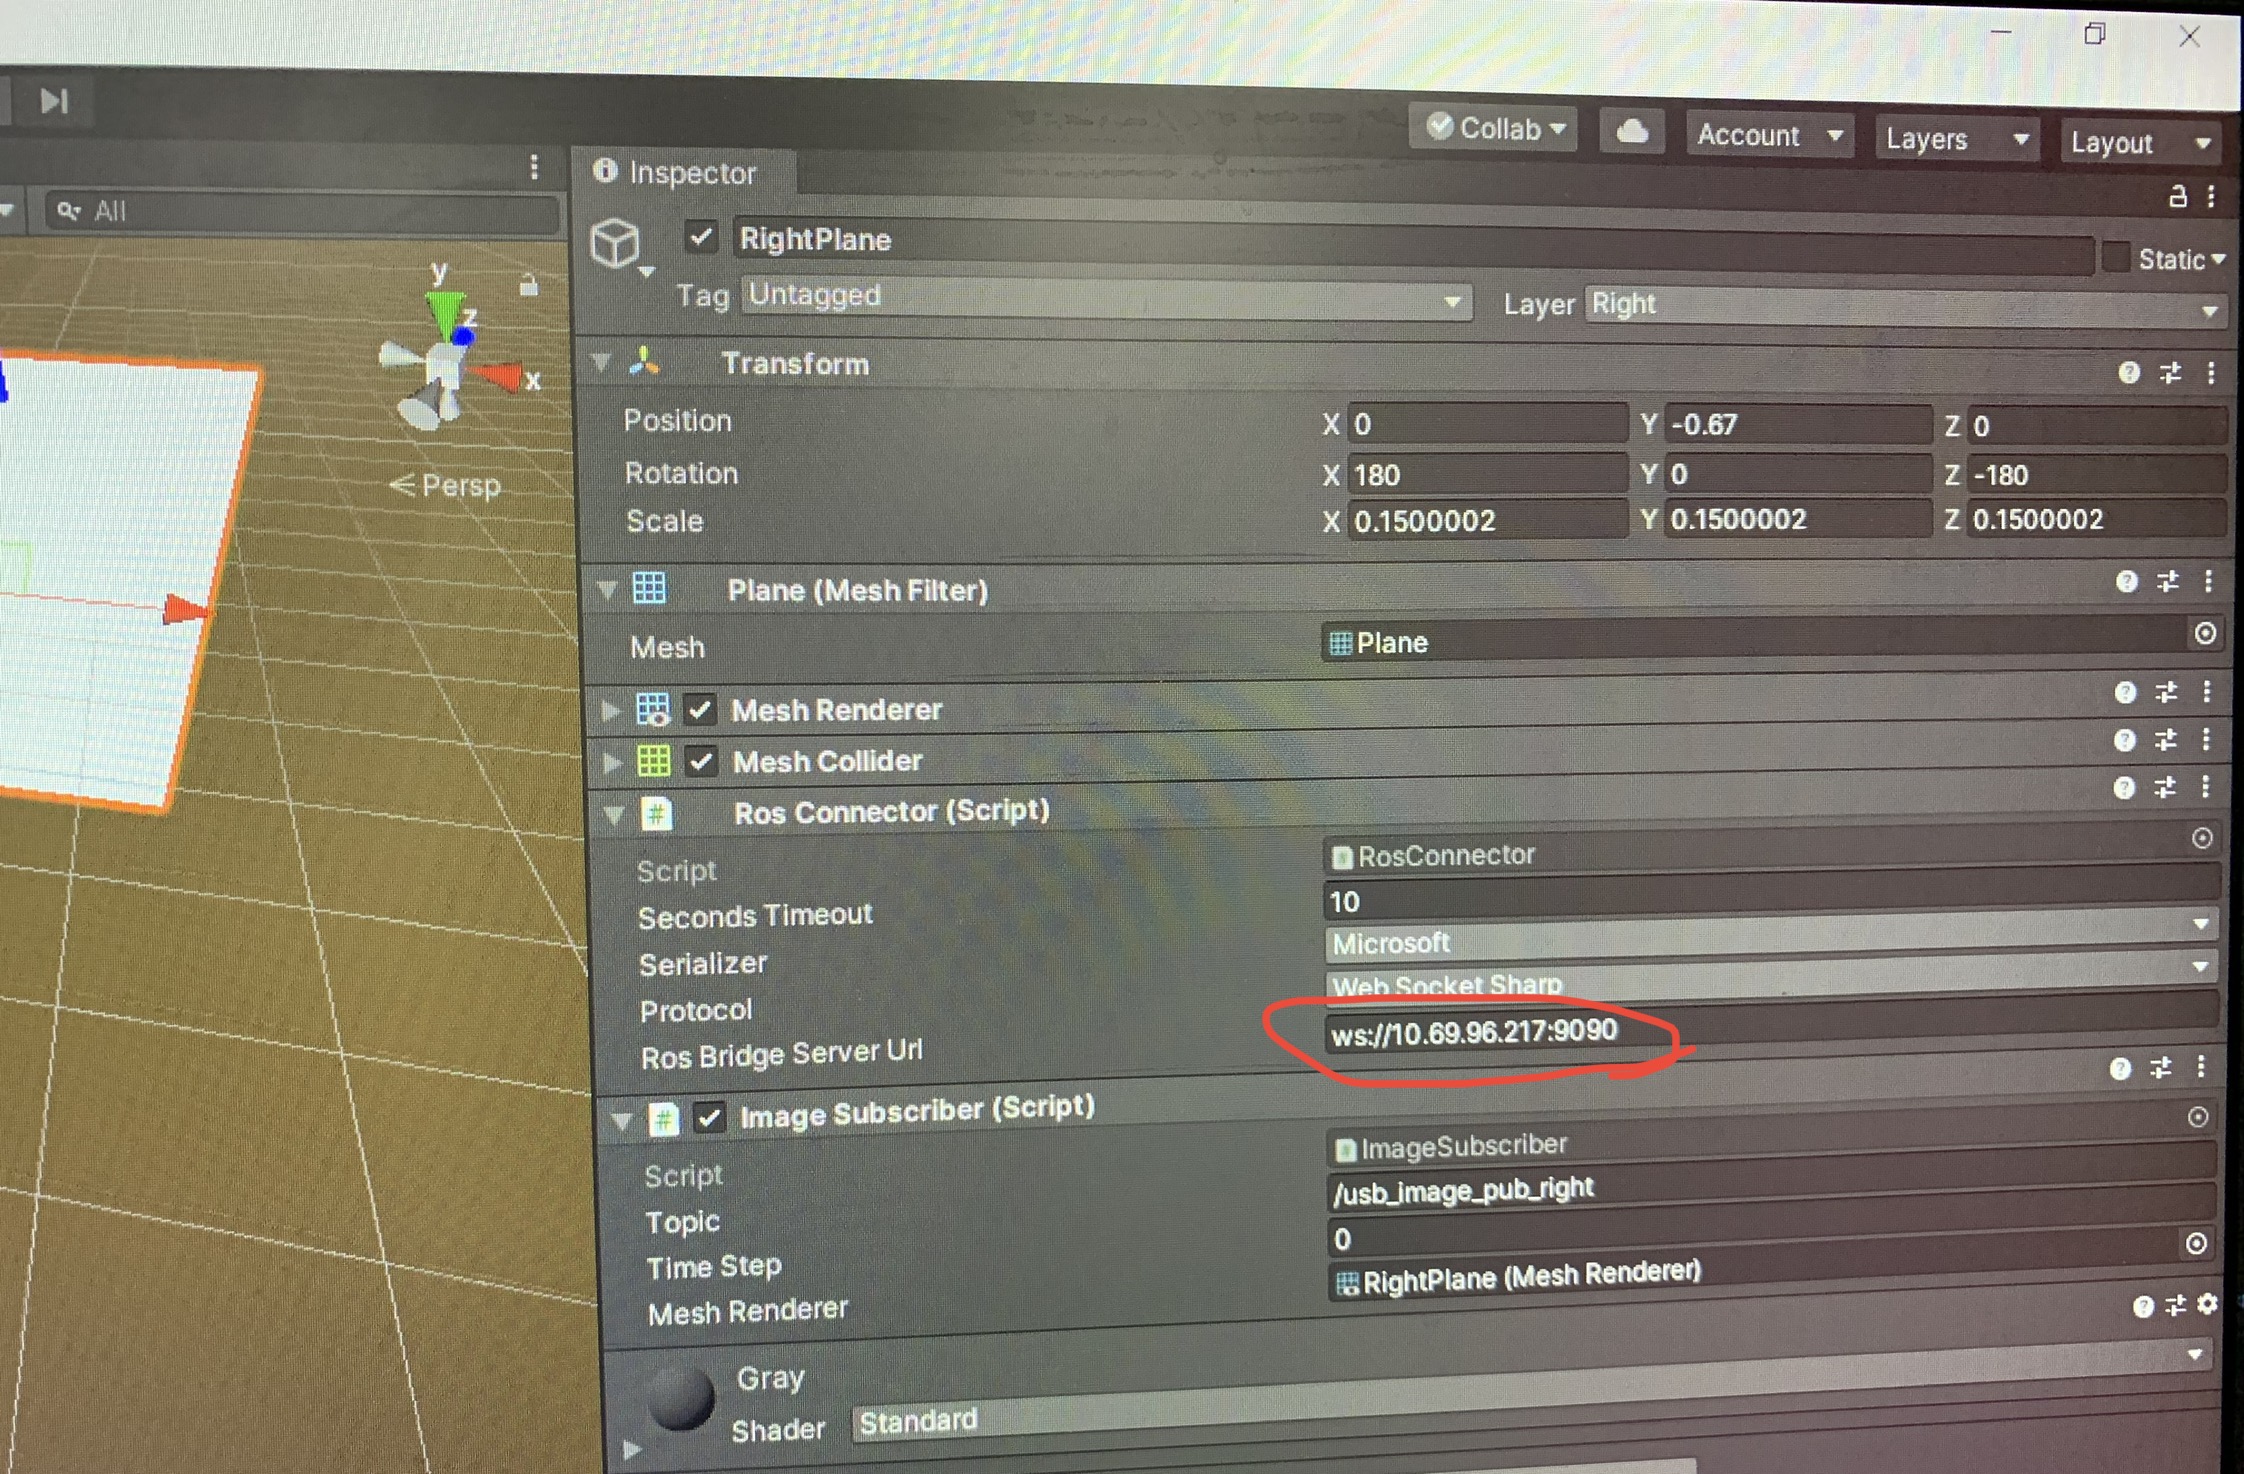
in Rosconnector put DARWIN’s server URL in both LeftPlane and RightPlane’s Ros Bridge Server Url (circled in red)
Step 4
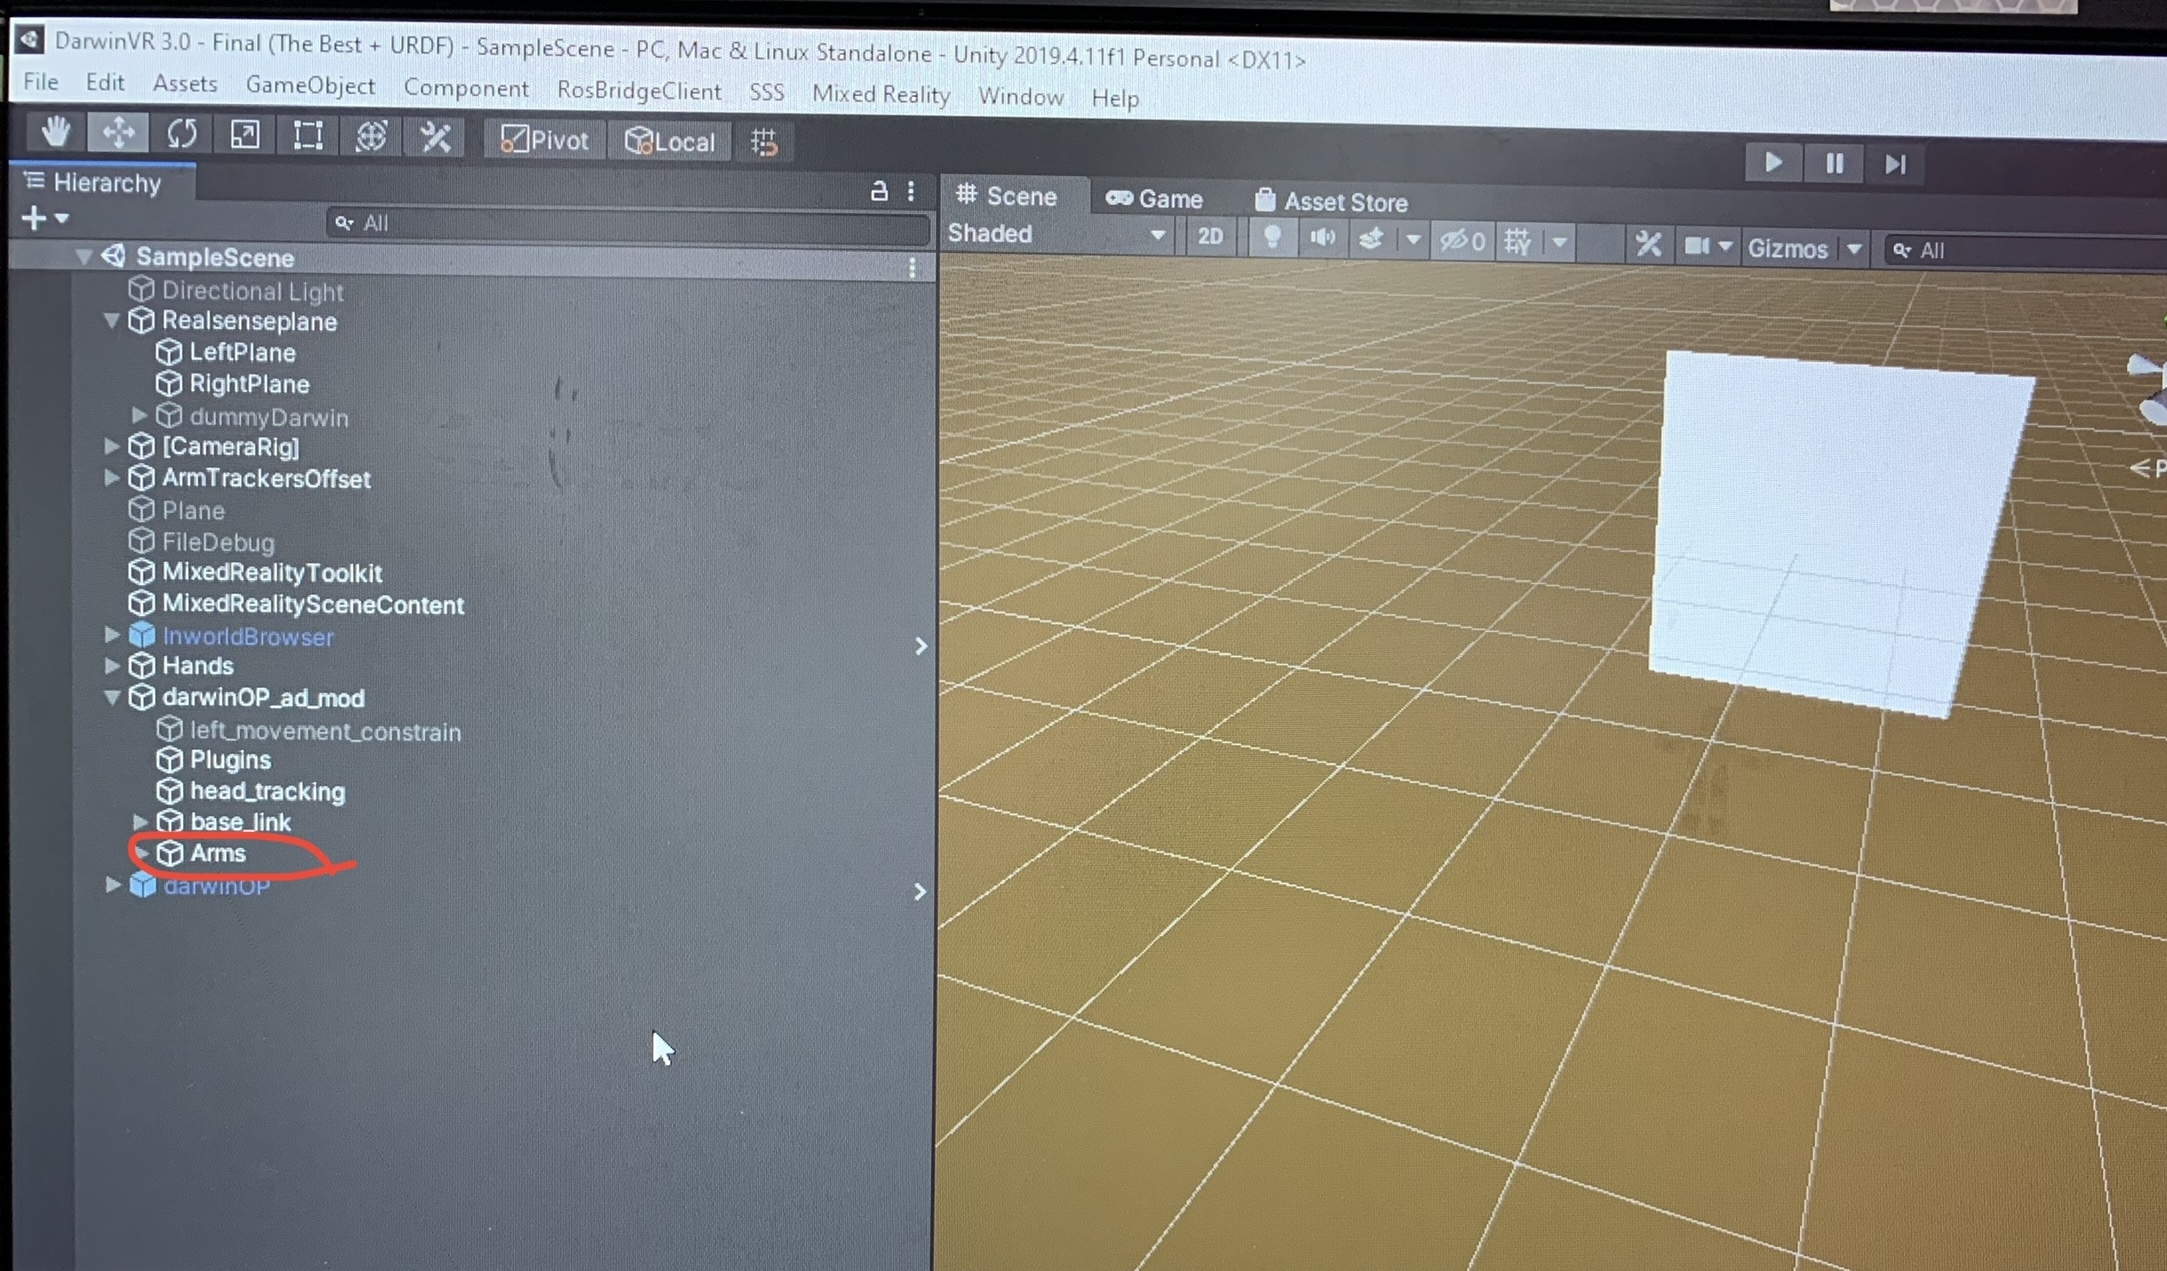
Go to darwinOP_ad_mod expand it and find Arms (circled in red)
Step 5
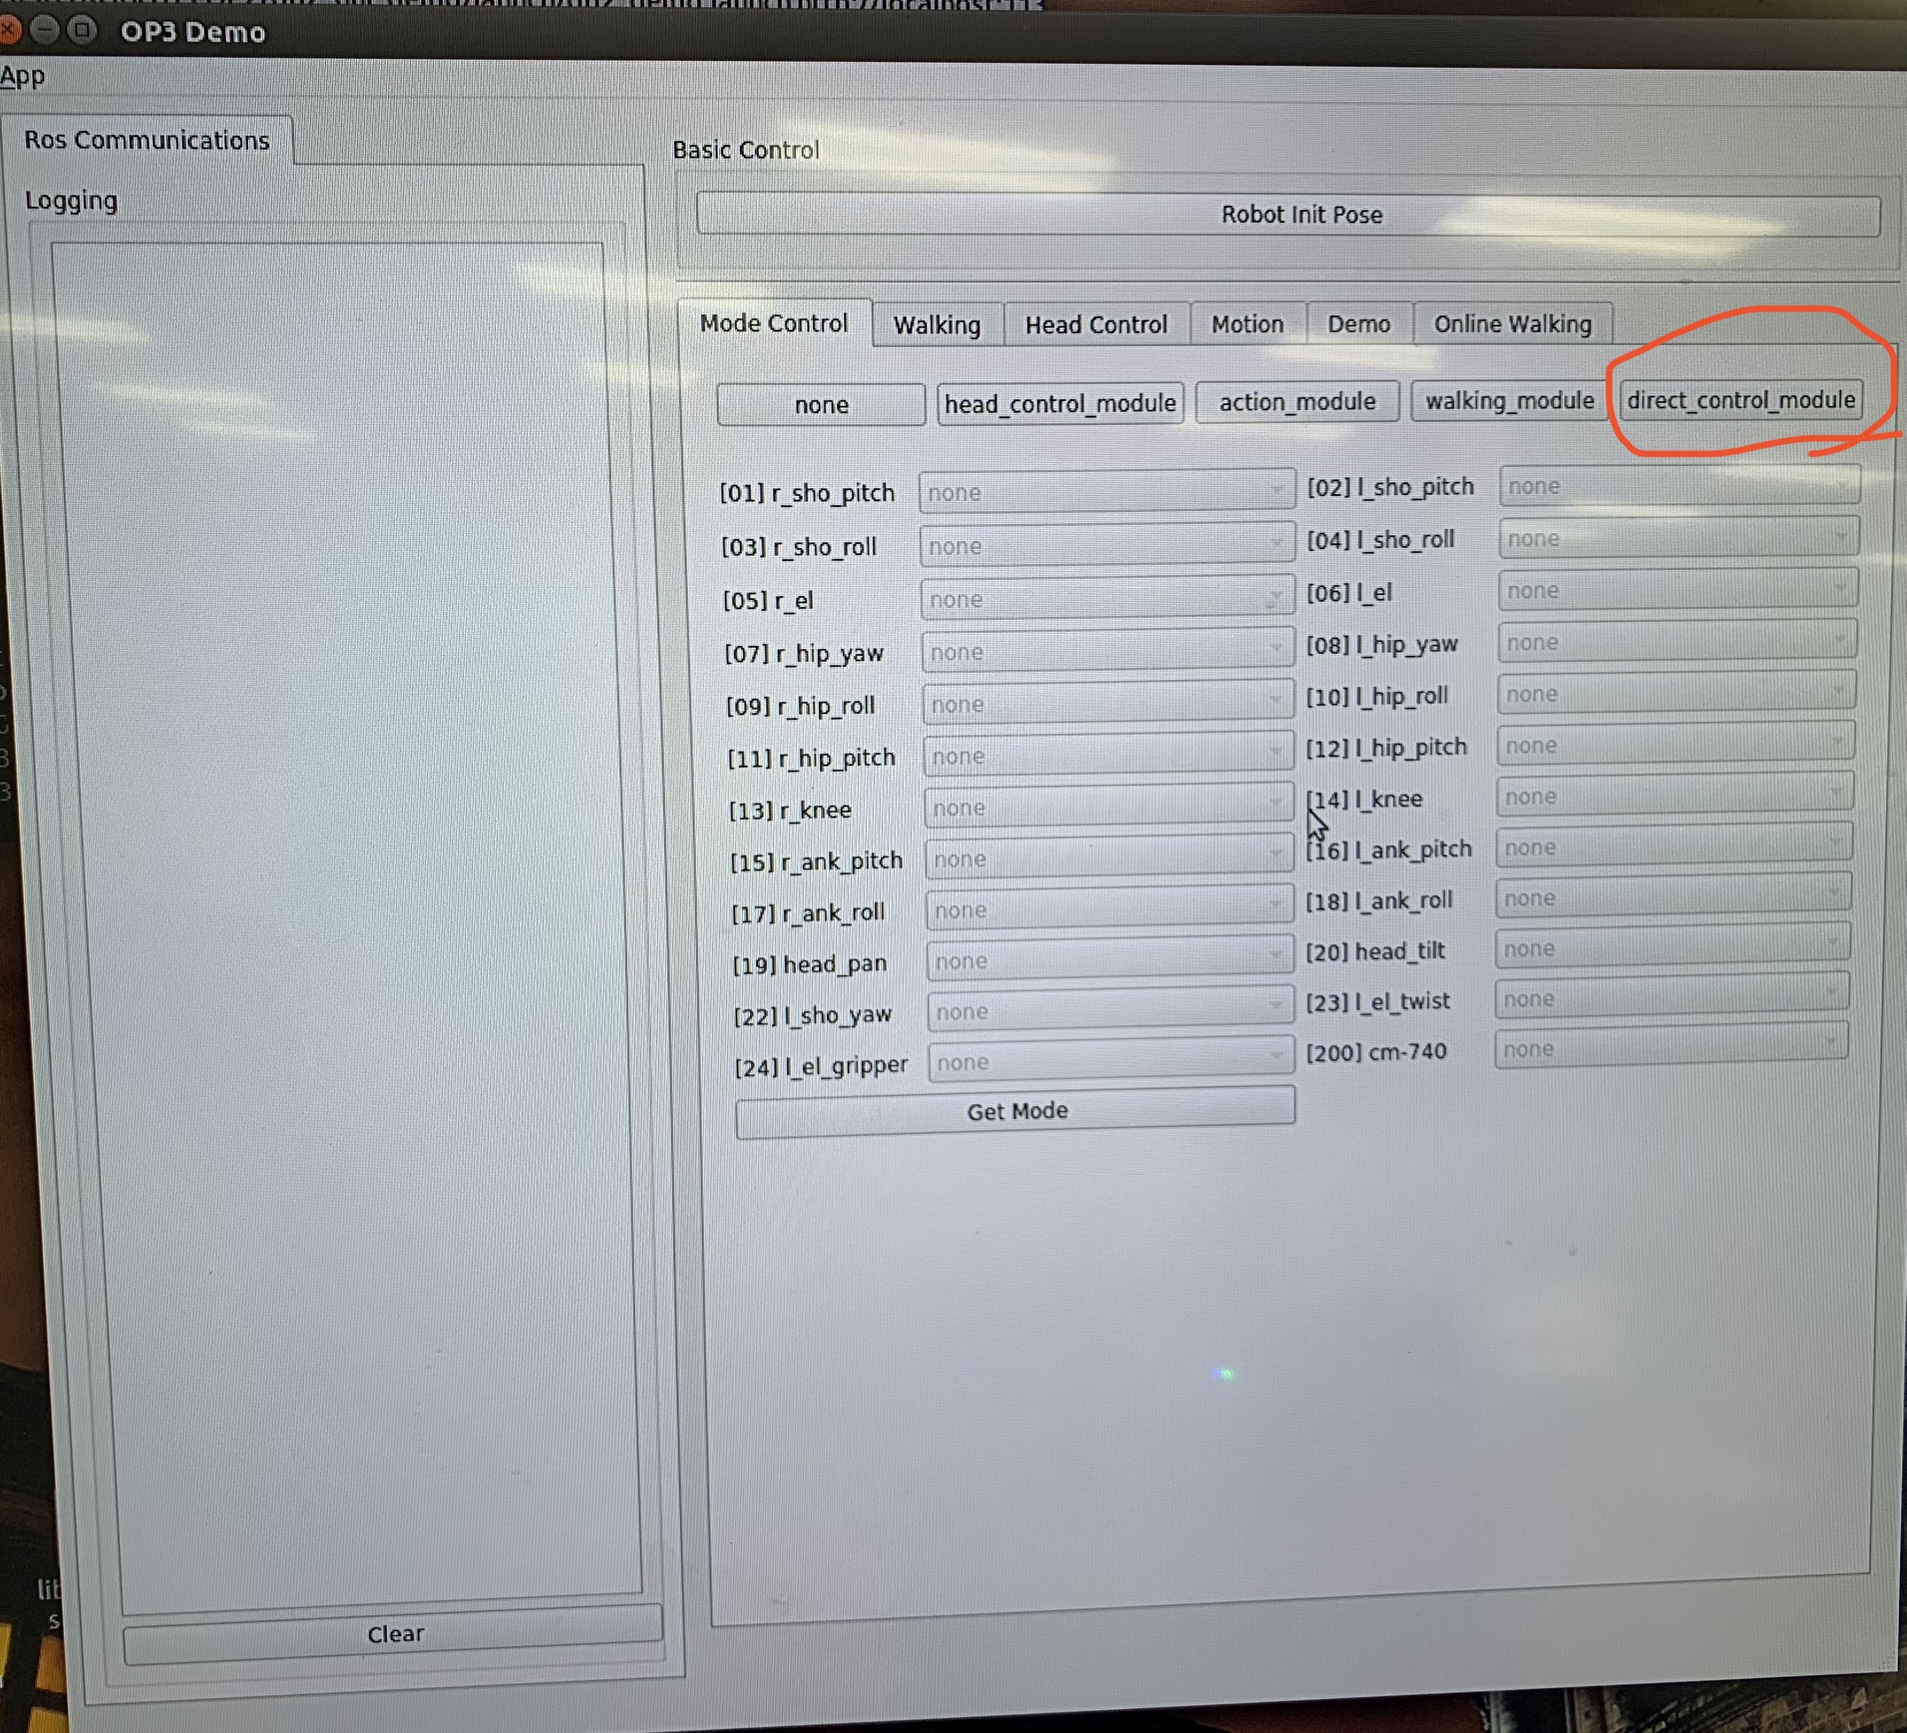
Once the unity scene is set up go to DARWIN's GUI we set up before and click direct_control_module this will transfer control over to the VR set user. (circled in red)
Step 6
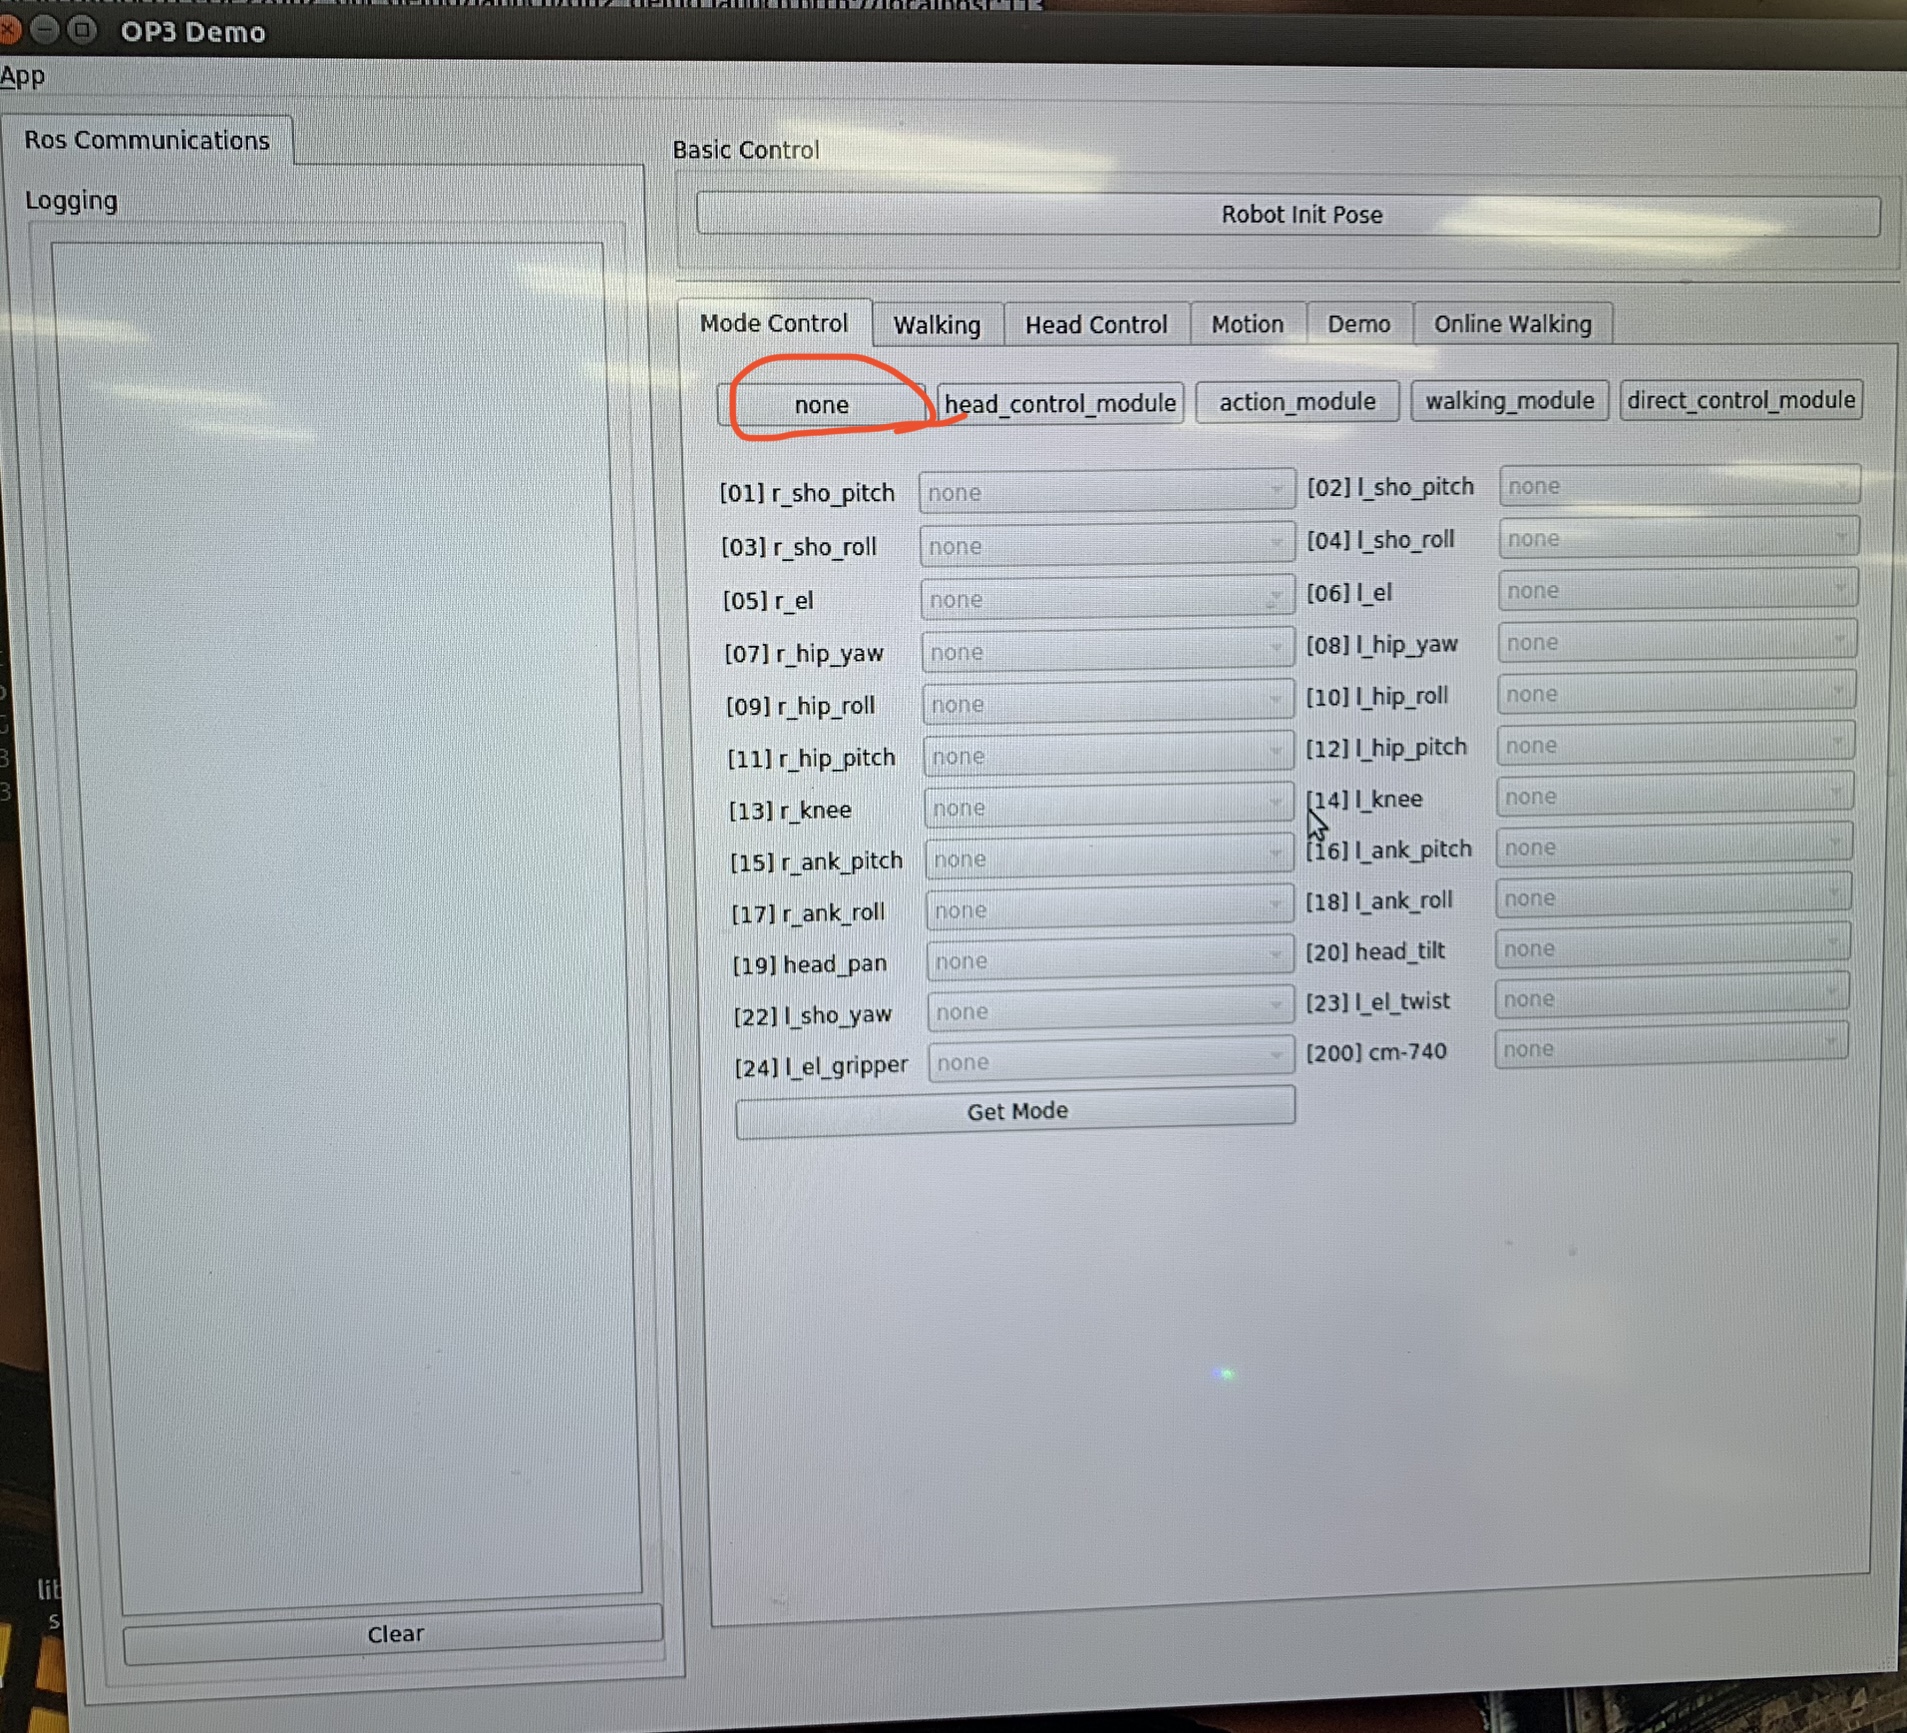
Once you are done click on none and wait for it to stop moving(circled in red)
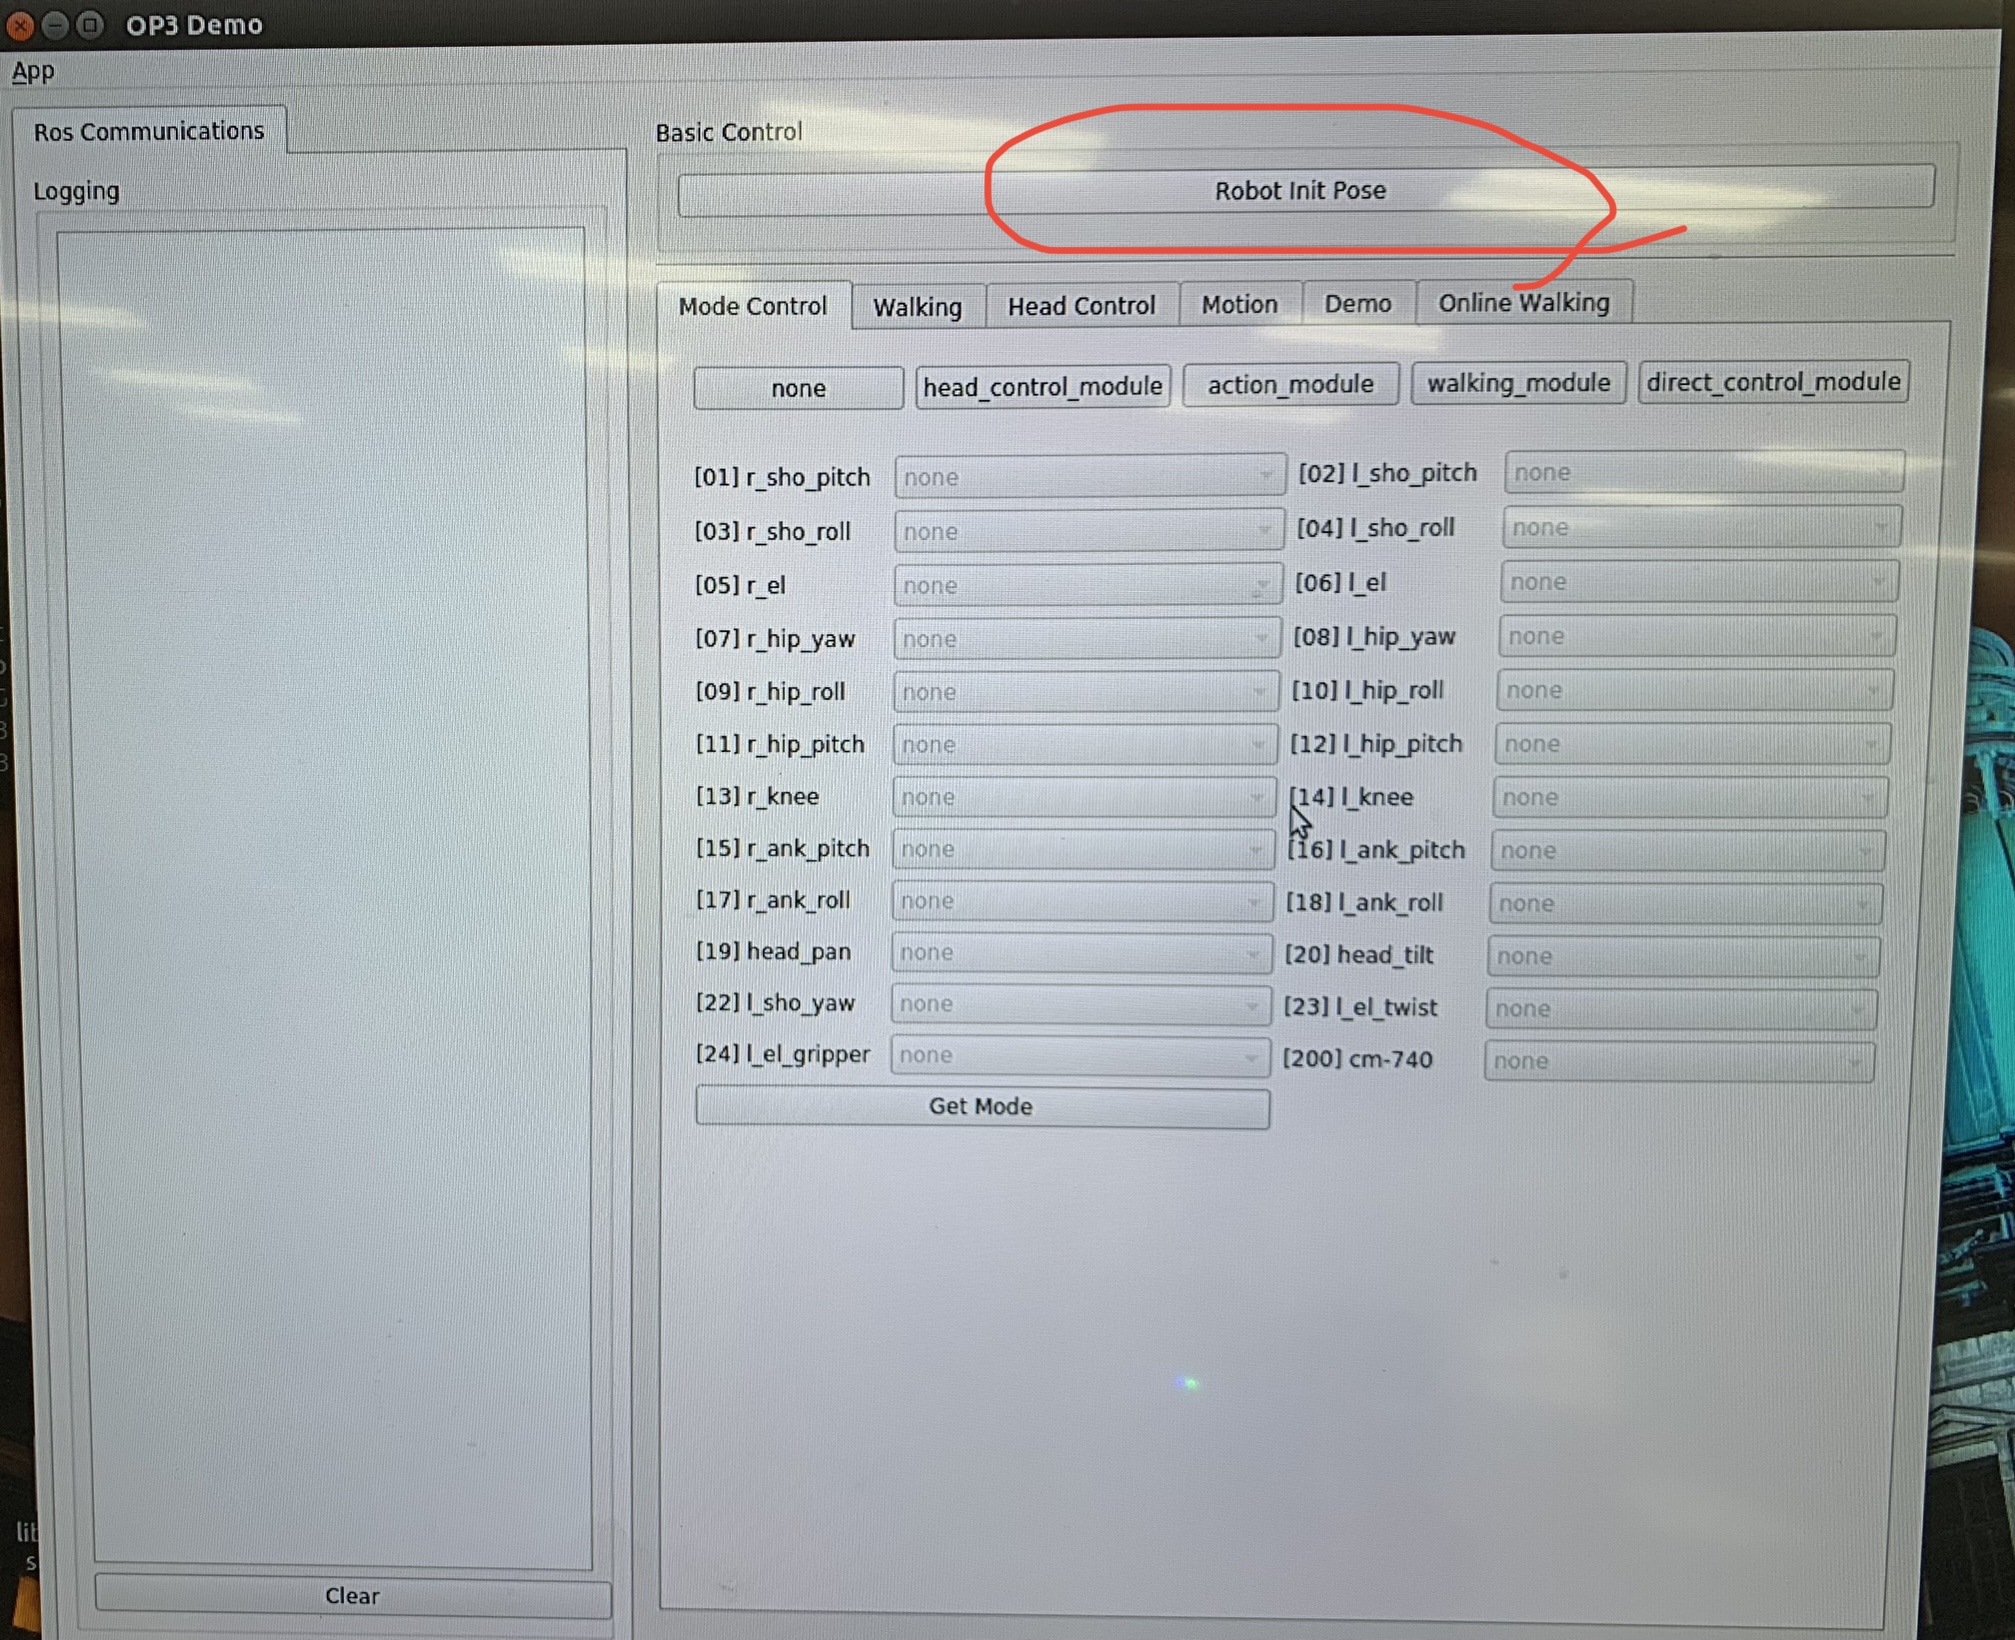
After it stops click Robot init Pose to return darwin to his initial pose (circled in red)
then stop the unity scene.
Shut Down
This section gives step-by-step instructions along with photos to fully and properly shut down DARWIN.
Step 1
To fully shut down DARWIN properly close out of the GUI and for every terminal hit CTRL C (the 4th terminal might require you to hit it a few times) and after the program stops type in exit twice to fully close the terminal repeat this for all the terminals ( 3 should already be exited out once you close the GUI so just type in exit twice)
Step 2
After that go to the right hand corner and shut down the computer wait for the blinking lights in DARWIN’s chest to stop
Step 3
Turn off the controller on DARWIN’s back and you are done
Debug Section
Final Words
Speculating future work derived from this tutorial, includes testing Telepresence and Avatar Programs. In the big picture, the problem of testing changes for Avatar robots can be solved with this tutorial.
For questions, clarifications, etc, Email: Schnewei@unlv.nevada.edu
