
This is an old revision of the document!
Table of Contents
Virtual Reality Continued - Quantum Meta-Gloves
Author: <Nathan Kassai> Email: kassan@unlv.nevada.edu
Date: Last modified on <01/19/2023>
Keywords: <Virtual Reality, Tutorial, Step-by-Step>
Time to complete - 15 minutes
By the end of this tutorial, you will have fully integrated your hands into the Virtual Reality Environment!
Here is the final product after this tutorial: (Make sure to include link here!)
Prerequisites
Before starting this tutorial, the author assumes you either:
- Understand how to install/upload packages into Unity
- Followed the previous Unity Crash Course which goes over everything mentioned above to prepare you for this tutorial
In previous tutorials, we have created 3D Virtual Environments utilizing the game engine Unity, wrote scripts to create unique behaviors between game objects, and even rendered our VR Environment to a Virtual Reality Headset using the Varjo XR3. Finally, it's time to utilize one more piece of tech to map your hands to a virtual hand model to enable interactions in our Unity environment. To do this, we will utilize the Quantum Meta-Gloves.
Motivation and Audience
This tutorial's motivation is to teach incoming lab members how to set up the Quantum MetaGloves with Manus Core, and how to get the Virtual Reality gloves working in Unity. To fully understand and follow the tutorial, the author assumes the reader has the following background and interests:
* What is Unity?
* Virtual Reality and or Augmented Reality
The rest of this tutorial is presented as follows:
- Hardware
- Manus Core
- Connecting Manus Core to Unity
- Final Words
Hardware
To complete this tutorial, you'll need the following items (shown in the image below from left to right)
- A - Quantum Meta Gloves Pair (1)
- B - Angled USB - C to USB - A Cables (2)
- C - Manus MetaGloves Dongle (1)
- D - Manus Glove Batteries (2)
- E - Finger caps (5 per hand, varying in size)

Manus Core
This section will allow you to install Manus Core onto your computer and begin the Manus Glove Pairing process.
Step 1 Go to the following link and log into our DASL Manus account (note - for security reasons, the login information will not be included in this tutorial. Login information will be found near VR Station)
https://resources.manus-meta.com/downloads
Step 2 Scroll down until you see Manus Core 2.0 Web Installer as seen below, and hit download.
Software
To get the headset running, you must install Varjo Base! Go to the following link:
https://account.varjo.com/login
And login to DASL’s Varjo Base Account (For security purposes, the account information will only be provided in the lab. Account information will be located in the VR area)
Once you’ve logged in, you may hit download:

After the executable has downloaded, run it, and follow through the installation process (Note: If it asks which headset you are using, specify Varjo-XR3)
Varjo Base
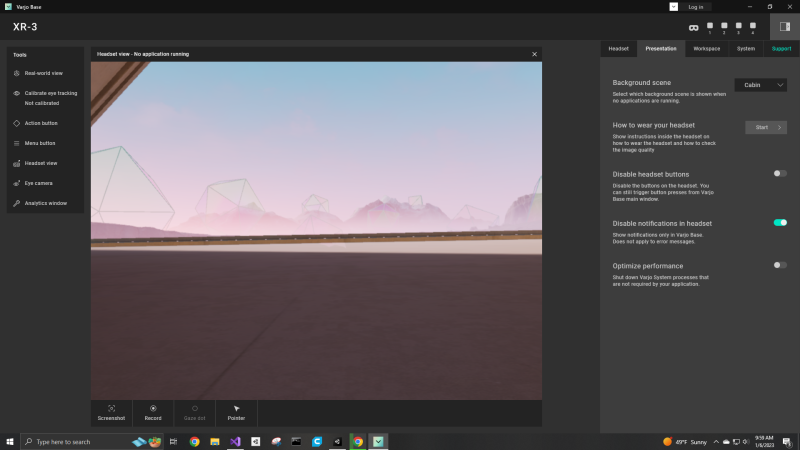
Once the software has been installed properly, you should see the following:
Note: There are two types of tracking that the Varjo XR3 uses:
- Inside-Out Tracking
- Utilizes the Front-facing cameras to draw virtual boundaries around the player
- SteamVR
- Utilizes HTC Vive 2.0 Base Stations to track the position of the headset
You can use either or, however, since our lab has Base Stations, we will use SteamVR
To change the tracking type, go to Varjo Base, click on System, and under Headset Tracking, change it to SteamVR.
- Calibration with SteamVR will not be shown in this tutorial. Tutorial for any headset utilizing SteamVR will be shown here (Add link for SteamVR calibration).
Connecting the Varjo XR3 to Unity
In order to get our headset connected to Unity, we will require the following packages:
- SteamVR
- Varjo's Unity SDK
Before installing the above-mentioned packages, please create a new Unity 2020+ 3D project and name it Varjo_XR3_Intro.
Once the project has opened, go to the Asset Store, download SteamVR (if not already downloaded), and import it into your project.
Once SteamVR has finished installing, you may now install the Varjo SDK for Unity
Copy this Github link: https://github.com/varjocom/VarjoUnityXRPlugin
Go back to Unity and press Window. Then scroll down to Package Manager. When the package manager opens, press the top left (+) icon and select add package from git URL. Paste the above GitHub link into the text box and press add.
After a few minutes, the package should have installed the Varjo SDK into Unity!
In the Asset section, search for the Player GameObject and drag it into the Hierarchy.
And finally, hit play and put on the headset!
Final Words
This tutorial's objective was to allow you to render your 3D environment into a Virtual Reality Headset. Go ahead, play around with your environment! Add more objects to your scene and make it come to life! In the next tutorial, we will look at integrating another piece of tech into our Unity scene; the Quantum MetaGloves!
For questions, clarifications, etc, Email: kassan2@unlv.nevada.edu