This is an old revision of the document!
Table of Contents
Using HTC Vive to Control Dynamixel Servo
Author: Keitaro Nishimura Email: nishik1@unlv.nevada.edu
Date: Last modified on 05/02/17
Keywords: OpenVR SDK, HTC Vive, Dynamixel, tutorial
The photo above depicts using the Vive position tracking to move a Dynamixel servo around. This tutorial shows you how to setup a Visual Studio Project to use the OpenVR SDK, how to get the position data of the Vive controllers, and how to use that position data to move around a Dynamixel servo.
Motivation and Audience
This tutorial's motivation is to teach the reader how to use the position tracking of the HTC Vive controllers to move a Dynamixel servo. This tutorial is not meant to be a comprehensive tutorial on openVR and Dynamixel SDK. Rather a starting point for the reader to then follow further to learn more about the respective APIs.
Readers of this tutorial are assumed to have the following background and interests:
* Know how to follow directions
* Have experience with/or interest in cpp
* Be interested in some form of HMI
* Have completed the previous 2 tutorials
The rest of this tutorial will follow as presented:
- Parts Lists and Source
- Setting up Visual Studio Environment for OpenVR
- Getting the position Data of the Vive Controller
- Integrating the Dynamixel SDK to move the servo
- Final Words
Parts Lists and Sources
To complete this tutorial, you'll need the following items listed bellow.
| Part Name/Description | Vendor | Vendor URL | Qty | Notes |
|---|---|---|---|---|
| HTC Vive Kit | Vive or Fry's | https://www.vive.com/us/product/ or http://www.frys.com/product/8987273 | 1 | The kit will come with all the necessary hardware. 1 Vive HMD (head mounted display), 2 lighthouse base stations, 2 controllers, and the cables and power sources needed. |
| A computer with at least a GTX 1060 or equivalent | Amazon | https://www.amazon.com/ | 1 | Please reference the recommended computer specs for any computer the reader plans to use. The lab however already has a computer specifically for research with the vive. |
| Tripod mounts for lighthouse base stations | Amazon or build in-house | https://www.amazon.com/s/ref=nb_sb_noss_2?url=search-alias%3Daps&field-keywords=tripod+for+camera | 2 | Since the base stations have a standard camera mounting hole on the bottom any standard camera tripod should work. You can also use scrap pieces of 2×4 wood to create your own mount for them. |
| Dynamixel Servo (RX-28) | Robotis | http://www.robotis.us/dynamixel-rx-28-hn07-n101/ | 1 | You do not need to use this specific servo, lease please not that some parts of this tutorial may be different depending |
| USB to Dynamixel | Robotis | http://www.robotis.us/usb2dynamixel_int/ | 1 | This is needed to communicate between the dynamixel and computer |
| SMPS2Dynamixel | Robotis | http://www.robotis.us/smps2dynamixel/ | 1 | This is needed to power the dynamixel |
| 12V~5A power adapter | Robotis | http://www.robotis.us/smps-12v-5a-ps-10-us-110v/ | 1 | This should be together with the SMPS2Dynamixel |
| Robot Cable-X4P | Robotis | http://www.robotis.us/cables/ | 2 | The actual length does not matter, but the pin type (4pin) does |
| Male to Female USB Extension Cable | Amazon | https://www.amazon.com/AmazonBasics-Extension-Cable-Male-Female/dp/B00NH11R3I/ref=sr_1_2?ie=UTF8&qid=1494974321&sr=8-2&keywords=usb+extender+male+to+female | 1 | This is not necessary for this tutorial but will make your life a lot easier in the last section (we should have a box full of these in the cabinets) |
All of the items mentioned above should already be available to your in the lab. Please check with the lab manager or your lab mates for the whereabouts of the various parts.
Setting up Visual Studio Environment for OpenVR
In this section, we will go over how to setup the visual studio environment to be able to develop with the OpenVR SDK. Although it is possible to do with QT as well this tutorial will focus exclusively on Visual Studio. If you need to use QT please refer to the other sample code within the OpenVR folder that is written with QT (e.x. helloworld_overlay).
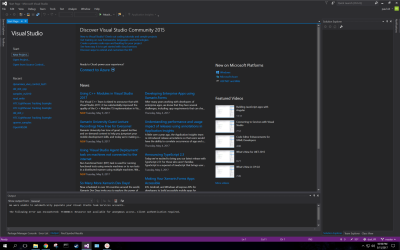
1. The first step is to open up a new Visual Studio Project. This picture below should depict what you will see when opening up the IDE. If you have a problem with an expired license please refer to the previous tutorial on how to fix that (if you are using a lab computer this shouldn't be a problem).

Once open click on the New Project… link under “Start” on the left-hand side of the window. A new window will pop up prompting you to choose what type of project, where to save it and what to name it. As the picture below shows click on the “VisualC++” option on the left-hand side and choose “Empty Project”. The name doesn't matter in this case. For this tutorial I will name it “ViveDynamixelPosTest”, but feel free to name it whatever makes sense to you. Don't worry about the save location, the default will work fine. Then click “OK”.

You should be greeted by an empty project, as depicted below.

At the top of the window, you will notice a tab with “x86” in it (if it is already x64 don't worry about this). Click on it and choose the “x64” instead. If you don't there will be build errors later on. I had forgotten to do this when making this tutorial thus why there is already code in my window in the picture bellow.

You have now created you own VisualStudio's project! We will now go into all of the setting and changes to the folders that you will need to make so that you can use the OpenVR SDK with it.
2. In the new project window, if you look at the right hand-side, you will notice the Solution Explorer window. Within it, you should find your project and all of its contents (right now empty folders). Right click on the name of your project (it should be highlighted and in bold text right after the window opens) and click on the Properties option at the bottom of the menu.

Once you have clicked on it the Property Pages window will appear. This is where the majority of changes will happen.

Under “Configuration Properties” in the “VC++ Directories” click left of the Library Directories and choose <Edit…>.
 In the new window that popped up enter the locations the .lib files for OpenVR, sdl, and glew. All of which can be found inside the OpenVR SDK folder (if you don't already have it downloaded refer to the previous tutorial). For me these paths are:
C:\openvr-master\lib\win64
C:\openvr-master\samples\thirdparty\sdl2-2.0.3\bin\win64
C:\openvr-master\samples\thirdparty\glew\glew-1.11.0\lib\Release\x64
These pathways can differ depending on where you saved the OpenVR folder, but after openvr-master it will be the same. Although you can type the pathway directly into the window you can also look for it by clicking the folder icon in the top right-hand corner next to the red “X” symbol (which will delete the highlighted pathway). Once entered click OK.


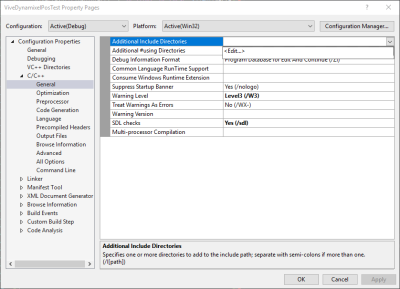
Then move to the “C/C++” tab and in “General” click left of “Additional Include Directories” and choose <Edit…>. Then the directories to all of the needed header files for OpenVR, sdl, and glew. For the they were:
C:\openvr-master\headers
C:\openvr-master\samples\thirdparty\sdl2-2.0.3\include
C:\openvr-master\samples\thirdparty\glew\glew-1.11.0\include
They may differ for you depending on where you saved your file but after openvr-master will be identical. Once again you can either type the pathways directly or find them through the folder icon in the top right hand corner.


Then change the option for SDL checks from “Yes” to No“.

Then while staying under “C/C++” move from “General” to “Optimization” and change “Optimization” to “Disabled (/Od)” and “Enable Intrinsic Functions” to “Yes (/Oi)”.

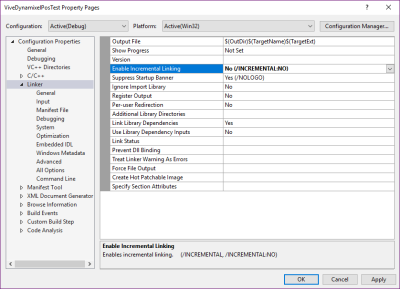
Now moving from “C/C++” to “Linker” under “General” change “Enable Incremental Linking” to “No (/INCREMENTAL:NO)” and click left of “Additional Library Directories” and choose the <Edit…> option. Then in the pop up window add the same pathway that you used from “Library Directories”. Then click “OK”, for me the pathways were:
C:\openvr-master\lib\win64
C:\openvr-master\samples\thirdparty\sdl2-2.0.3\bin\win64
C:\openvr-master\samples\thirdparty\glew\glew-1.11.0\lib\Release\x64


Now move from “General” to “Input” and click left of “Additional Dependencies” and choose the <Edit…> option. The in the pop up window put in this:
openvr_api.lib
glew32.lib
SDL2.lib
SDL2main.lib
glu32.lib
opengl32.lib
Now move from “Input” to “System” and change “SubSystem” to “Console (/SUBSYSTEM:CONSOLE)”.

You have now finished changing the Property setting and click on the “Apply” to officiate all of the changes.
Now go in a File Explorer window open up the “samples” folder within the OpenVR SDK. Then copy and paste the “shared” folder into your project. You can do this by dragging the folder from the File Explorer into your visual studio project and dropping it ontop of your project name (the same place you right clicked to get the properties option), and by copying it into the project folder where the default option makes you save it. After doing this you should be able to see the files within your project's “Solution Explorer”.
NOTE: In the picture with the shared folder in the visual studio I made a mistake and the “shared” folder should be inside the “ViveDynamixelPosTest” folder shown in the picture.


Then it is time to copy over the .dll files over to your project. “dll” stands for Dynamic Link Library and is the core for each API used here (OpenVR, sdl, and glew).
The pathway to find each of the .dll files is as follows:
[path to OpenVR SDK folder]\openvr-master\bin\win64  -for Openvr_api.dll
[path to OpenVR SDK folder]\openvr-master\samples\thirdparty\glew\glew-1.11.0\bin\Release\x64  -for glew32.dll
NOTE: the sdl2.dll file isn't in the folder but if you search your computer drive for it. Steam uses it so you can copy it from there (make sure to copy it and not move it from there). search for “sdl”.

Then copy them into the (for me) Documents/Visual Studio 2017/Projects/(project name)/(project name)/x64/Debug folder.

You have now finished preping the project to use the OpenVR SDK! Now to test whether it is correct or not we will copy and paste the hello world code into the project to see if it builds.
3. Go back to your open Visual Studio project and right click the “Source Files” folder inside the Solutions Explorer. Choose “Add” then “New Item…”. In the pop up window inside “Visual C++” select the “C++ File(.cpp)” option and click “Add”. You don't have to change the name but you can if you want to (I changed it to main.cpp). You now have a new empty file to fill.


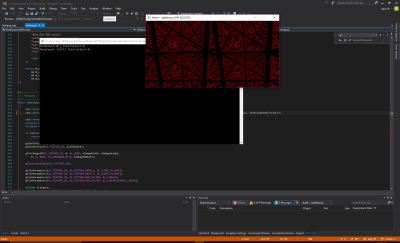
Open the hellovr_opengl example code and copy it all into your new empty file. Before testing the code you need to connect the HTC Vive to the computer. After connecting the Vive, try to build it by clicking on the “Local Windows Debugger” button at the top of the window. If everything goes well the code should start to run (after doing some initial setup steps, just click ok to everything).

Now if you encounter some errors here are some troubleshooting steps to take.
- Make sure that you changed the x86 option to x64 at the top of the Visual Studio window.
- At the top of the code try to add the files from the “shared” folder that you copied. When it tries to auto-complete for you and you can't find the folder or corresponding files you may want to try to copy them over again or move the location you saved them in your project folder.
- Go back and compare your properties settings with those of the openvr_opengl example code. Make sure that they are the same.
- Check the GitHub Issues tab to see if anyone is getting similar errors. If not create a new issue. (this is more of a last ditch effort as if you are getting errors at this stage your questions may be too broad/generic for the community to answer concisely)
If you have persistent errors at this stage feel free to email me.
If everything went well then you have successfully setup your own visual studios project to work with the OpenVR SDK! Don't worry if you can't see anything except for the controllers. Since you changed the location of the code it just can't find the image used in the original code. In the next section, we will add position tracking and how to change the image shown in the cubes in the example code.
4. First, we will change the image used on all of the cubes in the example code. You can use any image as long as it is a png file, you can't use a jpg. Once you have found an image that you want to use using ctrl+f to search for ”.png“ in your new code. The result will be a pathway to the original image file. Change that pathway to point to the new file that you want to use. Build and test the code to see if you can see the new image being used by the code. In the picture below I used the UNLV logo.


For the position tracking, I used code from the OpenVR-Tracking-Example


