This is an old revision of the document!
Table of Contents
Soap Making Tutorial
Author
<Arim Baek> Email: baeka3@unlv.nevada.edu
<Yehyun Lee> Email: leey93@unlv.nevada.edu
Date: Last modified on <03/27/25>
Keywords: Soap making, Clear soap, Soap with a toy inside
Motivation and Audience
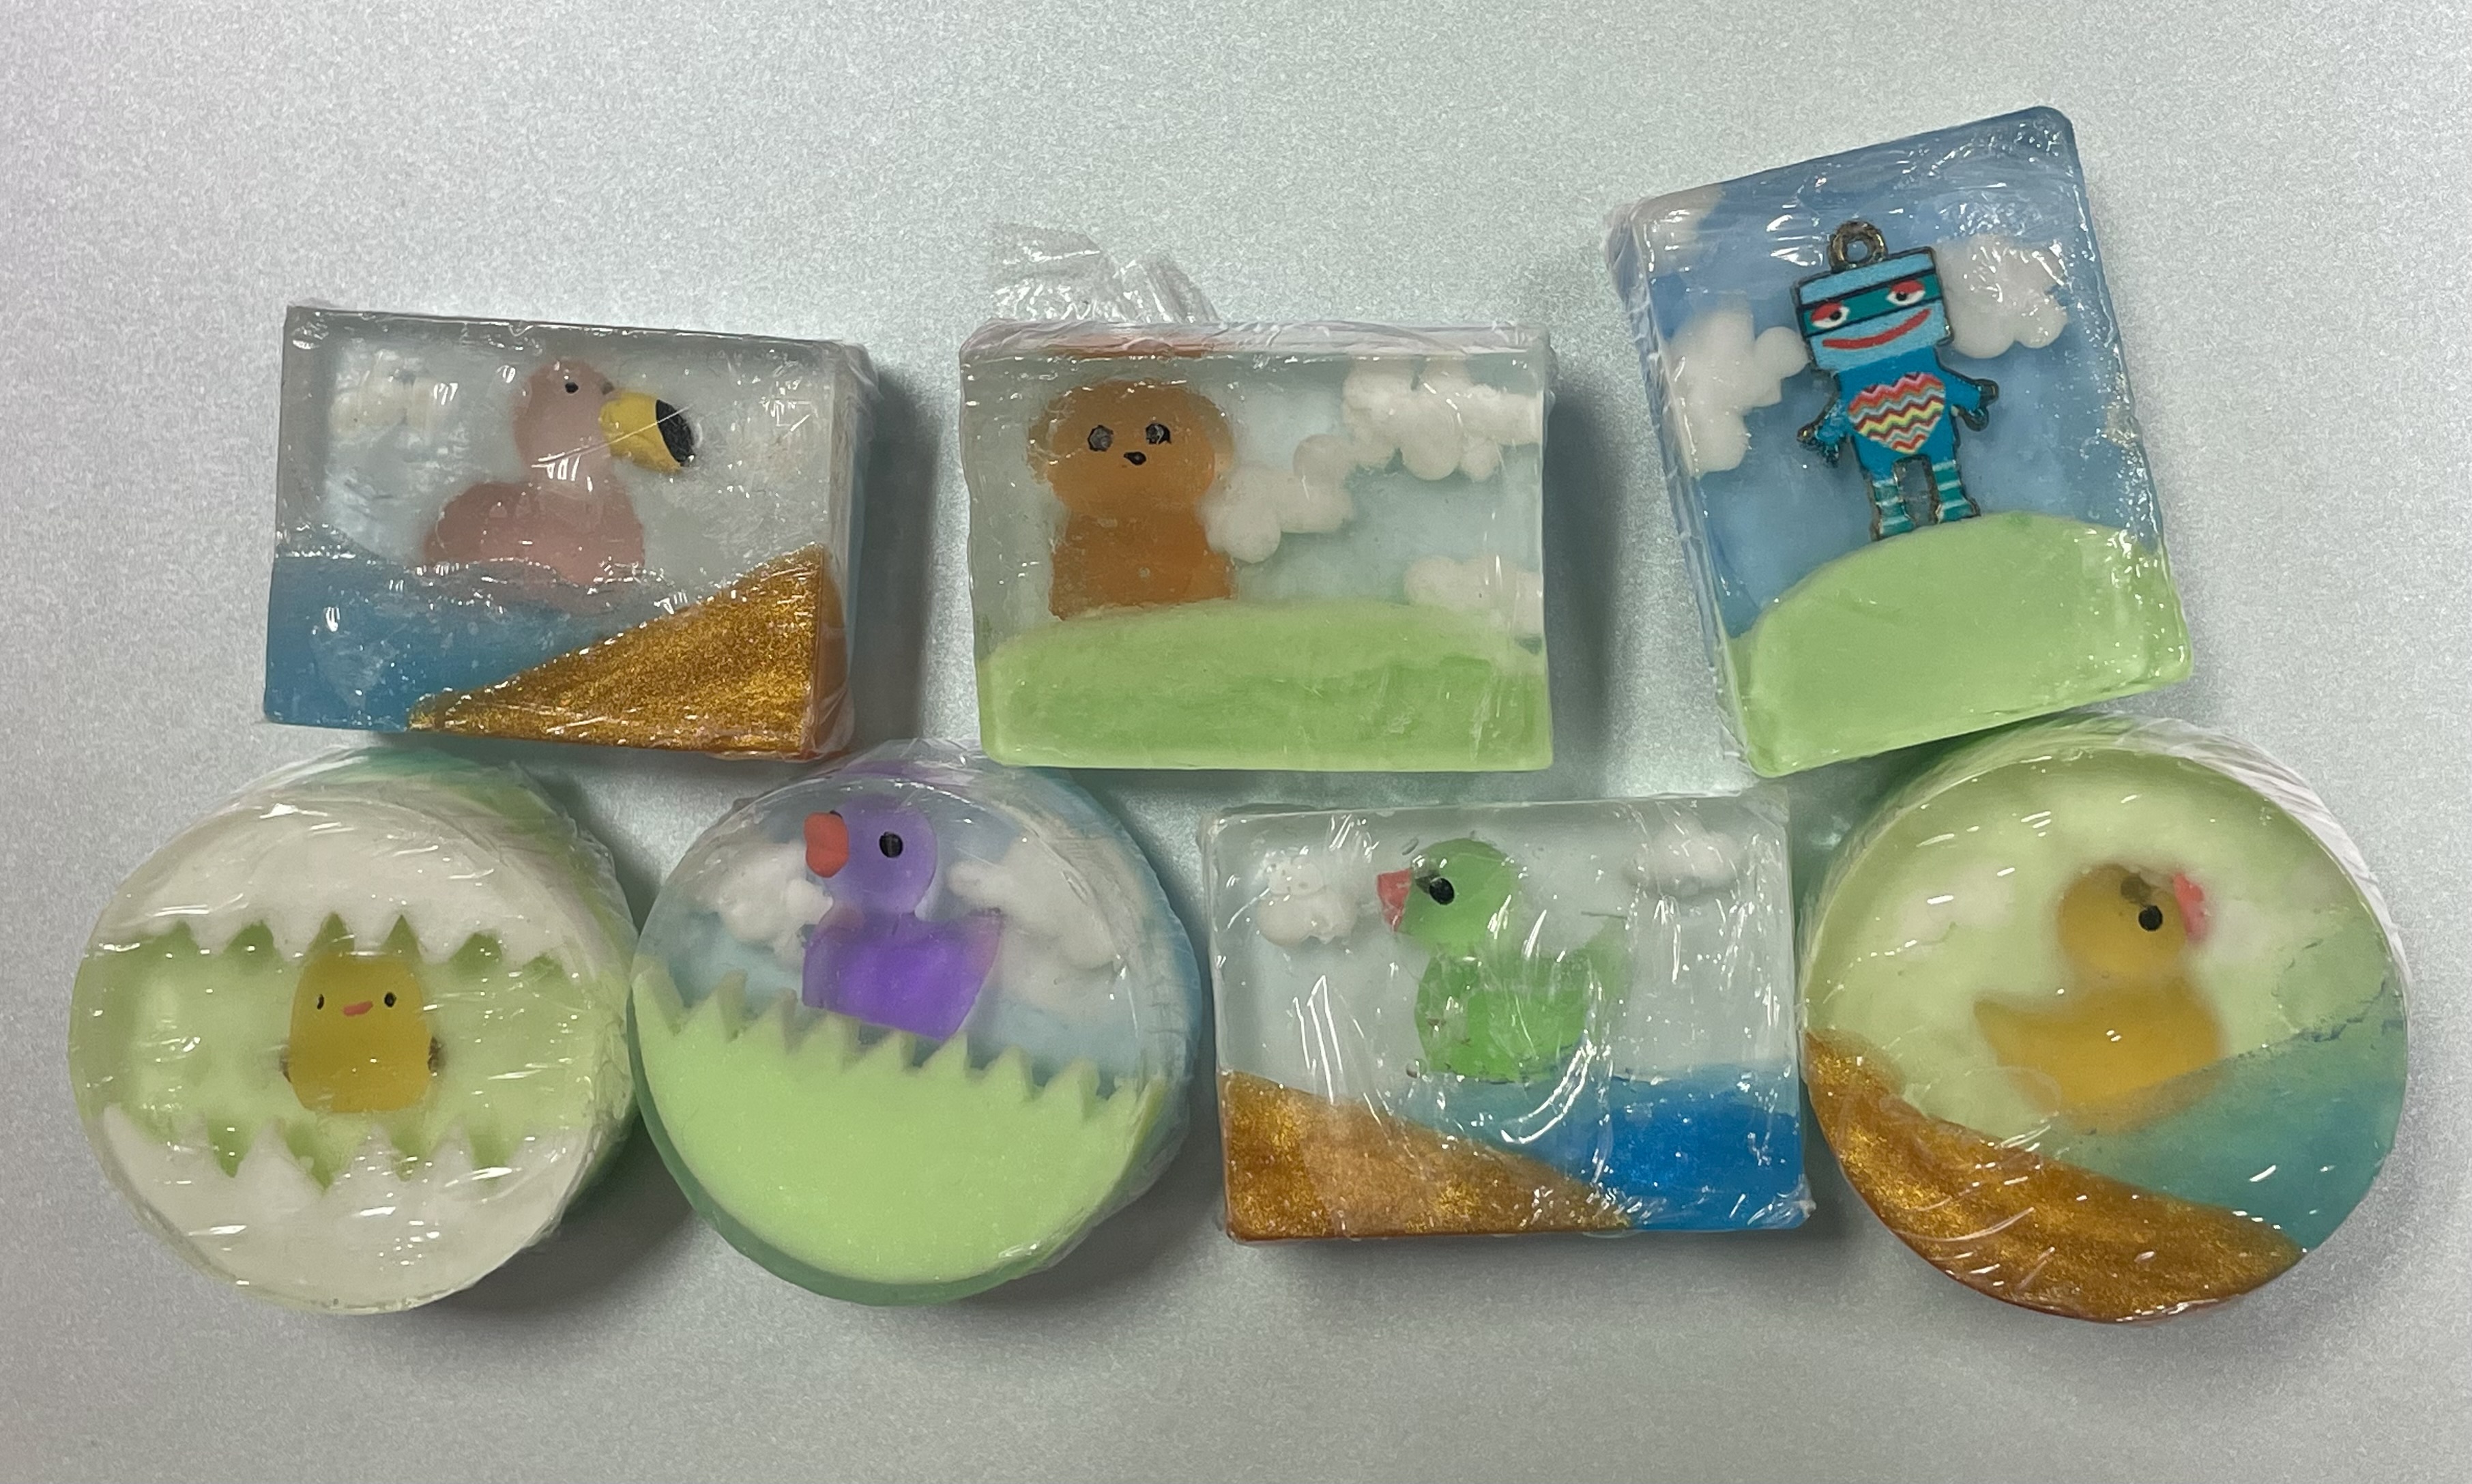
This tutorial's motivation is to demonstrate how to make clear soaps with toys inside.
This tutorial focuses on methods to make the soap transparent, such as controlling temperature and removing bubbles.
The steps are as follows:
1. Materials and Purchase Links
2. How to Make a Transparent Soap Layer
3. Two Soap Designs with a Toy Inside
Section01 - Materials

- Clear Soap Base
https://www.amazon.com/dp/B09KKYP128
- White Soap Base
https://www.amazon.com/dp/B0D7HMNYYD?th=1
- Colors
https://www.amazon.com/dp/B07CH9S1DS
- Scent
https://www.amazon.com/dp/B0B4NPJ28W
- Charms
Robot: https://www.amazon.com/dp/B09QPTFBT7
Astronaut: https://www.amazon.com/dp/B0C8SSG1HG
- Gas stove kits
https://www.amazon.com/dp/B0D9M3BKQC
- Molds
Circle: https://www.amazon.com/dp/B0C4M1PNCP
Rectangle: https://www.amazon.com/dp/B01CDUO8WA
- Plastic Wrap
https://www.amazon.com/gp/product/B07WD9PF7T/ref=ox_sc_act_title_1?smid=ATVPDKIKX0DER&th=1
- Plastic package bags
https://www.amazon.com/dp/B09NPMGZN6
Section02 - Clear Soap Layer
To make soap transparent enough to see the toys inside, removing bubbles is the most important factor. In this section, we will introduce methods to minimize the bubbles that occur during the melting and pouring process of the soap base, allowing for the creation of even more transparent soap.
The materials needed to make transparent soap are as follows:
1. Clear soap base
2. Pot and stove
3. Aroma oil for fragrance
4. Spoon (for stirring)
5. Knife and cutting board
(1) Cutting the soap base
Section03 - Design of the Soap with a Toy Inside
(i) Robot Soap

(1) wirte you own steps ..
1-1. Following steps of STEP01
explanation

1-2. next steps
explanation
(ii) Astronaut Soap
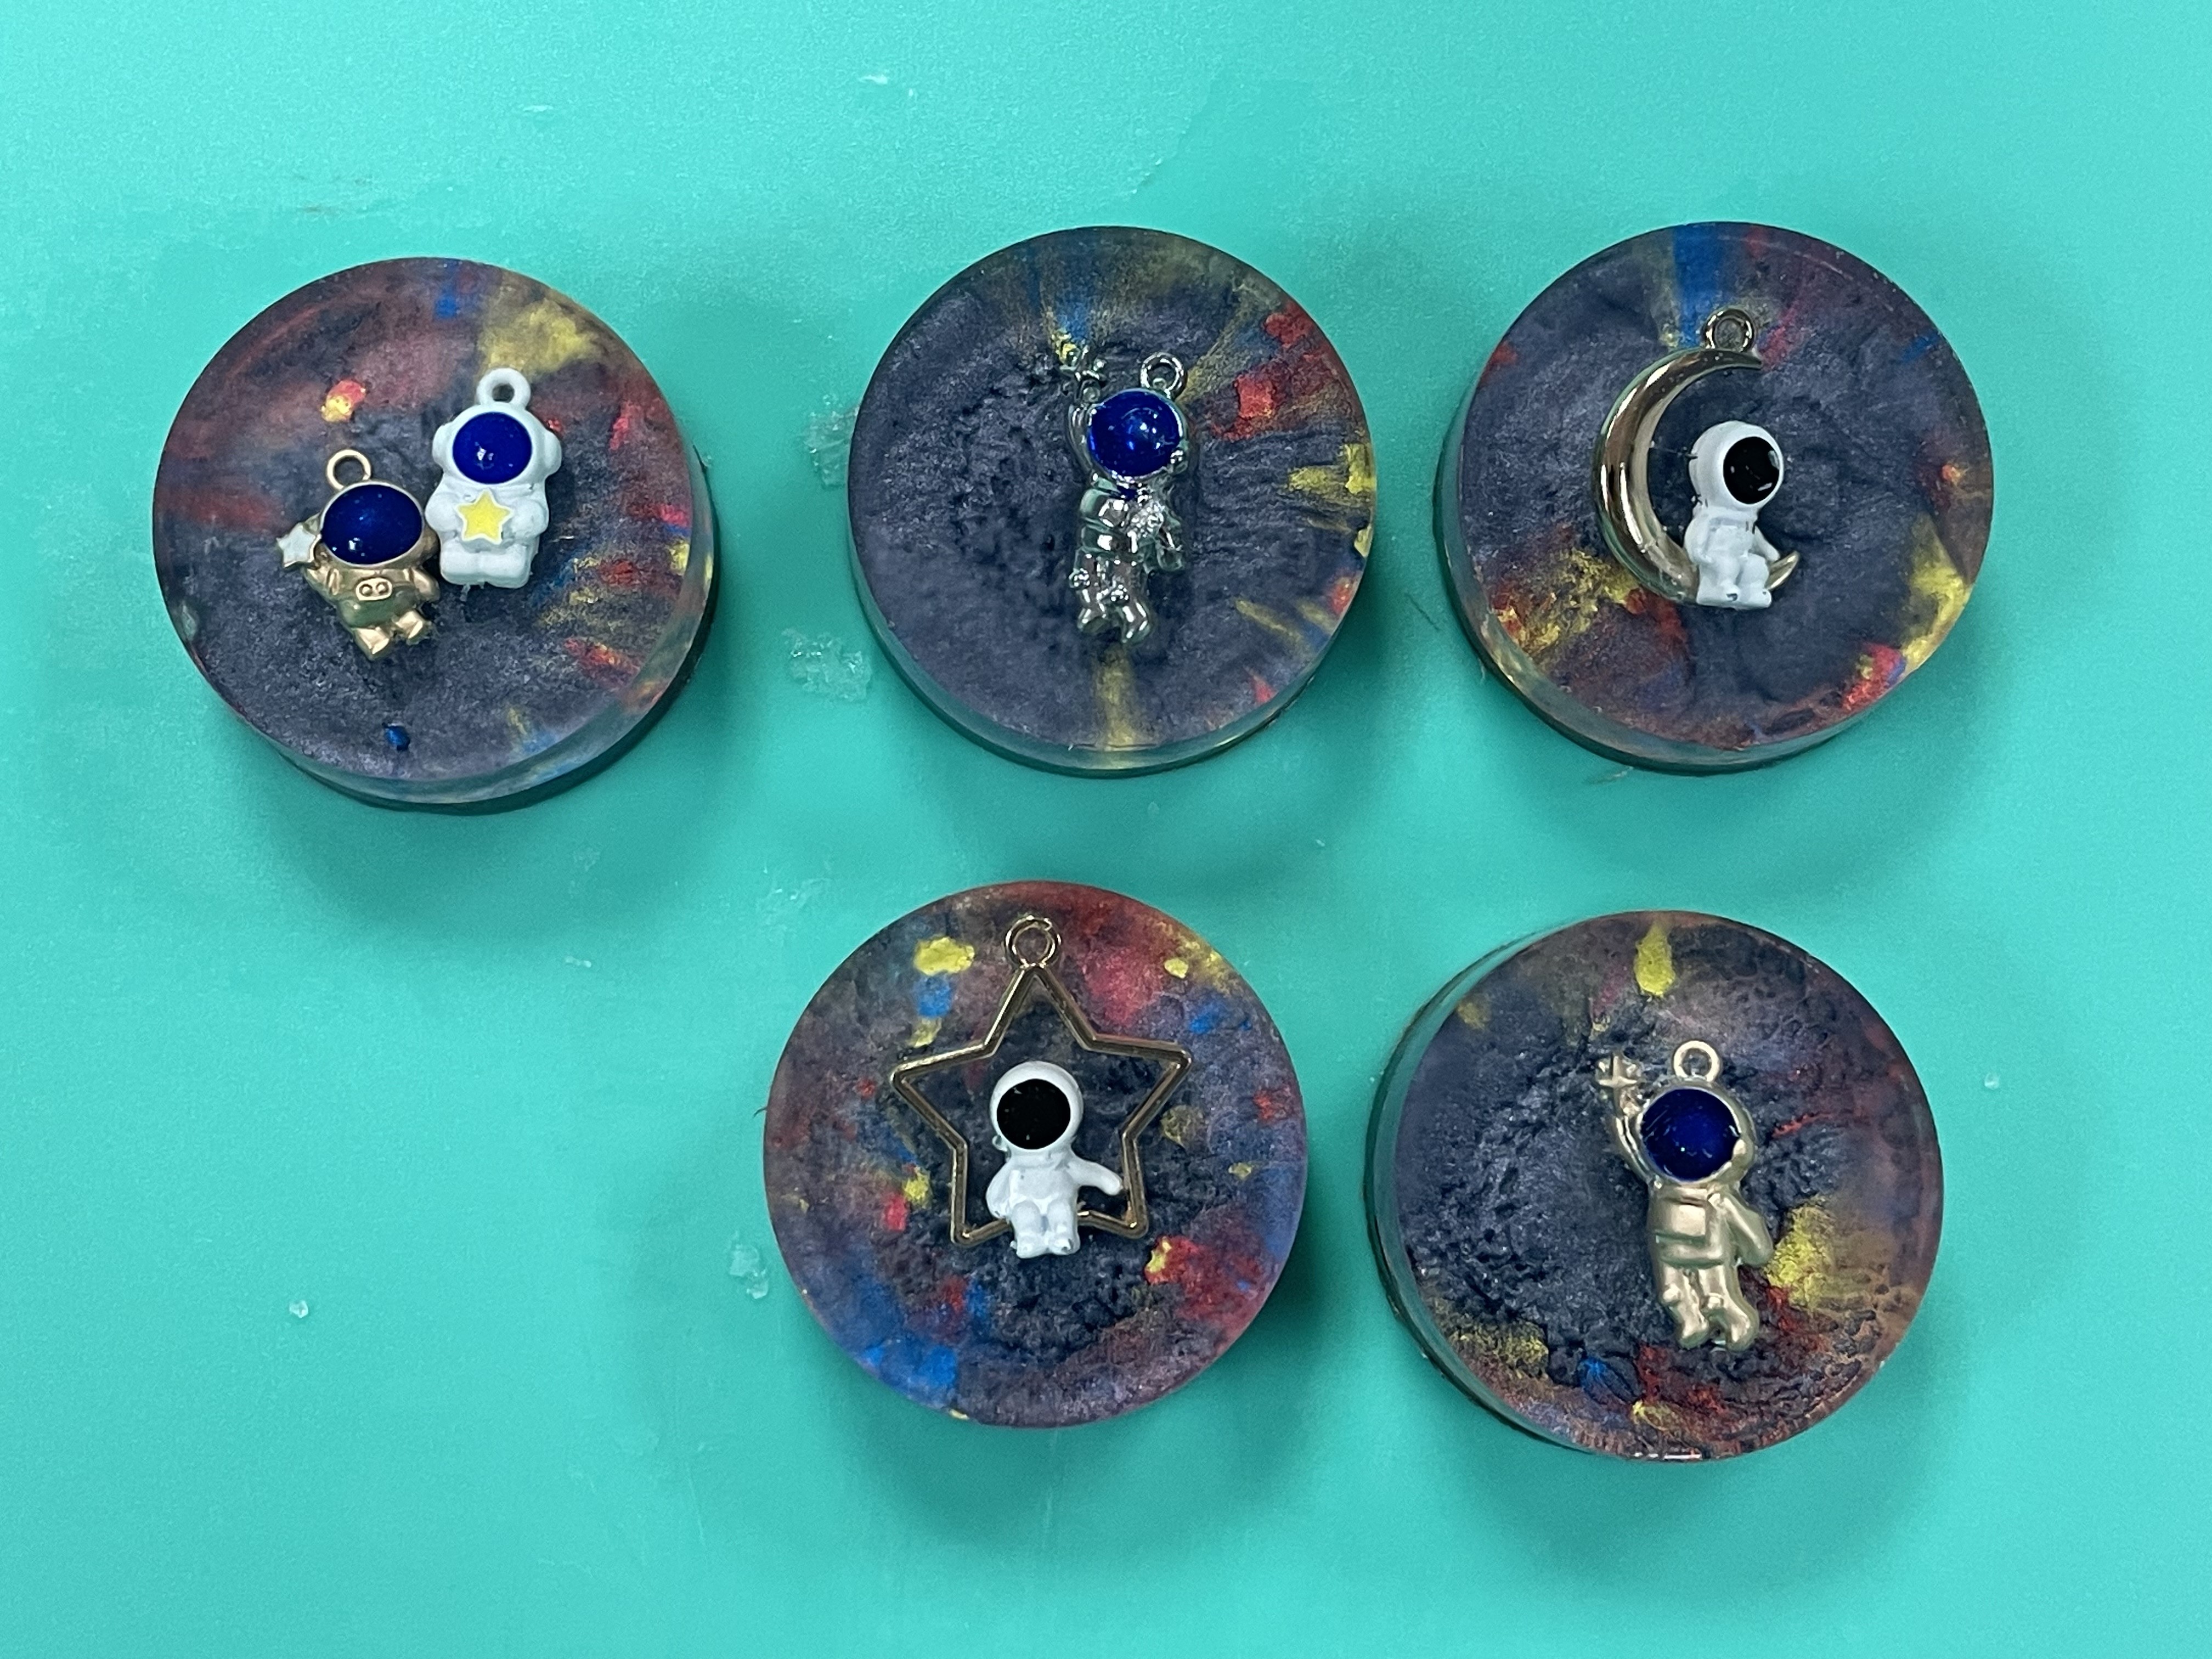
This is a soap with a Marvel shape and an astronaut charm inside.
It requires a clear soap base(see Section01), color powder, and charms.
The steps are as follows:
(1) Clear Layer
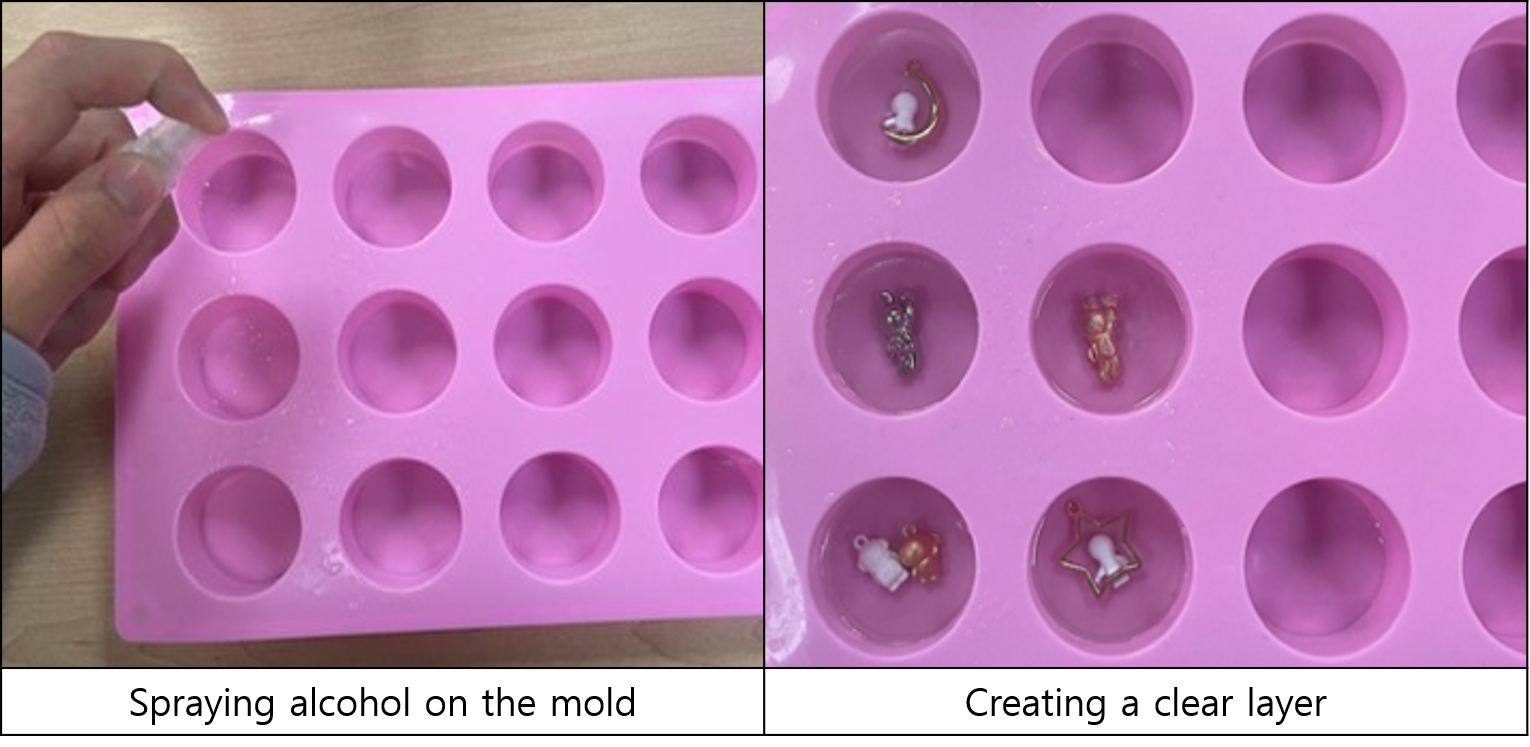
1-1. Spray alcohol.
Spray alcohol onto the mold before pouring the soap.
Alcohol helps the soap spread evenly and ensures that each soap layer adheres well to one another.

1-2. Pour the clear base(see Section01) into the mold, filling half of its height.

1-3. Add the charm.
The charm must be placed before the clear base hardens to prevent air bubbles from forming between
the soap and the charm. Place the charm into the base very carefully to minimize air bubbles.
Since the front side of the finished soap will be the bottom of the mold, place the charm upside
down so that its front side faces the bottom.

1-4. Spray alcohol.
Before the clear base hardens, spray alcohol on the surface to remove any bubbles.
Wait until the layer is fully set.
(2) Marvel Layer
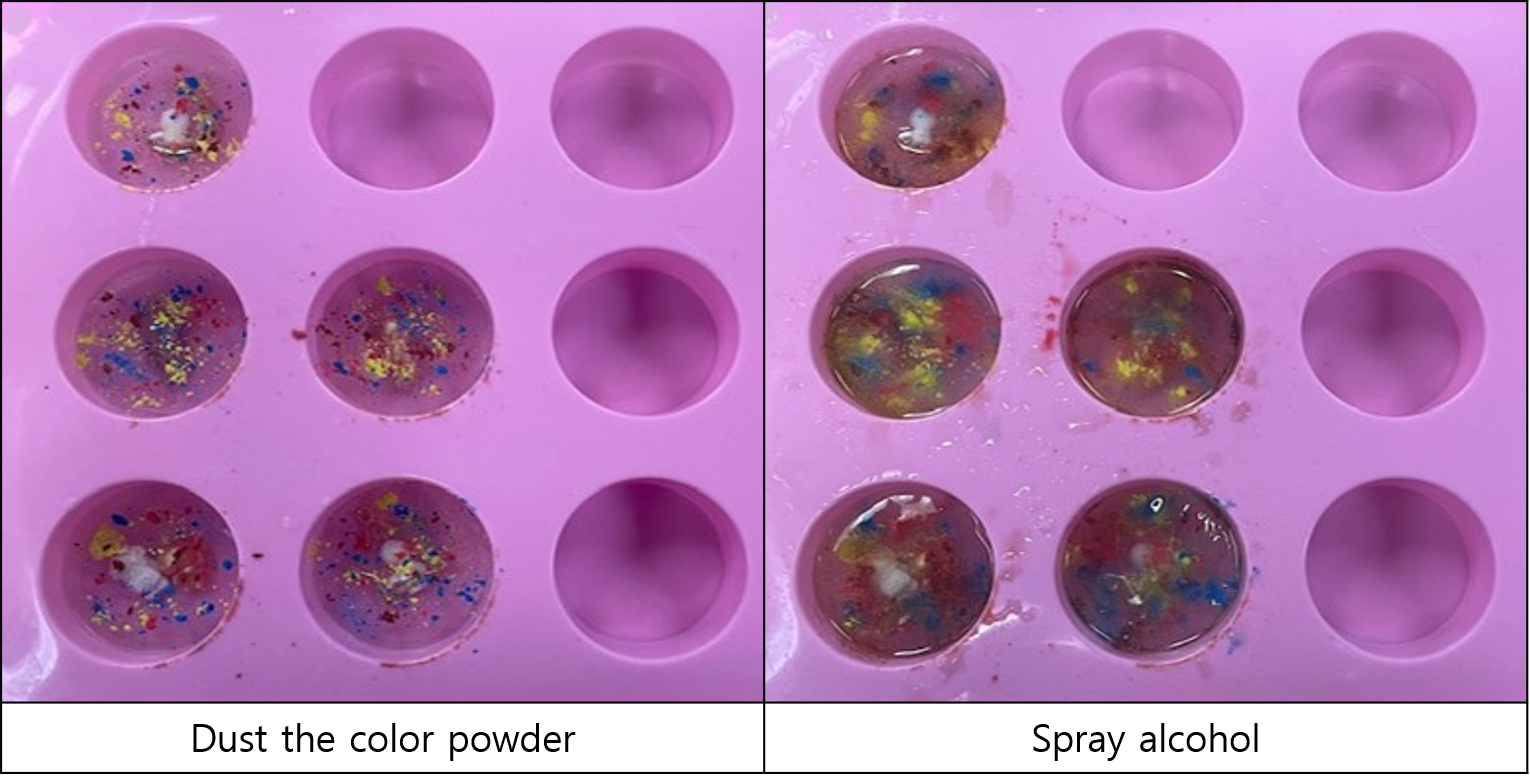
2-1. Dust the color powder.
Sprinkle a small amount of the desired color powder onto the surface.
Since a dark color will be used as the background, it is recommended to choose a bright color to
make it stand out.

2-2. Spray alcohol.
Spray alcohol onto the surface where the color powder was sprinkled to help it blend.
If sprayed too closely or too forcefully, the powder may be mixed excessively,
so adjust the distance and pressure to achieve a good marble effect.
Wait until the alcohol dries to ensure the marbled powder adheres well to the soap surface.
(3) Background
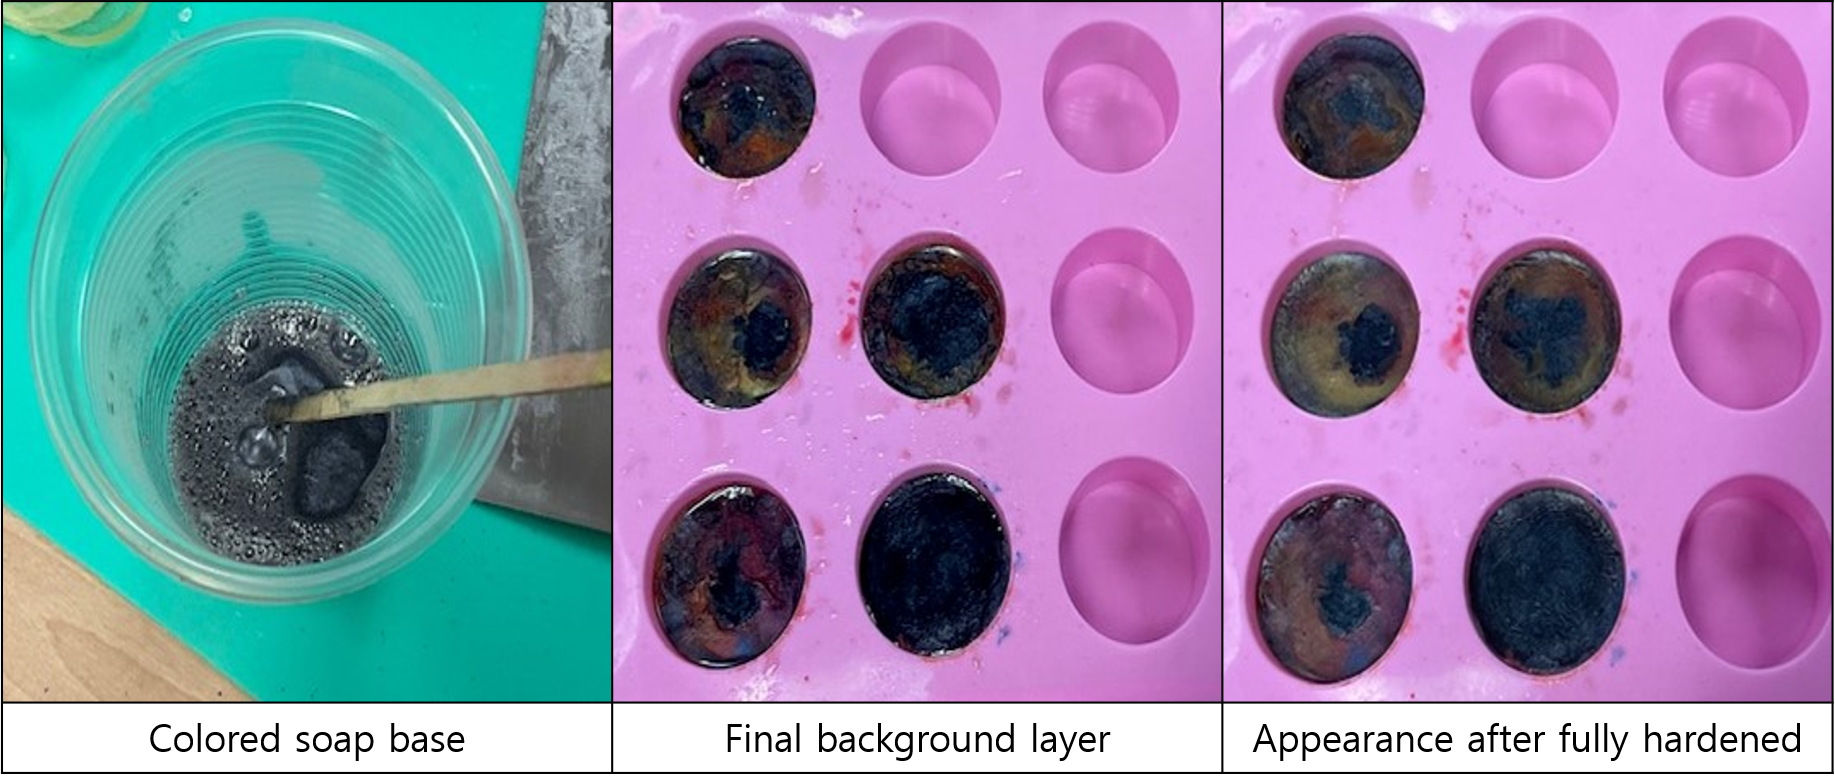
3-1. Color the background layer
Use colors like black and silver to tint the soap base for the final layer.
During the mixing process, bubbles may form due to stirring.
Allow the soap base to cool slightly so that a thin film forms over the surface where the bubbles
have appeared. Remove this film before use to prevent bubbles from forming in the soap.

3-2. Pour the colored base into the mold.
Since the melted base is hot, it may mix with the marbled powder layer when poured.
To prevent this, pour the base very slowly.
Then, spray alcohol on the surface to remove bubbles.

3-3. Completion
Wait until the soap has completely hardened and cooled, then carefully remove it from the mold.
Immediately wrap the soap in plastic wrap.
The longer the transparent layer is exposed to air, the less clear it becomes,
so wrap the surface as quickly as possible.
(iii) Other designs