Table of Contents
Optitrack Motion Capture System Setup Guide
Author: Keitaro Nishimura Email: katnimura@gmail.com
Date: Last modified on 04/25/17
Keywords: Optitrack, Motion Capture, Setup, Tutorial

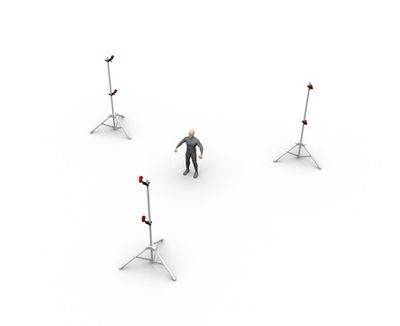
The picture above depicts the 4 camera setup of the Optitrack Motion Capture System which allows you to capture the position and orientation data of an object within the capture field over. This tutorial will show you how to setup the camera's for your specific project and needs, calibrate the cameras, and how to capture and export position data of an arbitrary rigid object.
Motivation and Audience
This tutorial's motivation is to teach the reader how to set up their own motion capture space. Readers of this tutorial are assumed to have the following background and interests:
*Know how to follow direction
*Interests in capturing the position data of a moving object over a set time
The rest of the tutorial will be made up of three sections:
Hardware Setup
For this section, the reader will first need to confirm that they have all the parts listed in the bellow. Please find the desktop computer labeled “Motion PC” for the Arena Motion Capture Software. Reference the links to find out what each part should look like.

| PART NAME/DESCRIPTION | VENDOR | VENDOR Number or URL | PRICE($) | QTY |
|---|---|---|---|---|
| Arena Motion Capture Software | Natural Point | https://www.optitrack.com/support/software/arena.html | 1999 | 1 |
| Calibration Square | Natural Point | https://www.optitrack.com/products/tools/ | 99 | 1 |
| Camera Stand : 10ft | Natural Point | http://optitrack.com/products/mounts-tripods/ | 79 | 4 |
| Hardware Key | Natural Point | https://www.optitrack.com/products/keys/ | 99 | 1 |
| Manfrotto Super Clamp with 3-way Head(#056,#035,#037) | Natural Point | https://www.optitrack.com/products/mounts-tripods/ | 69 | 4 |
| Manfrotto Wall Mount with Swivel-Tilt Head | Natural Point | https://www.optitrack.com/products/mounts-tripods/ | 49 | 15 |
| Marker Set : 5/8“ Semi-soft | Natural Point | https://www.optitrack.com/products/motion-capture-markers/ | 249 | 2 |
| Motion Capture Suit(M) | Natural Point | https://www.optitrack.com/products/motion-capture-suits/ | 279 | 1 |
| Optihub | Natural Point | https://www.optitrack.com/products/sync-switches-hubs/ | 299 | 3 |
| Optitrack FLEX:V100R2 Red,46.2ºFOV(4.5mm) | Natural Point | www.naturalpoint.com | 599 | 18 |
| Optitrack Sync Cable : 30ft | Natural Point | https://www.optitrack.com/products/cables-connectors/ | 10 | 2 |
| OptiWand Kit | Natural Point | https://www.optitrack.com/products/cables-connectors/ | 249 | 1 |
| USB 2.0 Active Extension Cable : 5m | Natural Point | https://www.optitrack.com/products/cables-connectors/ | 20 | 3 |
| USB Cable : 16ft A to B | Natural Point | https://www.optitrack.com/products/cables-connectors/ | 5 | 3 |
| USB Cable High Grade, Left | Natural Point | https://www.optitrack.com/products/cables-connectors/ | 10 | 18 |
The lab should have all of the necessary parts listed above in one place as shown below.

Please note that you will also need:
- Carpet or something to cover the floor if it is reflective
- A ladder tall enough to reach to top of the 2m tripod comfortable
- A smaller tripod to use during calibration
Construction
This section will guide the reader step by step how to setup their own space.
1. Decide on the space and configuration.
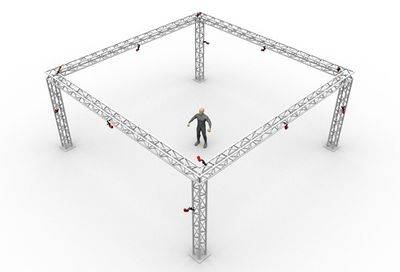
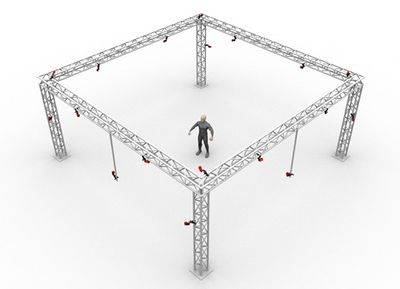
- Depending on how much space is available or the capture volume needed, the camera configuration and space needed will change drastically. Below are some examples of camera configurations for 6, 12, and 16 cameras. The closer the cameras are to the tracked subject the higher the accuracy, but shrinks the capture volume, while placing the cameras farther away enlarges the capture volume while lowering accuracy. Also the area within the volume the object is can change the setup. If you need to capture data at close to the ground having cameras that point at the ground is beneficial. This can be achieved by pointing all the cameras at the ground. But if you also need to capture data points above ground level, having two rows of cameras would be the best setup (one at the top and one at the middle of the tripods). The capture volume and accuracy needed will also vary the number of cameras needed. Although adding more cameras will raise the accuracy of the data if the cameras are placed close enough to where the images from them are similar, the benefit of the additional camera is negligible and will only add a load to the software.
- For example, in the picture of the current system (04/25/17), there are only 4 cameras in each corner of the capture volume close together. This is because it will be mainly capturing still objects close to ground level. This makes having a large volume extraneous and in turn extra cameras as well. All of the cameras are pointed at the ground floor to maximize the accuracy. Although it would be possible to add a second row of cameras the added benefits would be negligible and shrink the already small capture volume further.
- If the mocap PC isn't already setup please set it up at the “front” of your space. Please keep in mind that you will need to connect the hubs to the computer so keeping it as close to the edge of your volume is recommended. It is also recommended that you set up the peripherals (monitor, keyboard, mouse) so that you can access them while outside and inside the capture volume. Please don't forget to plug in the hardware key into the computer if it isn't already plugged in.
3. Setting up the Tripods
- Once the space and configuration have been chosen evaluate the area. Is it free of potential obstacles to the cameras? If not move them out of the space. Is the floor reflective? If it is, use carpets or something similar (eg wood pallets) to cover the floor of the capture volume. Light reflecting off the floor will add noise to the data and make calibration impossible.
- Then depending on how many cameras and configuration take out the number of tripods needed. Place the cameras on the top of the tripods using the clamps to secure them. For the top row make sure that the cameras are mounted vertically (similar to a mobile phone video). Do not worry about the camera angle, for now, this will be fixed during calibration. Then extend the tripod to their maximum heights making sure to secure each part with the locking pin. If your configuration merits a second row place them at the midpoint of the tripod with the clamps, this time mounting them horizontally (similar to a DSLR or point and shoot camera).
- Once the tripods are set up move them into your desired configuration.
- Once you have placed them in your desired configuration take out the camera usb cables and connect them to the appropriate port on each camera.
3. Setting up the Optitrack Hubs
- Once the cameras are all in place connect usb camera cables (the usb end is red) to each camera.
- Take out the Optitrack hubs and based on the number and length place them around the perimeter of your capture volume. You can not have a usb extender between the camera and the hub. Introducing an extender will throw off the synchronization(timing) of that camera. making it impossible to calibrate and get accurate data from that camera. However, there is no need to connect the same number of cameras to each hub. It can, however, help the software equally distribute the load on the solftware. For our current setup we are using two hubs on the sides with two cameras plugged into each.
- Once the hubs have been set and the usb cameras have all been connected to a hub connect the sync cables to each hub as explained in the following diagram.
- Then take the usb uplink cables and connect them between each hub and the computer. If the cable is too short you can use an active usb extender to reach the computer. Please note that you can connect all of the uplink cables to an usb hub on the computer it isn't optimal for the software computation. Connecting each usb to a different physical port on the computer will disperse the computational power needed for each hub equally throughout the software. But if port space is at a premium there isn't anything barring you from doing this.
- Finally once all of the cables for the hubs have been set up connect them to their respective power bricks to turn them on. The hubs do not have a power switch and will automatically turn on when plugged in and turn off when unplugged.
You have now finished the hardware setup and can move on to the calibration portion of this tutorial.
Camera Calibration
In this section, I will guide the reader step by step on how to calibrate the Optitrack Flex3 motion capture cameras properly for their own setup. For this part, you will need the help of another person. So please have someone that can spend the next 0.5-2 hours (depending on how many cameras you have) helping you.
1. Start the Optitrack Arena software
- Turn on the Mocap PC and double click the Arena Icon on the desktop to start the software(the pw for the computer is a std variation, consult other lab members if you don't know what that means).
- On the GUI's right-hand side click on the select camera button to import all of the cameras in your setup into the software. Once you click on the button a window will pop-up with all of the cameras that the software was able to find. Double check that all of the cameras you setup are visible, if not double check all of the usb connections and sync cables to make sure everything is plugged in correctly. You can check the device manager to see if there is a specific hub not being pick up.
2. Angling the Cameras
- Once all of the cameras have been found and imported into Arena click and drag the left side of the camera windows to enlarge them until they take up most of the screen. Then right click the camera screen and click the gray point scale option. This will allow you to see an image of what the sensor is seeing besides just reflective points. Then right click again and click on the cross-hair option to add one to the camera screen. You will use this to center the camera.
- Now take out the reflective markers and tripod. Depending on where in the volume you want to focus the cameras place the markers there. For a basic setup with two rows of cameras place one marker at the center of the volume on the ground plane and one on the top of the tripod at about waist level. You will be centering the top row of cameras on the marker on top of the tripod and the bottom row of cameras on the one below. If you are planning to focus the cameras on a specific location within your volume place the marker there instead and center the cameras on that marker instead.
- Once the centering points have been set up call your friend or acquaintance over to help you. Teach them how to bring up the grayscale and crosshairs on the camera screen, the options can sometimes change when changing from camera to camera, and have them direct you on where to angle the cameras to center them on the cross-hairs. Using the clamps pivots angle the cameras until they are centered on their corresponding marker. e.g. The top row of cameras on the marker on top of the tripod and bottom row on the ground plane marker. Please be careful when moving the cameras around as to not drop or damage them while doing this. The clamps pivots are also very sticky so may need some elbow grease to move around. Use the ladder to reach the top cameras and be careful while on top.
- While centering the cameras check that there isn't any noise coming into the cameras from reflective surfaces. If the camera is picking up the lens of another camera, move it just enough to where it isn't in range anymore. It is ok if the camera isn't 100% centered in this case.
3. Calibrating the cameras through Arena
- Once all of the cameras have been centered on their own respective markers remove the centering markers from within the volume and prepare the calibration wand and the calibration square.
- click on the wizards menu and choose calibration, this will start the calibration wizard for the cameras. Click next on the pop-up window and follow the instructions to start the calibration phase.
You have now finished calibrating the cameras and can now follow move onto the next section which will take you through how to setup a rigid body and then capture and export position-orientation data.
Data Acquisition
This section will walk the reader through how to create their own rigid body around an object they plan to track. Then how to capture the motion data and export it as a text file for usage in other software (eg matlab).
1. Creating the Rigid Body
- To create a rigid body within Arena you will need to have at least 3-4 markers on the object you want to track. Place the markers around the object so that the center of the markers locations will point towards the center of the object as well. This is because Arena will export the position and orientation of the rigid body you create, not the individual position data. You can view the individual position data while inside Arena if that is something you need. For this tutorial, I will use the motion capture hat with 4 markers.
- Once the object has been setup click on the wizard menu again and this time click on the rigid body to start the rigid body wizard. Follow the instructions to finish creating your own rigid body and save it.
2. Capturing and Exporting Position Data
- Once the rigid body has been created when you start the cameras you should see it on the screen when you move it into the capture volume.
- Now record the rigid body moving through your capture volume for some movement.
- Once you have recorded the movement data right click it in the hierarchy tree on the left hand side of the gui within “take” and click trajectorize. This will create trajectories of the movement allowing you to see the change in x,y,z positions of each marker.
- Now right the trajectory created under “trajectories” and choose export BVH. This will export the position and orientation data of the rigid body as a text file.
Final Words
Congratulations you have now successfully created, tracked and exported position-orientation data of a rigid body you created! You are have completed this tutorial. If you have any other questions feel free to email me or check the opitrack wiki for more information not covered in this tutorial.
Possible future tutorials that can be derived from this tutorial is the full body tracking of the DRC HUBO or quad-copters within a capture volume.


