
====== Setting Up The Robotis Manipulator ======
Author: Alex Cater Email: [email protected]
Date: Last modified on 03/15/17
Keywords: Robotis, Manipulator, 6 DoF, SDK Set Up, Dynamixel, Kinematics
Resources
Robotis Manipulator SDK :
http://en.robotis.com/BlueAD/board.php?bbs_id=downloads&mode=view&bbs_no=1152543&page=1&key=&keyword=&sort=&scate=
Robotis Manipulator SDK Manual :
http://en.robotis.com/BlueAD/board.php?bbs_id=downloads&mode=view&bbs_no=1152545&page=1&key=&keyword=&sort=&scate=
Robotis Manipulator Product Page :
http://www.robotis.us/robotis-manipulator-h/
RoboPlus Download :
http://roboplus.software.informer.com/download/
RoboPlus Manual :
http://support.robotis.com/en/software/roboplus_main.htm
Eigen C++ Library :
http://eigen.tuxfamily.org/index.php?title=Main_Page
Download and unzip the SDk and Eigen library into a directory of your choice. Both will be used to set up the SDK. Install the RoboPlus app. The RoboPlus software includes the Dynamixel Wizard which will be used to test the servos that make up the manipulator. Links to the RoboPlus and SDK manual are included and should be used in conjunction with this tutorial.
What You Will Need
1)The Manipulator
Shown below is the Manipulator-H.

2) USB2Dynamixel
The USB2Dynamixel is the median between your PC and the Manipulator. Without it you will not be able to use the RoboPlus software, the SDK or the Dynamixel Wizard. A picture is shown below.

3)Power Supply
Any power supply that is 24 V and supplies a minimum of 15A is required.
4)A PC running on a windows environment
The SDK was built for Windows 7 environment however I had no issues running the SDK on Windows 10. It will work on any Windows machine that is using Windows 7 or higher.
5)Visual Studio
Any Visual Studio release that is 2010 or higher will work. I used VS 2017 and had no issues running the SDK.
Setting Up The Manipulator And Testing The Servos
Assuming you have all the materials needed and you have the SDK downloaded and RoboPlus installed you are ready to get started. It would be a good idea to have the SDK and RoboPlus manuals open and ready. They will go more in depth with the information and processes. This tutorial will give a general procedure for setting up the manipulator but referencing the manuals will give a more detailed instruction.
First, some general information about the manipulator. It is a three joint, 6 Degree of Freedom arm composed of six dynamixels. Specific details about the dynamixels are located in the manipulator SDK manual. The layout for the dynamixels are shown below. The power supply will connect to the first four servos and the last two will get their power from the servo before it. The dynamixels communicate serially via the USB2Dynamixel.

Next, let's test each servo with the Dynamixel Wizard. Connect the USB2Dynamixel to your PC via USB and also to the first servo via the 4-pin connector. Open up RoboPlus and go to the Dynamixel Wizard. Using the device manager in windows locate the COM port used by the USB2Dynamixel. Right click it and select “properties”. Go to the “port settings” tab and click on the advanced options and change the latency time to 1ms.
In the top left of the Wizard select the correct COM port and then click “open port” button to the right. You should see a screen like the one shown below.

1000000 bps is the default BAUD rate for manipulator servos. Make sure it is selected and click “Start Searching”. A list of the servos will appear to the left. There should be six total. If not then be sure to check if all the servos are connected properly and that the power supply is connected and on. If successful a window like the one below should appear.

Now, you can double click each individual servo and get a variety of data from it. The servos will appear in the order that they are connected. Things like current position, velocity and acceleration along with the ID number, temperature and torque as well as many other things. Double click the first servo in list to the left. This should be the first connected to the USB2Dynamixel. Make sure that the ID number is set to 1.

The ID numbers for each servo should be in order from 1 to 6, just like the picture shows below. This is important because the SDK expects the servos to have these specific ID numbers. If they are incorrect the SDK will not work properly. Be sure to change them each to the correct ID number. Torque Enable must be set to 0 for you to be able to change the ID numbers so change it if it is set to 1.

Once the ID numbers are correct go ahead and text each servo by changing the goal position. To do this Torque Enable MUST be set 1 now so go ahead and change it back.

Now, set the goal position to any arbitrary number. Make sure the number is within the range noted. Click “apply” and the servo should adjust to the new position. You can also change the velocity and acceleration values as well but changing the position is all that is needed to verify the servos work. After verifying the servo works properly, set the position for each servo to 0. Do this for each servo.

Now that the manipulator is set up and tested we can get started on setting up the SDK and running a few programs included with the manipulator.
Setting Up the SDK
You will need a computer running a windows environment and Visual Studio downloaded. I ran the SDK with no issues on windows 10 and using Visual Studio 2017. Download the SDK and the eigen files from the resources given above. Setting up the SDK is very simple and straight forward. If set up correctly it should build and run properly with no hassle. If for some reason your SDK wont build or the programs wont work correctly with the manipulator it is best to assume your own error before someone elses. Be sure to check everything and see that it is set up correctly or start over completely if errors persist.
Open up Visual Studio and go to file then Open and then to Project/Solution. Navigate to the directory you installed the SDK in and open up the ARMSDK Project File. This should load up the entire SDK.

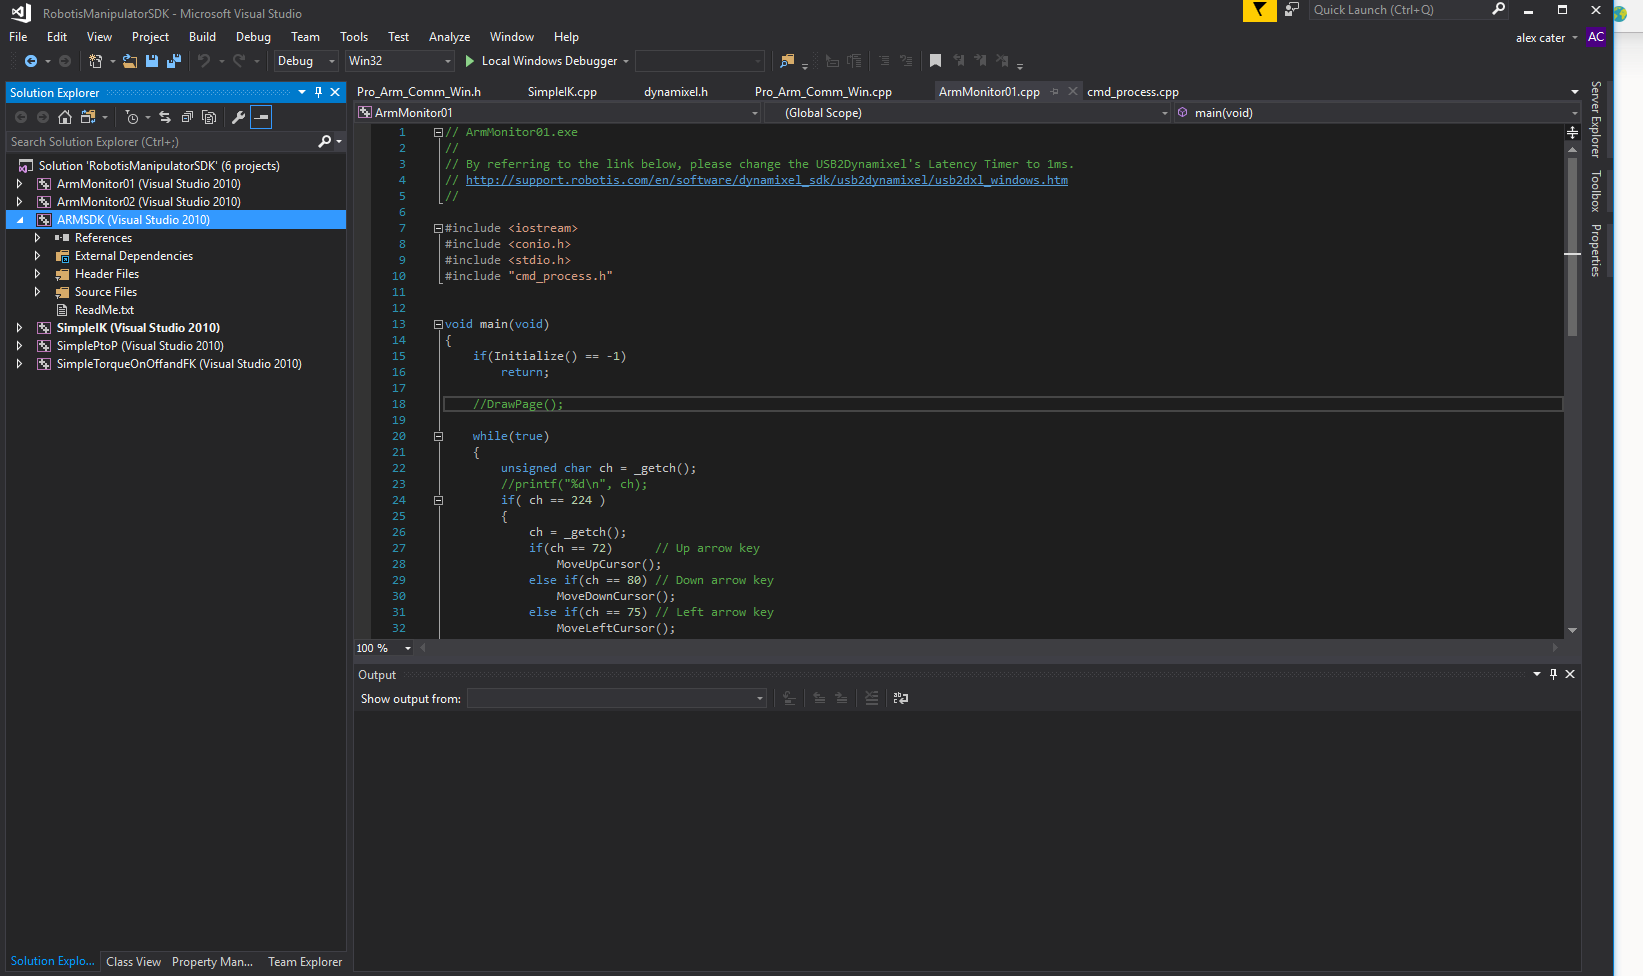
You will notice on the left hand side that there are six separate projects excluding ARMSDK. Each of these projects, which include ArmMonitor1,ArmMonitor2,SimpleIK,SimpleP2P and SimpleTorqueOnAndOff, use files within ARMSDK. These projects are dependent of ARMSDK in other words.
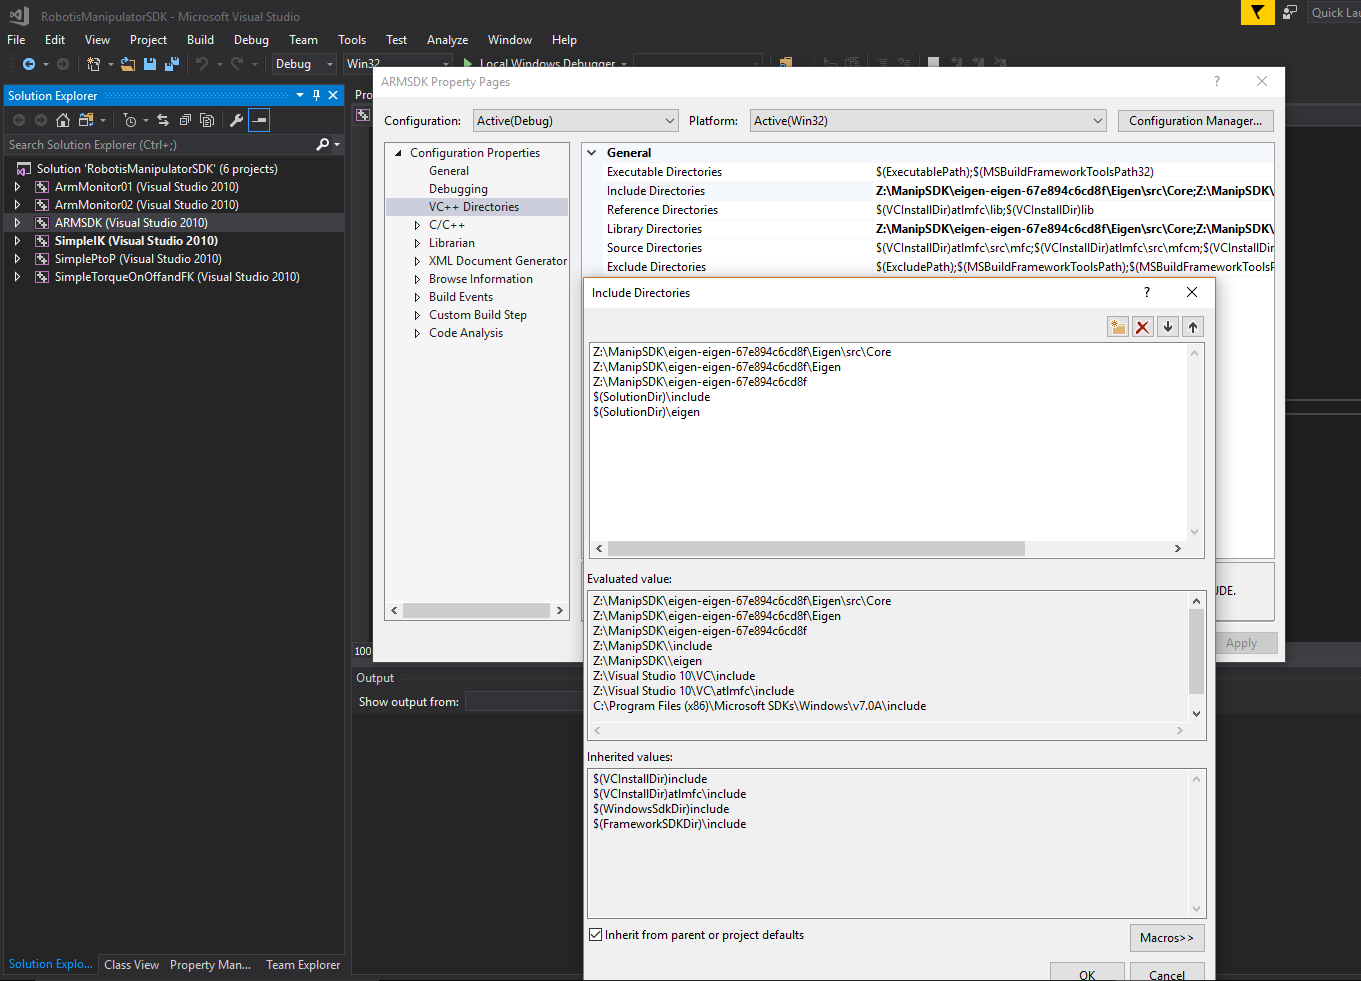
Before we can build these projects we need to include the eigen files. The Eigen library includes functions used for inverse and forward kinematics. You will need to add these files to all 6 of the projects AND the ARMSDK files. Right click on a project, I started with ArmMonitor1, and go down to properties. Click on VC Directories and double click on the Include Directories section and click on edit.

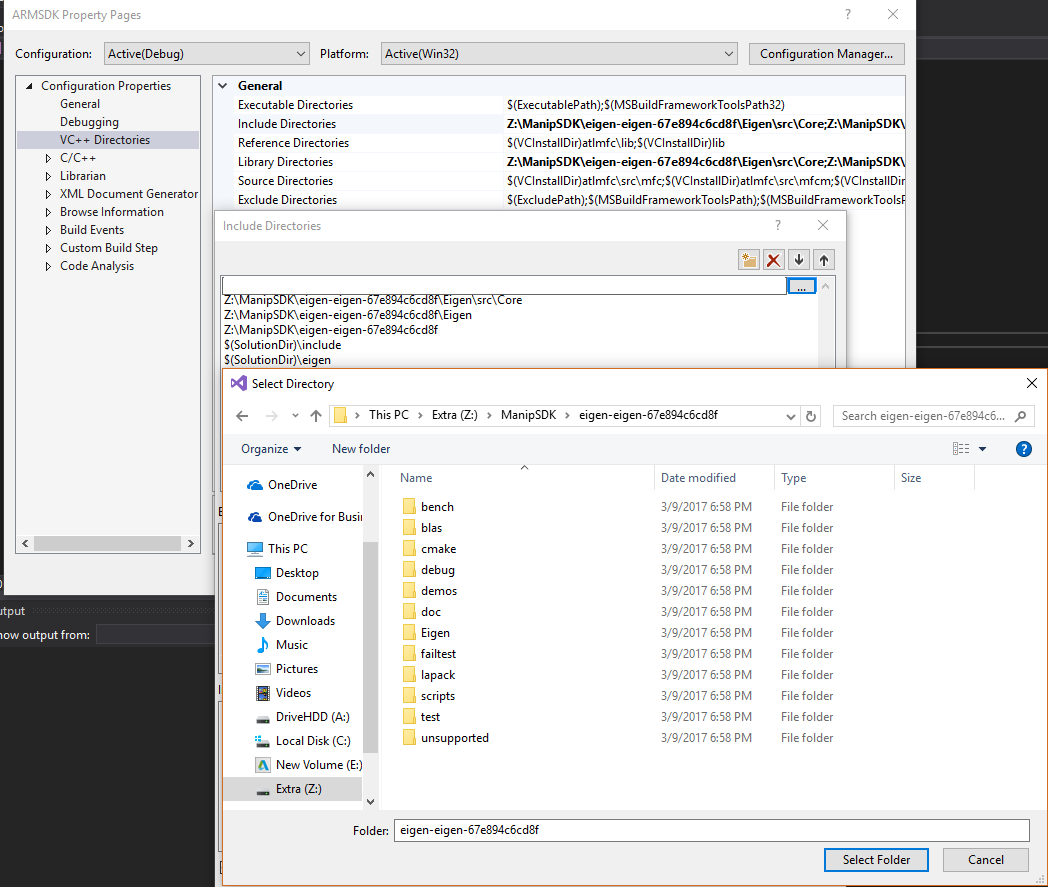
Click on the little folder above on the right to navigate to the eigen directory. Add it to the list of included directories and click ok and apply. Do this for each project.
Assuming that was all done correctly you can build and run each program. Simply right click on a project and select “build”. After it is done building right click it again and this time select “debug” to run your program. The program will execute and you will be asked to type in the COM port that is being used by the manipulator (in my case it was 3) and also the BAUD rate. The BAUD rate for the manipulator (1000000 bps) is represented by the number 3. So enter in 3 for the BAUD rate. A prompt will tell you that the USB2Dynamixel successfully connected.
robotis_manipulator
robotis_manipulator.txt · Last modified: 2017/04/26 15:49 by acater