This is an old revision of the document!
Table of Contents
2. Concepts involved in developing a sensor head for the humanoid Hubo in DARPA robotics challenge (2013)
Introduction
Keywords:Stereo camera,Lidar,ROS,Point clouds,Sensor fusion.
This tutorial will teach you to access different image streams,point clouds and colorized point clouds from an RGB depth Camera “Asus xtion pro live”. We will be using Robot Operating System for this tutorial. To learn how to install ROS on your computer click here. To be more precise we will be using “electric” version of ROS in this tutorial.
Motivation
Previous DARPA challenge also known as DARPA urban challenge emphasis was given on full fledged autonomous ground vehicles. 53 teams competed in this competition. Actual land vehicles were modified and built to be autonomous ground vehicles. Making an actual car autonomous requires the need of increasing the vehicle's perception in a more substantial way.
Coming to Robotics parlance ,sensors of different kinds like vision,proximity,heat,weather played an integral role on the projects involved. Using 2 or 3 sensors on a robot is better but combining all of these to give unified data reflecting all these sensors gives more fruitful results.
For the DARPA grand challenge(2005) and DARPA urban challenge(2007) the competitor(robot) “Marvin” from University of Texas,Austin used powerful sensors like the VELODYNE lidar ,three high resolution cameras,etc. The data from both of these sensors were augmented to produce a colorized point cloud. But this was done on a minor scale and it was predicted that better performance in autonomy could be achieved by doing full-scale sensor fusion.
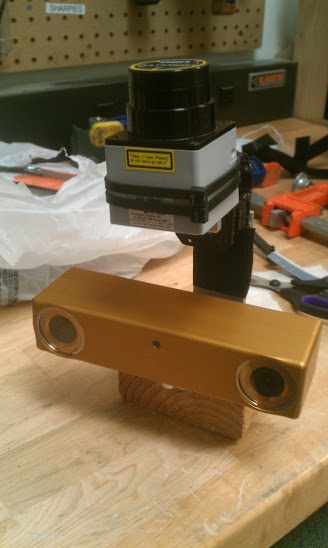
This tutorial marks the inception of development of a product which combines point clouds from LIDAR(Laser Range finder) and a Stereo camera,hence producing a point cloud with spatial coordinates and also the RGB values of a pixel. You can see a picture(figure 2) of the sensor head above in its rudimentary stage. Its decided to have a hokuyo LIDAR and a Bumblebee camera(for stereo vision). In the mean time,I will be using a RGB depth camera “Asus xtion pro live” as a test-bed for the sensor development.
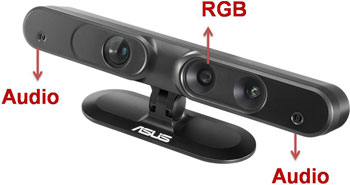
Initially the asus xtion camera was thought of an ideal vision system to be used in the hubo for DARPA as you can see in the picture below.
The idea had to be dropped due to a specific reason. Kinect and Xtion are under the same technology from “Primesense”. The IR dots produced on the objects surface(from Kinect or Xtion Pro) will be cancelled out in the presence of sunlight hence comprising our depth data.
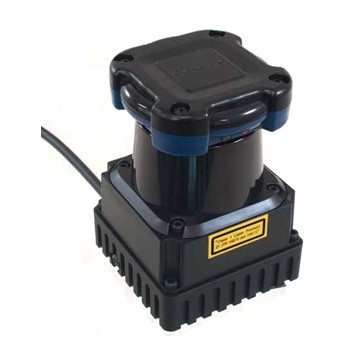
Due to this reason the use of infrared rays is replaced by the laser rays which doesn't get much affected in the sunlight. We will be using this model of the hokuyo Lidar UTM-30LX(see picture below) for the emission of the laser rays.
Why learn about this RGB depth camera and How is it related with sensor head of the hubo ?
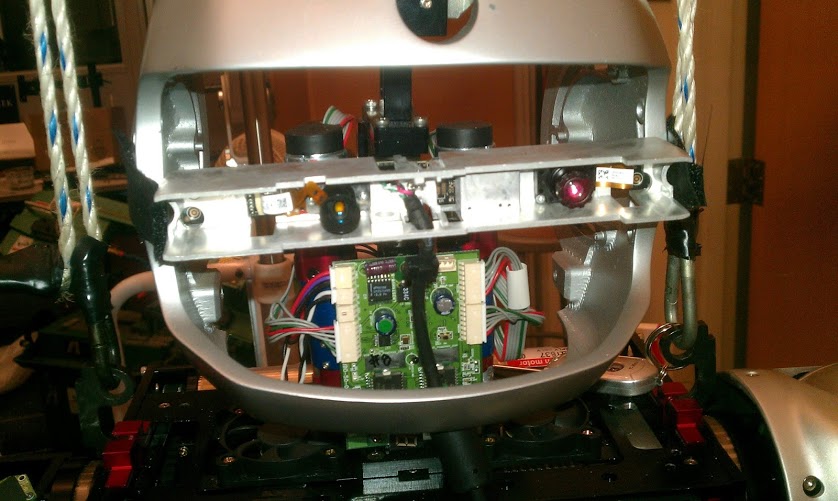
The RGB-D camera used is not much different(in terms of data output and perception)from the sensor head in figure 1. The primary difference would be the field of view,ability to perceive point clouds in the sunlight. But the RGB-D camera would be an ideal test-bed for understanding depth images,manipulating point clouds also transferring the tested algorithms to the sensor head. It can also be used for implementing cutting edge 3D computer vision algorithms on the hubo in indoors.
Getting Started
Now lets visualize the different image streams from the RGB-D camera. We would begin this by installing the required package from ROS.
Installing Openni_kinect package
1.Open up a new terminal(ctrl+alt+T) and enter the command:
sudo apt-get install ros-electric-openni-kinect
Of-course one could import the source but this makes installation a little faster and smooth. For those who are new to ROS ,I would recommend this method.
2. After the install in the terminal enter the commands one after the other:
roscd
cd ..
cd stacks
cd openni_kinect
cd openni_launch
cd launch
The folder “openni_launch” may be modified in the new installation but you can always find two launch files in “launch” folder. Launch the file with begins with name openni. Enter the following command in the same terminal:
roslaunch openni_launch openni.launch
This would fire up your camera and get all the image streams published.
Visualizing Different image streams
Open up a new terminal and enter:
rostopic list
This is the list of different image streams produced by the launch file. We don't need all of them so lets visualize the necessary image streams using image_view package.
Enter the following commands in separate window:
rosrun image_view image_view image:=/camera/rgb/image_color
rosrun image_view disparity_view image:=/camera/depth/disparity
rosrun image_view image_view image:=/camera/depth/image
You would see something similar to the video below:
So what did we see in the video?. The middle image is normal 8-bit RGB image stream. The right windows shows the depth image. Depth image as the name suggests is the measure along Z axis(from the camera's Z axis. The darker the object the closer it is along the Z axis. If you take your hand close to the camera it would be black in color. The left window shows the disparity,the nature and use of this image will be discussed in the succeeding tutorials. The way of accessing and working on this image stream will be done in the future tutorials.
Visualizing Point clouds
Point cloud is a well known jargon in Laser range finders and other time of flight sensor devices. Before we head out to visualize point clouds ,Open up a terminal and enter:
rosrun dynamic_reconfigure reconfigure_gui
Click the drop down box and choose “/camera/driver” and click the check-box:depth_registration. Open up a new terminal and enter:
rosrun rviz rviz
Now set Fixed Frame to /camera_depth_optical_frame.
2. Click the button named “Add” in the left bottom of the window. Double click on Pointclouds2. Now in the “Topic” select “/camera/depth_registered/points”. Please follow the next steps in the following video:
3.Towards the end of the video you would have seen the colorized point clouds. This pool of the data provides points with spatial coordinates and as well as the RGB value of that point. This particular data set would be very useful for Computer vision researchers and programmers. Manipulating and interpreting point clouds and the theory behind it would be discussed in the future tutorials.
Visualizing infrared points projected by the camera
Make sure rviz is open and please follow my steps as per in the following video:
This shows the infrared points projected by the camera. The points you see here are primarily involved in depth calculation,Point cloud estimation etc.
Conclusion
We effectively used ROS for accessing multiple data from the RGB-D sensor Asus xtion pro live. The capabilities of this particular sensor has been clearly demonstrated. The relationship between this sensor and also the sensor head bring developed for the DARPA robotics challenge is brought to light. The application of this pool of data in robotics contour will be discussed in future tutorials.


