Table of Contents
LEGO 2-Link Arm with Dynamixels
Author: Norberto Torres-Reyes Email: [email protected]
Date: Last modified on 04/23/19
Keywords: kinematics, planar, robotic arm, 2 link, lego, NXC, NXT, mindstorm, dynamixel, plotting

Motivation and Audience
This tutorial is for anyone who wishes to create a 2-link robotic arm using LEGO Mindstorm, NXC software, and Dynamixel RX-28 servos. This tutorial will also reinforce theoretical knowledge about 2-link planar mechanisms, serial communication, and servo control. Readers of this tutorial are recommended to have the following background and interests:
*Previous experience with LEGO Mindstorm
*Matlab and/or C-based programming experience
*Knowledge of linear algebra
*Some knowledge in serial communication
*Experience with using servos
The rest of the tutorial is presented as follows:
Parts List
A few parts for controlling the Dynamixels will be needed along with some parts used to communicate between the NXT Brick and the Dynamixel. The LEGO parts list is shown in the Build Plans section.
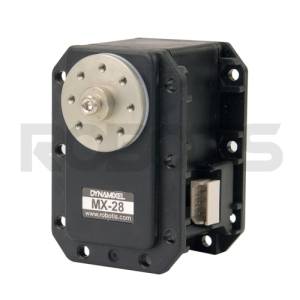
Dynamixel RX28
https://www.trossenrobotics.com/dynamixel-rx-28-robot-actuator.aspx

Lego BreadBoard Adapter
http://www.mindsensors.com/ev3-and-nxt/58-breadboard-connector-kit-for-nxt-or-ev3

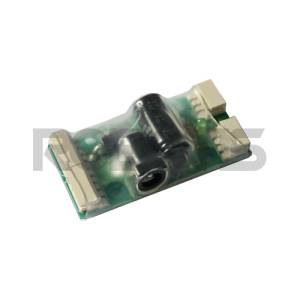
SMPS2Dynamixel
http://www.robotis.us/smps2dynamixel/

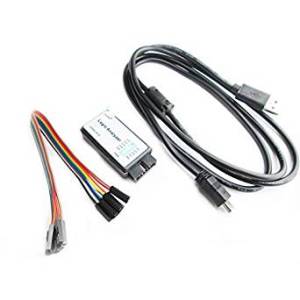
(Optional) HiLetgo USB Logic Analyzer
https://www.amazon.com/gp/product/B077LSG5P2/ref=ppx_yo_dt_b_asin_title_o00_s00?ie=UTF8&psc=1

Other Parts Needed:
- NXT Cable

- Dynamixel Connector Cables

- USB A-to-C cable

- 12V 2-Amp Power Supply

Theoretical Background
The theoretical background pertaining to this tutorial includes NXT/Dynamixel communication and 2-Link 2D kinematics. A review of these two tutorials will provide theoretical and practical knowledge for the reader in topics such as RS485 serial communication, NXT control of Dynamixels, 2-link planar kinematics, and geometric/algebraic solutions to inverse kinematics.
Build Plans
The build plans as well as the parts list are included below.
Build Plans
You will also need to download these files, which will have to be 3D printed so that the Dynamixel can be adapted to control LEGOs
NXC Code
The code required for this project is shown below. The code is also attached in a .zip file along with the required header file to interface with the Dynamixel servos. CODE
//2-Link Inverse Kinematic Control
//Norberto Torres-Reyes
//Date: 04/25/19
//Calculates the angles needed to reach desired end-point using two dynamixel
//servos for a 2-link planar mechanism.


#include "Dynamixel2.h"
#define ID1 91
#define ID2 90

float TwoLinkIK(float linkLength1, float linkLength2, float pX, float pY);

//Global Variables
float theta1 = 0;
float theta2 = 0;

//Program variables
int servoOffset1 = 200;  //Zero offset value for servo 1
int servoOffset2 = 468;  //Zero offset value for servo 2
float posX = 16.9706;       //X and Y coordinates of desired position
float posY = 0.0;
float linkLength1 = 12.0;   //Lengths for both links
float linkLength2 = 12.0;

task main()
{
 int servoPos1 = 0 + servoOffset1;  //Initial zero-angle position
 int servoPos2 = 0 + servoOffset2;
 UseRS485();                            //Initialize RS485 communication
 RS485Enable();
 RS485Uart(HS_BAUD_57600, HS_MODE_8N1); //57600 baud and 8bit, no parity communication
 Wait(100);

 setMode(ID1,SERVO,0,1023); //Initialize Dynamixel mode and range
 setMode(ID2,SERVO,0,1023);
 Wait(5);                   //Give time for dynamixel communication
 servo(ID1,servoPos1,50);   //Home both servos to zero-angle position
 Wait(5);
 servo(ID2,servoPos2,50);
 Wait(100);
 while(!ButtonPressed(BTNCENTER, FALSE)) //Program runs when orange button is pressed
 {
  TextOut(0,LCD_LINE1,"Press Orange" );
  TextOut(0,LCD_LINE2,"Button" );
  TextOut(0,LCD_LINE3,"To Begin" );
  Wait(10);
 }

 while(true)  //Loops following code until program is terminated
 {
  ClearScreen();
  TwoLinkIK(linkLength1,linkLength2,posX,posY); //Runs the 2 link inverse kinematic function
  servoPos1 = theta1*(180/PI)*3.41 + servoOffset1; //Assign corresponding angles to each joints
  servoPos2 = theta2*(180/PI)*3.41 + servoOffset2;

  TextOut(0,LCD_LINE1,NumToStr(theta1*(180/PI)));  //output current link1 angle
  TextOut(0,LCD_LINE2,NumToStr(theta2*(180/PI)));  //output current link2 angle
  servo(ID1,servoPos1,100);  //move servo to new position
  Wait(5);                   //allow time for dynamixel communication
  servo(ID2,servoPos2,100);
  Wait(5);

  posX = posX + 0.0;     //increases desired position if desired-
  posY = posY + 0.0;     //by a constant value or by some arbitrary function
 }
}

//calculates inverse kinematics for given parameters,
//elbow up/down position can be changed by changing signs

float TwoLinkIK(float linkLength1, float linkLength2, float pX, float pY)
{
 theta2 = -acos((pow(pX,2) + pow(pY,2) - pow(linkLength1,2) - pow(linkLength2,2))/(2*linkLength1*linkLength2));
 theta1 = atan2(pY,pX) - atan2((linkLength2*sin(theta2)),(linkLength1 + linkLength2*cos(theta2)));
}
Running, Testing and Analysis
To run the code, open it using “Bricx Command Center” and set the zero offset values to 512. Compile the code and upload it to the NXT. Run the program before you install the servos to the 2-link arm. The servos will go to their zero offset position, which has not yet been dialed in. Install the servos on the arm (make sure each servo goes to the correct joint) and try to align as close to the zero-angle position as possible. Once installed, adjust the zero offset values until the zero-angle position is achieved.
Video Preview
A preview of arm running can be seen in the video below, the arm is cycling from its zero-angle position to a set position.
Conclusions
In conclusion, this tutorial should help the user get a start on controlling a 2-link manipulator using Dynamixel servos and LEGOs. The theory and practice from this tutorial con be expanded to non-LEGO parts or to different LEGO manipulator designs.
